Setting up a Linux environment
- This page is for a Linux(Ubuntu) environment.
- If you would like a Windows environment, please click here.
- In this documentation, we will install 6 tools step by step.
Anaconda
Anaconda offers the easiest way to perform Python/R data science and machine learning on a single machine and some other useful tools.
Free download link for Anaconda : https://www.anaconda.com/
If you click the above link, you can see below page.
1. Click "Download" buttoon
2. Open the terminal and go where you donwload the file.
3. Type below command to install the Anaconda.
sh "Anaconda_file_name".sh
4. You may "Enter" until you may see a message below.
Do you accept the license terms? [yes|no]
[no] >>>
Please answer 'yes' or 'no':'
yes to autosetup the enviornment variables.
5. Type below command to check virtual environment for Anaconda.
source ~/.bashrc
You can activate and deactivate by below commands.
conda activate base(or another virtual enviromnet)
conda deactivate
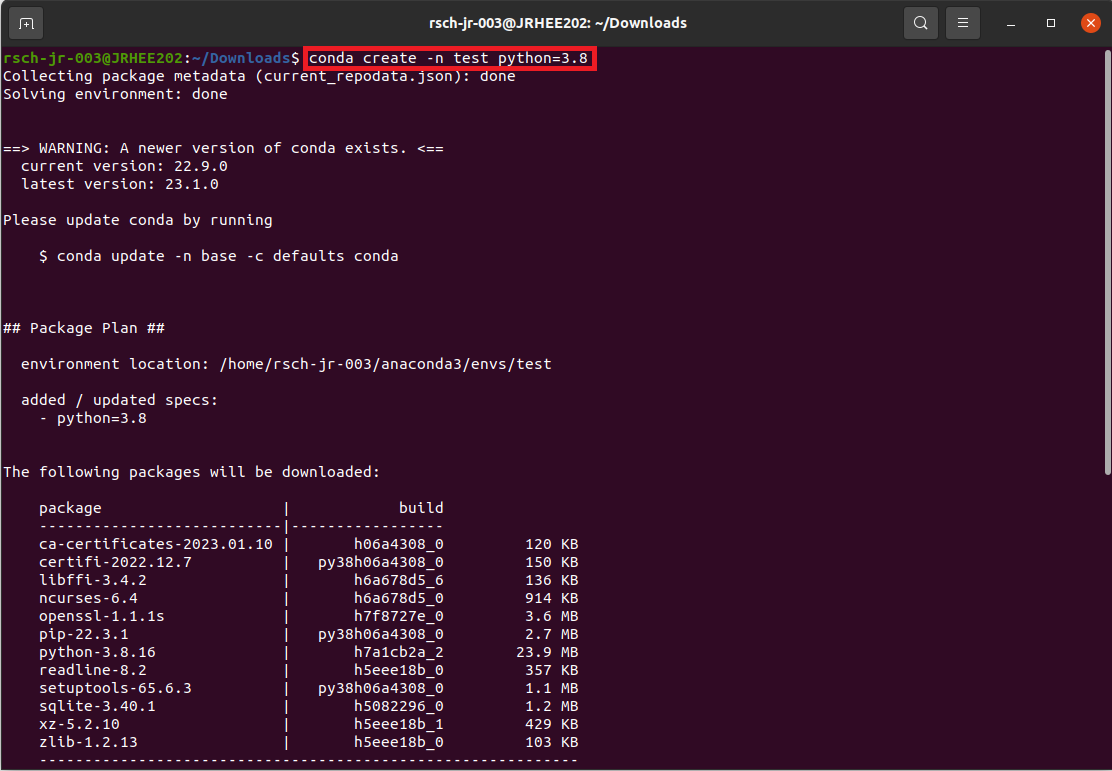
6. Create a new virtual environment to avoid conflict with other environment.
Type below command to create a new virtual environment.
conda create -n "environment name" python="python version"
When you activate new virtual environment without an error as above picture, successfully installed Anaconda
7. While virtual envrionment is running, type below command to install jupyter notebook
conda install --yes jupyter notebook
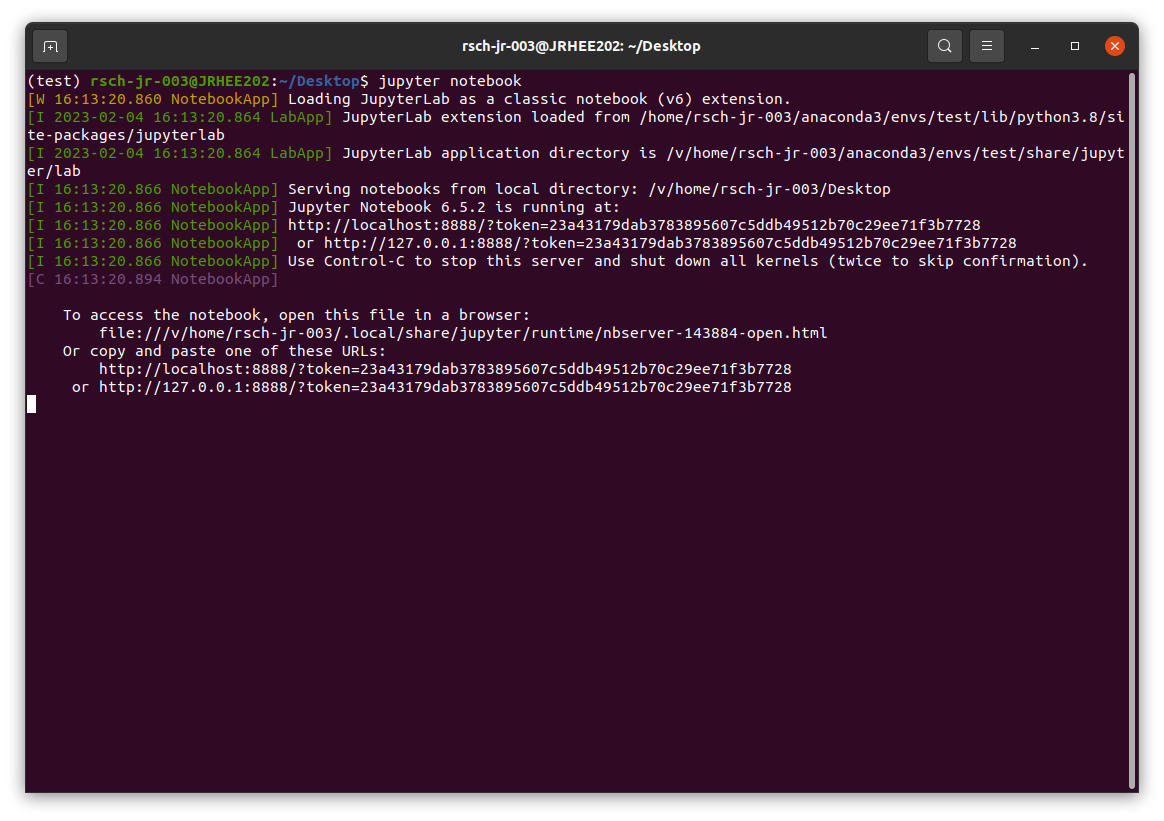
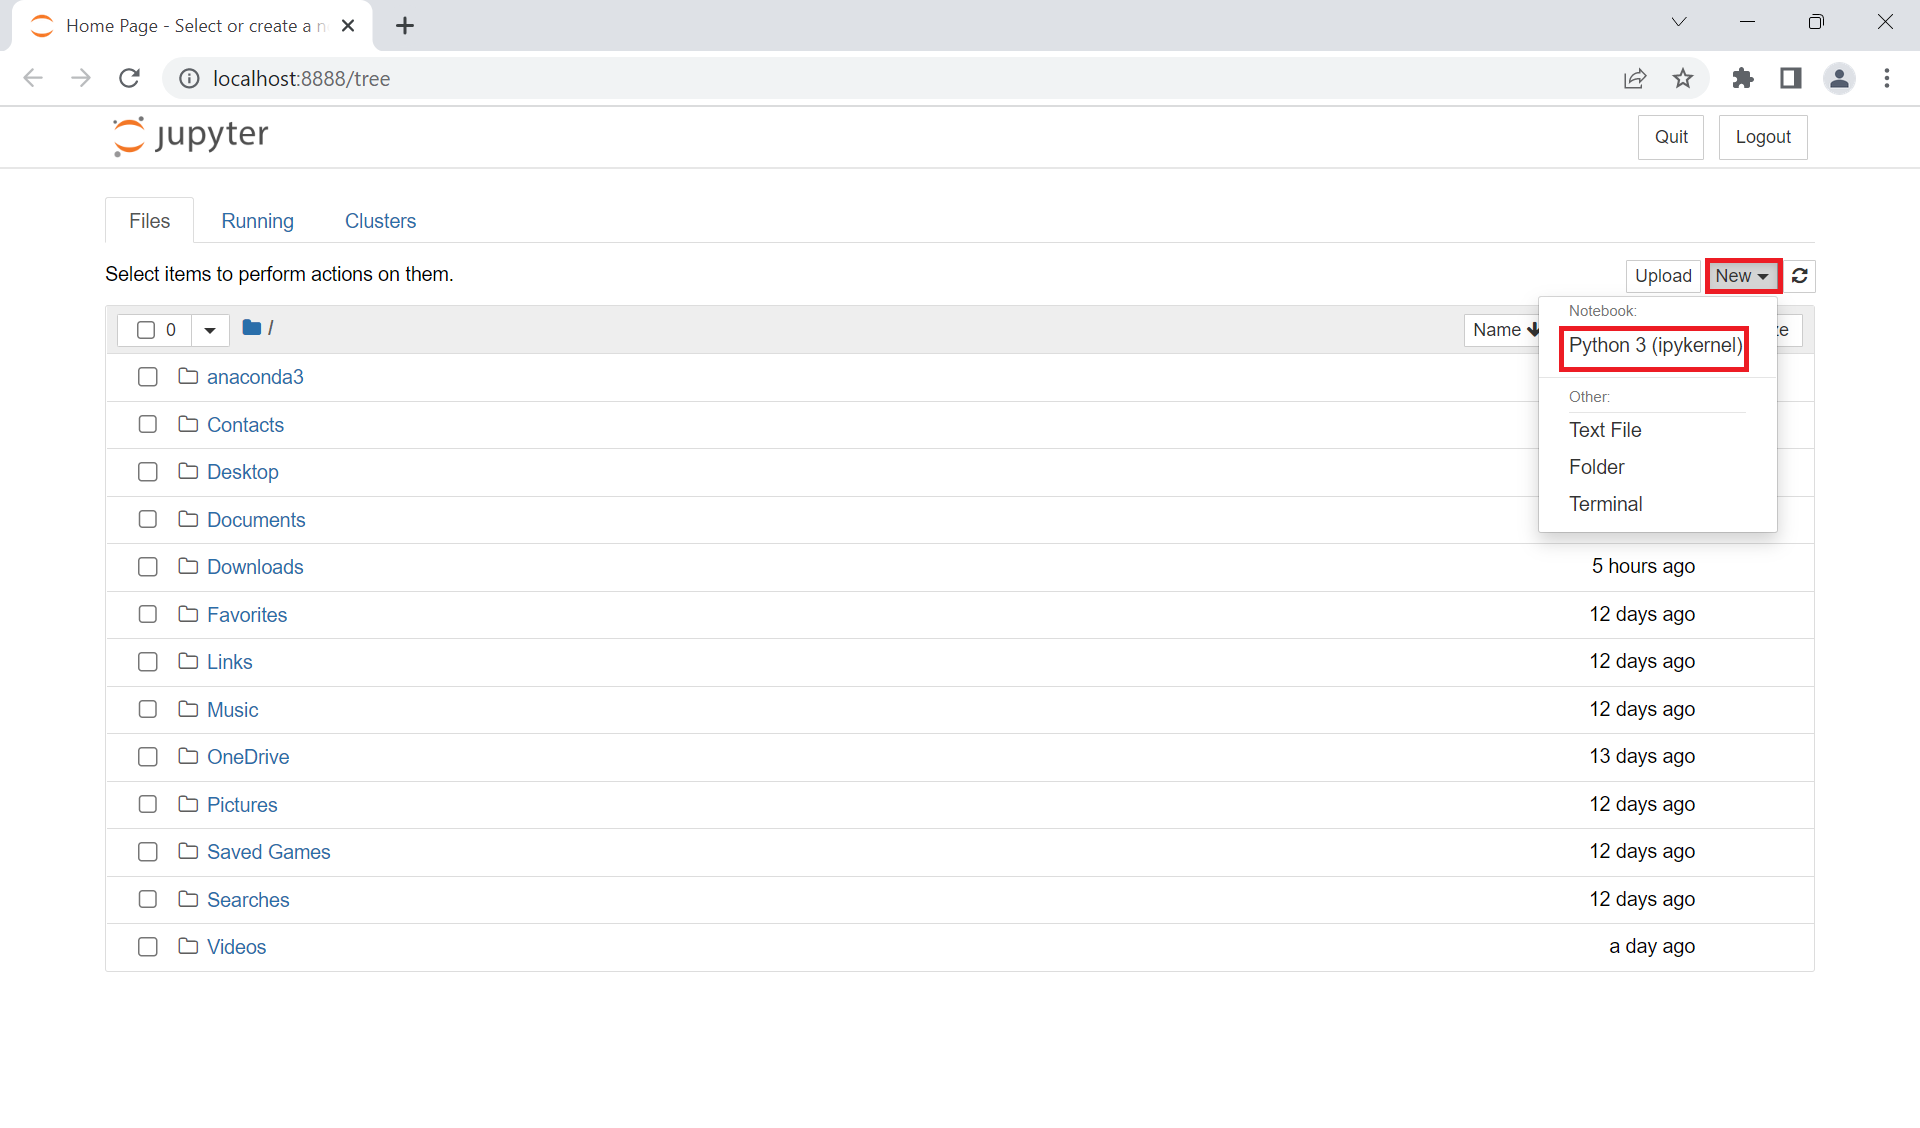
8.nbsp: You can execute jupyer notebook by typing jupyter notebook command on a terminal as you can see the picture below.
If you can see the jupyer notebook then installation for Anaconda and python is done
Nvidia Driver
Check wheter Nvidia is installed or not. Type
nvidia-smi
1. Type below command to check installable driver.
ubuntu-drivers devices
2. Go to https://docs.nvidia.com/cuda/cuda-toolkit-release-notes/index.html and find compatible version with CUDA.
3. Type below command to install nvidia driver. You may change "version" to number.
sudo add-apt-repository ppa:graphics-drivers/ppa
sudo apt update
sudo apt-get install nvidia-driver-"version"
4. Reboot the computer
5. Type below command
nvidia-smi
Tensorflow
1. You may activate virtual environment which you want to install Tensorflow.
conda activate "virtual environment"
2. Type below command to install tensorflow
conda install --yes tensorflow
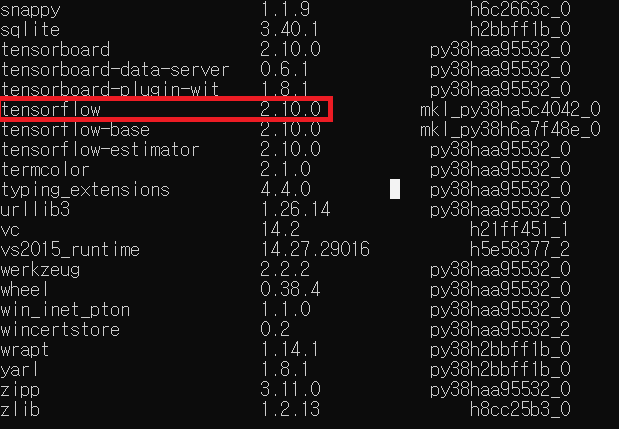
3. Type below command check list of your library.
If you can find tensorflow, installation is done.
CUDA
CUDA (Compute Unified Device Architecture) is a parallel computing platform and application programming interface that allows software to use paralle processing using NVIDIA GPUs.
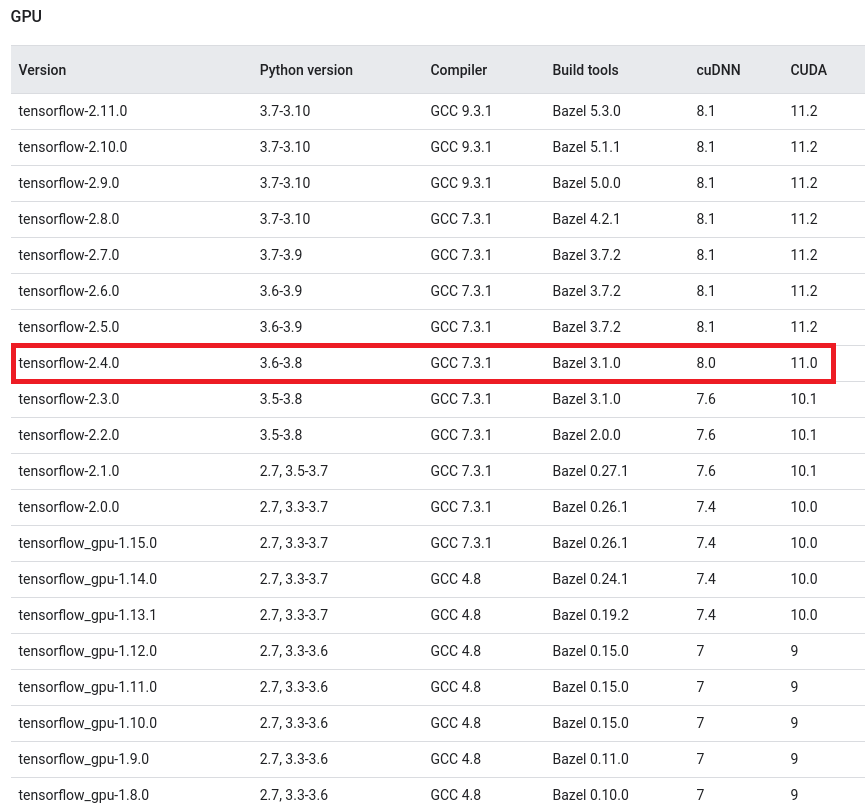
1. Please visit the following web page and check the versions of CUDA and cuDNN that compatible with tensorflow-gpu and python from https://www.tensorflow.org/install/source#tested_build_configurations
My version:
- Python: 3.8
- tensorflow_gpu-2.14.0
so I need to download
- cuDNN: 8.0
- CUDA 11.0
2. If you find right version of CUDA for your environment then you can download CUDA Toolkit from
https://developer.nvidia.com/cuda-toolkit-archive
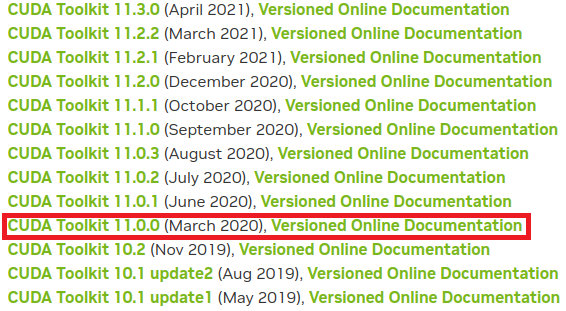
3. Find the matched version.
Warning
All the versions should be exactly the same, when you are trying to download. ex) 11.0.0 (o) 11.0.1 (x)
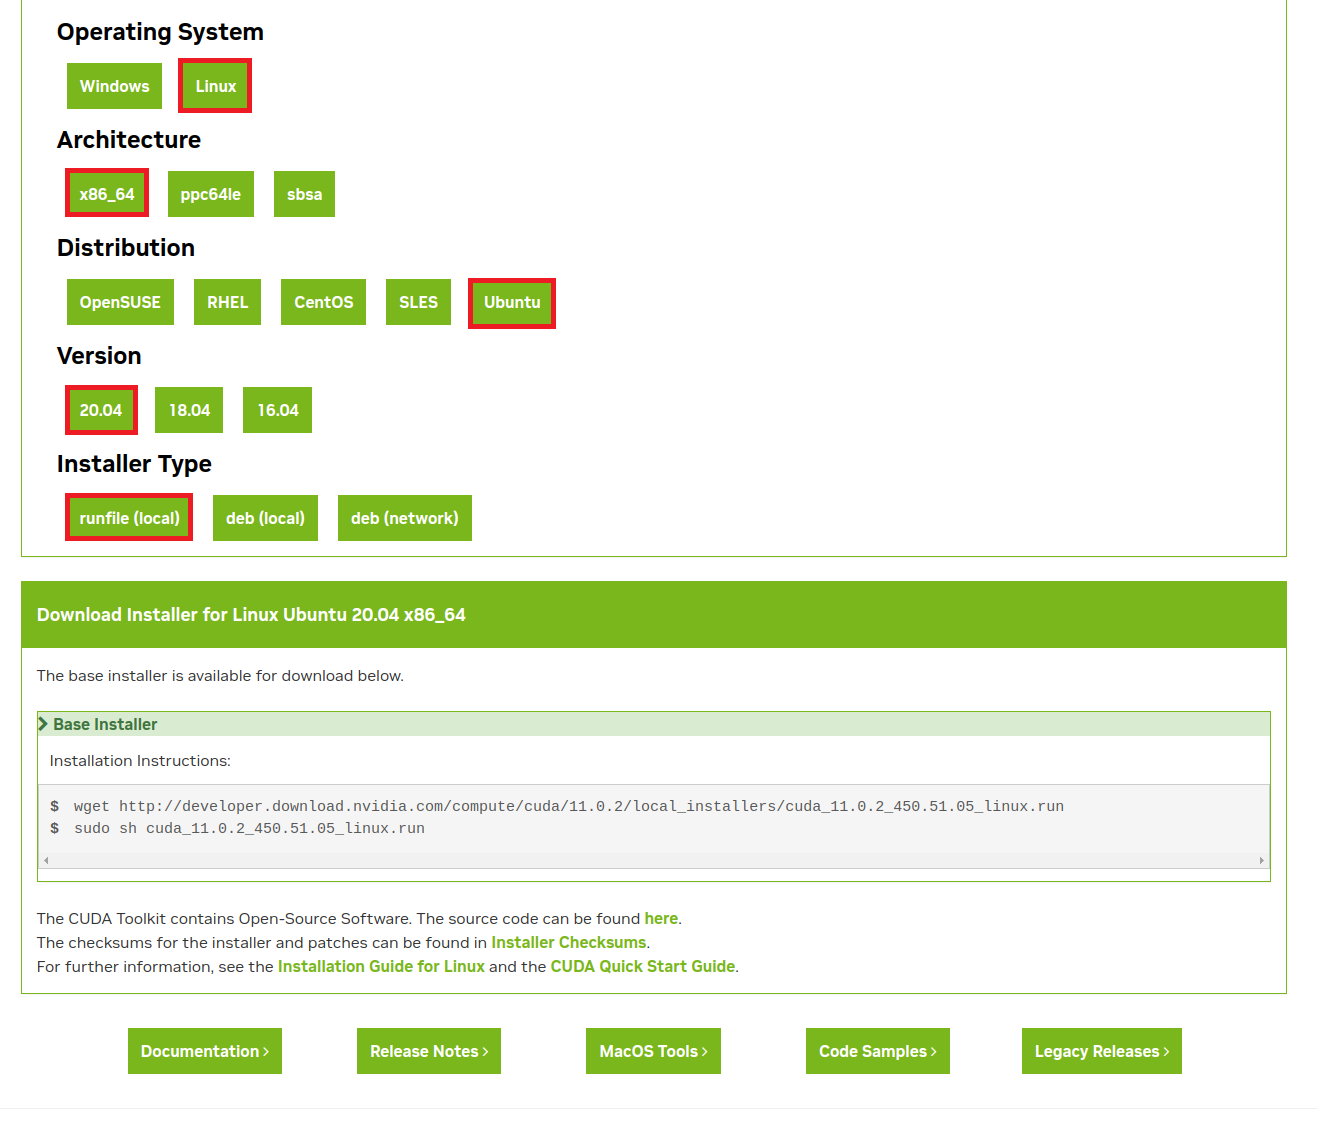
4. Follow the red boxes and type instructions on a terminal.
Tip
If you are using 22.04 version of Linux, you may click 20.04 version.
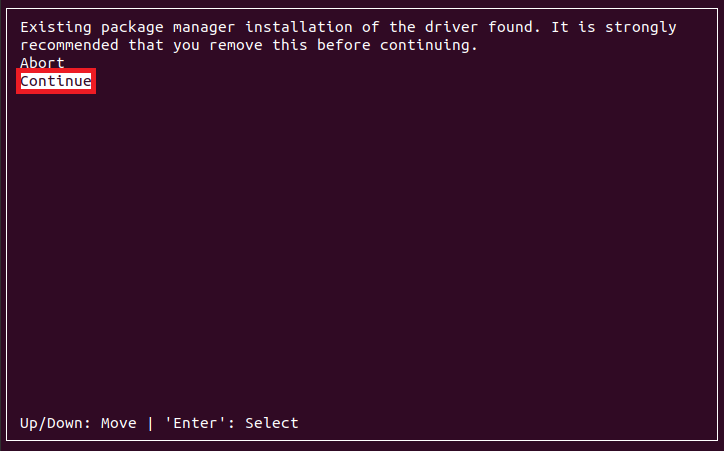
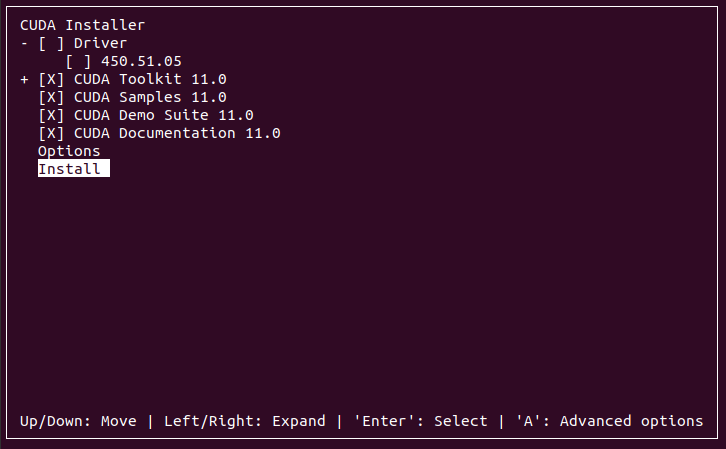
5. Once you type all the command from step 4, you can see the picutre blow.
Enter on "Continue" line.
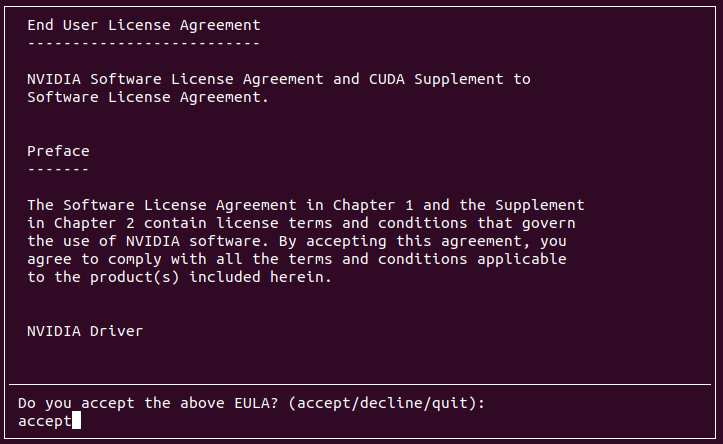
6. type accept to agree the license, and do enter.
7. Uncheck on Driver option, it is for who does not install the graphic driver.
Warning
If you do not uncheck on "Driver" option, it will crash on your installation.
Enter the "install" option. It will take some time.
8. Type below commnad to check cuda folder
cd /usr/local
ls
We will use the folder, which naemd version of cuda that you installed.
9. Type below command to change environment variables. You may change "installed version" to you checked folder from above step.
sudo nano ~/.bachrc
export PATH=/usr/local/cuda-"installed version"/bin${PATH:+:${PATH}}
export LD_LIBRARY_PATH=/usr/local/cuda-"installed version"/lib64:${LD_LIBRARY_PATH:+:${LD_LIBRARY_PATH}}
source ~/.bashrc
10. you may type nvcc -V
Release version should be installed CUDA version. If you can see the picture as above, then your cuda is successfully installed.
cuDNN
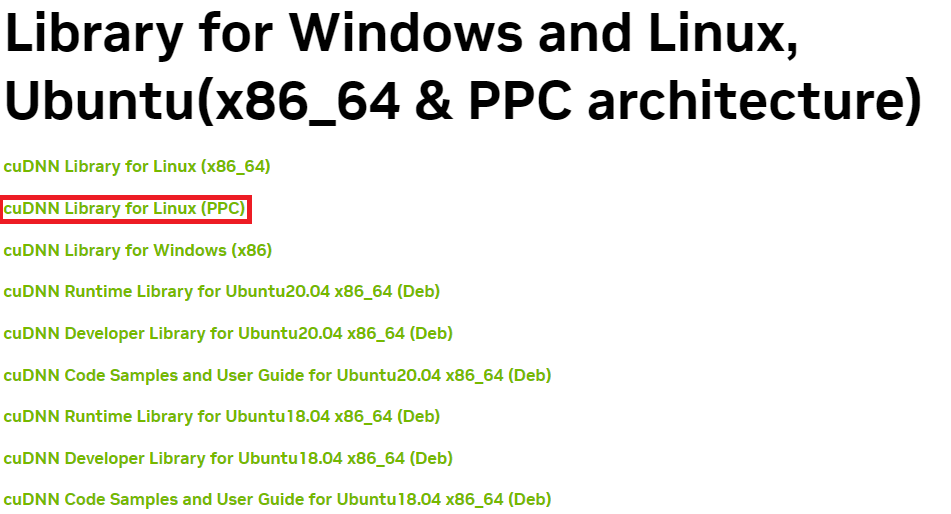
1. You can download cuDNN from https://developer.nvidia.com/rdp/cudnn-archive
I downloaded cuDNN v8.0.5 for CUDA 11.0
Warning
All the versions should be exactly the same except the last digit, when you are trying to download. ex) 8.0.X (o) 8.1.X (x)
2. You may go to folder that you installed cuDNN,then Type below command to extract the file.
tar -zxvf cudnn-11.4-linux-x64-v8.2.2.26.tgz
3. Go to extracted folder and type below command. Path should be changed to your cuda folder.
sudo cp ./cuda/include/* /usr/local/cuda-"installed version"/include
sudo cp -P ./cuda/lib64/* /usr/local/cuda-"installed version"/lib64
sudo chmod a+r /usr/local/cuda-"installed version"/lib64/libcudnn*
4. Type below command to check installed properly.
cat /usr/local/cuda/include/cudnn.h | grep CUDNN_MAJOR -A 2
"#define CUDNN_MAJOR 8"
"#define CUDNN_MINOR 0"
"#define CUDNN_PATCHLEVEL 5"
Image labeling tool
LabelImg is a graphical image annotation tool, which supports YOLO and CreateML formats for image labeling. You can find more details from https://github.com/heartexlabs/labelImg
1. You may go to a folder where you want to install image labeling tool
2. Type below command to setup the environment variables. Before start this step you need to install "Python 3" and "Qt5".
cd labelImg
sudo apt-get install pyqt5-dev-tools
sudo pip install -r requirements/requirements-linux-python3.txt
make qt5py3
3. You can open image labling tool by
python labelimg.py
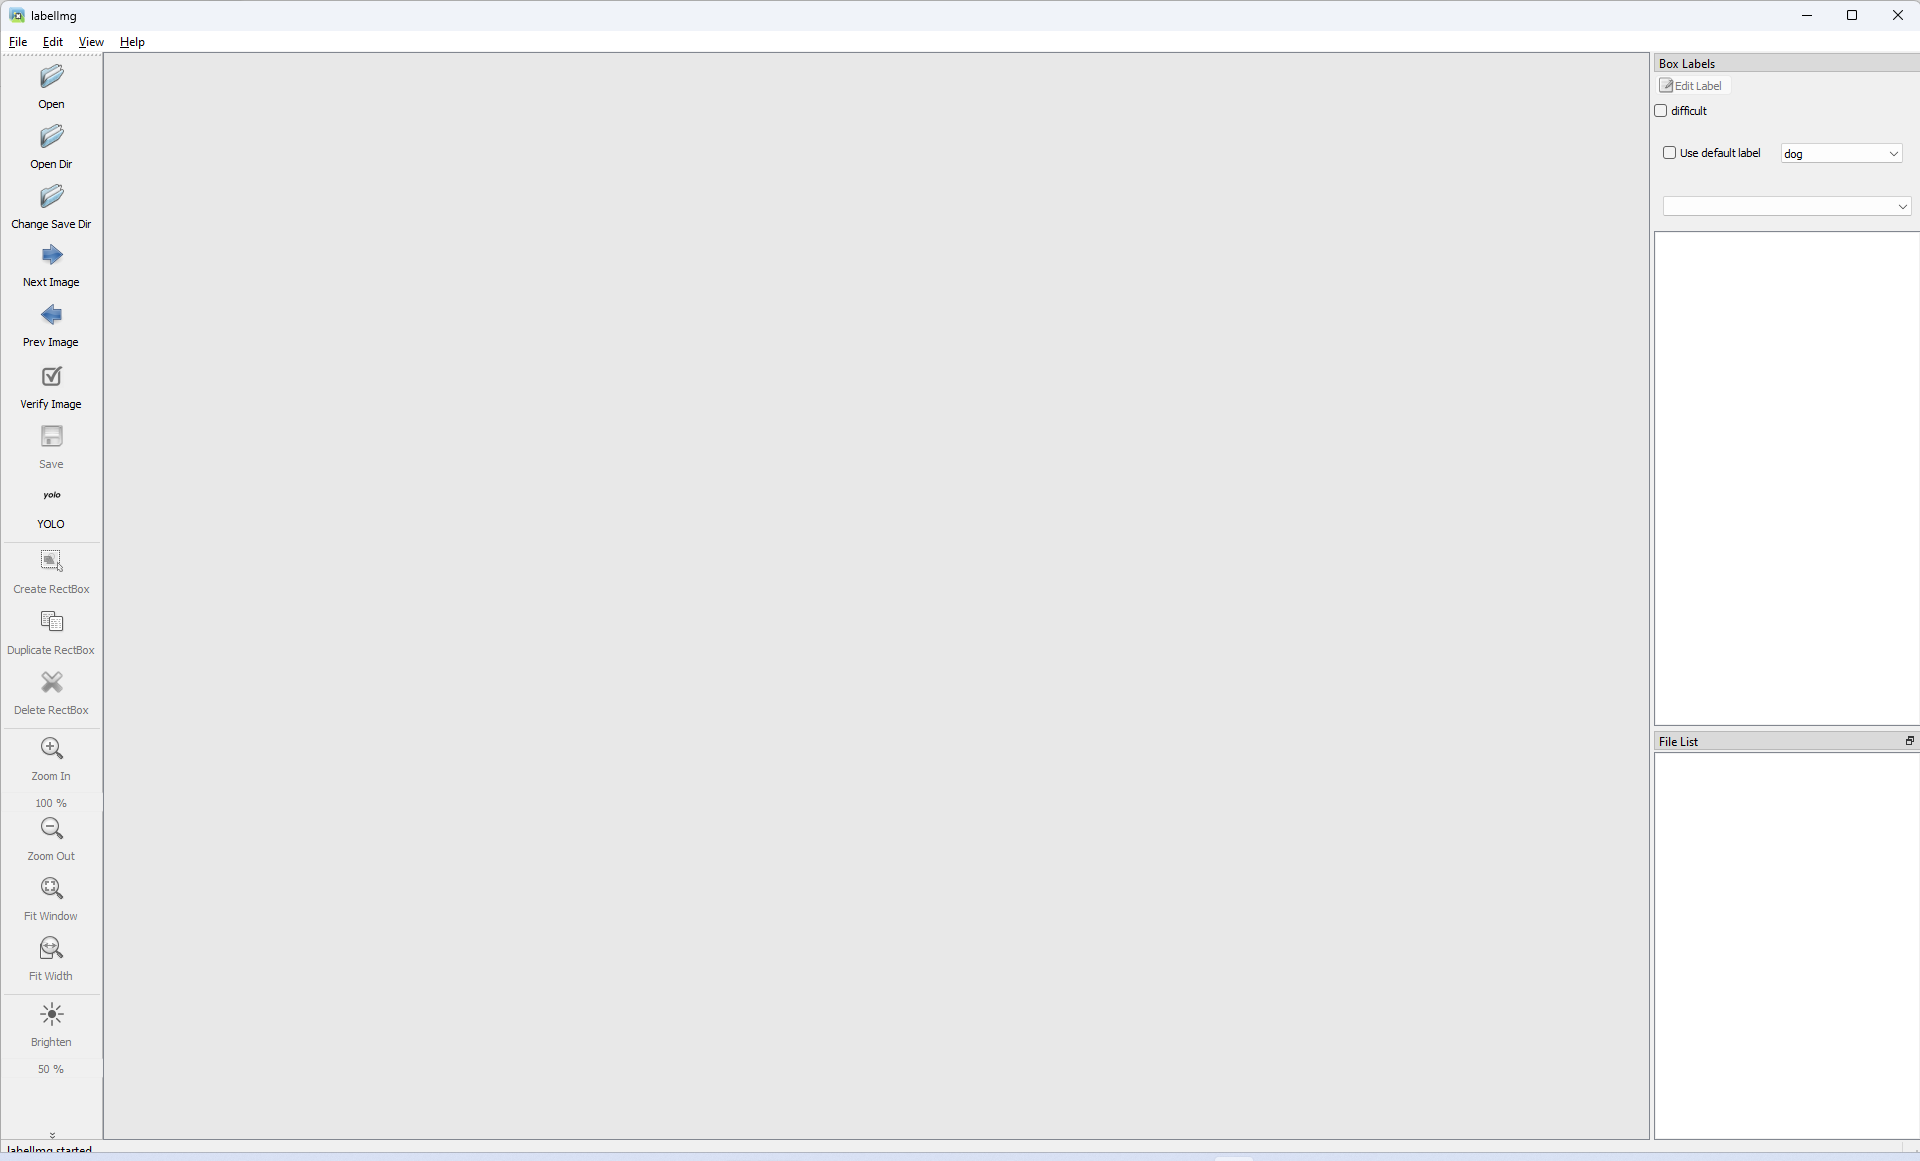
4. If you can see the picture below, installation is done.
Pytorch
Pytorch is An open source machine learning framework that accelerates the path from research prototyping to production deployment.You can check more details from https://pytorch.org/
1. You may activate virtual environment which you want to install pytorch.
conda activate "virtual environment"
conda env list
2. Go to https://pytorch.org/get-started/locally/ to check command for fitted version of your environment.
conda install pytorch torchvision torchaudio -c pytorch
2. Once the installation is done, run jupyternotebook.
3. Create a new code page, and you may type below command.
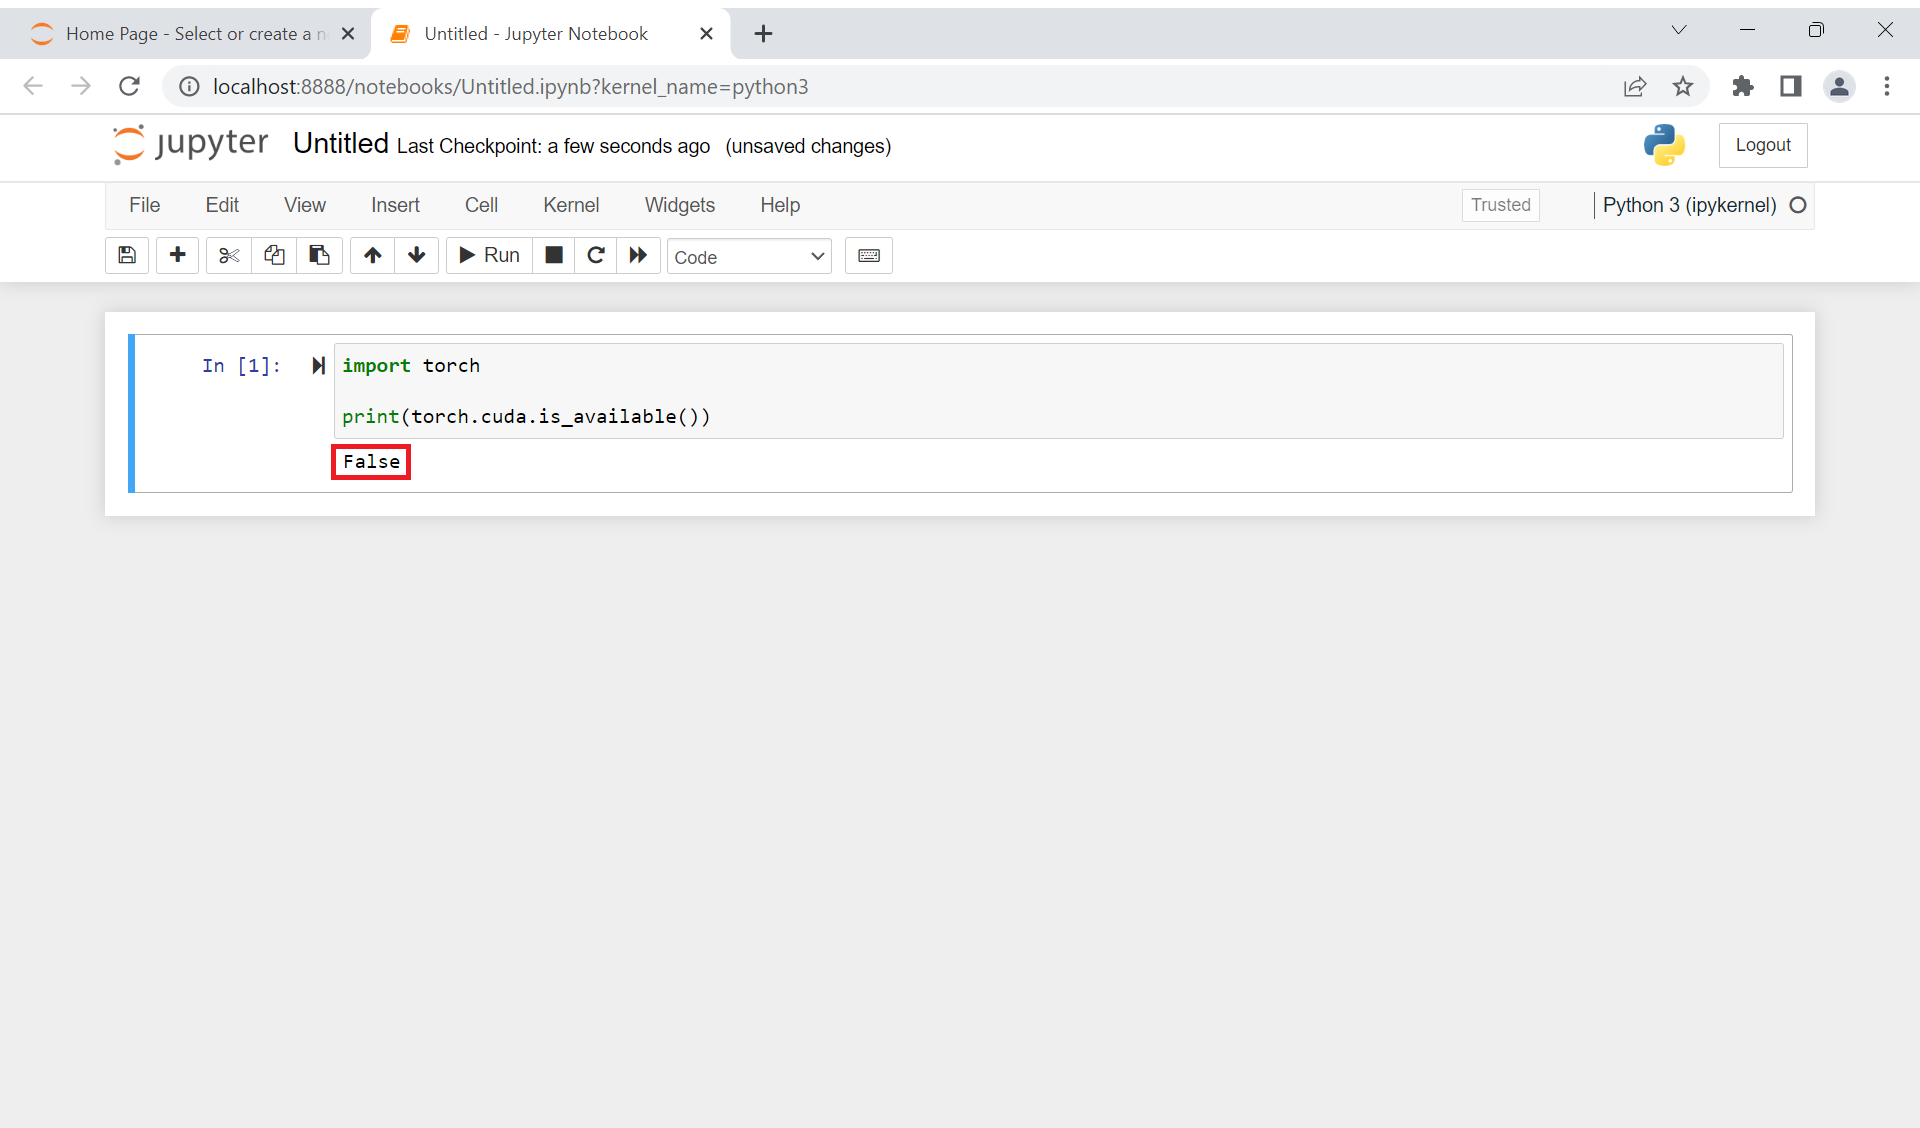
import torch
print(torch.cuda.is_available())
If result prints out "False", still GPU is not ready to use. You may type below command, change "CUDA version"
conda install pytorch torchvision torchaudio pytorch-cuda="CUDA version" -c pytorch -c nvidia
4. If result prints out "True", all the installation is successful.
After you finish installing the image labeling tool, please proceed to the next steps of 2. data preparation and 3. data recognition with deep learning.
Troubleshooting
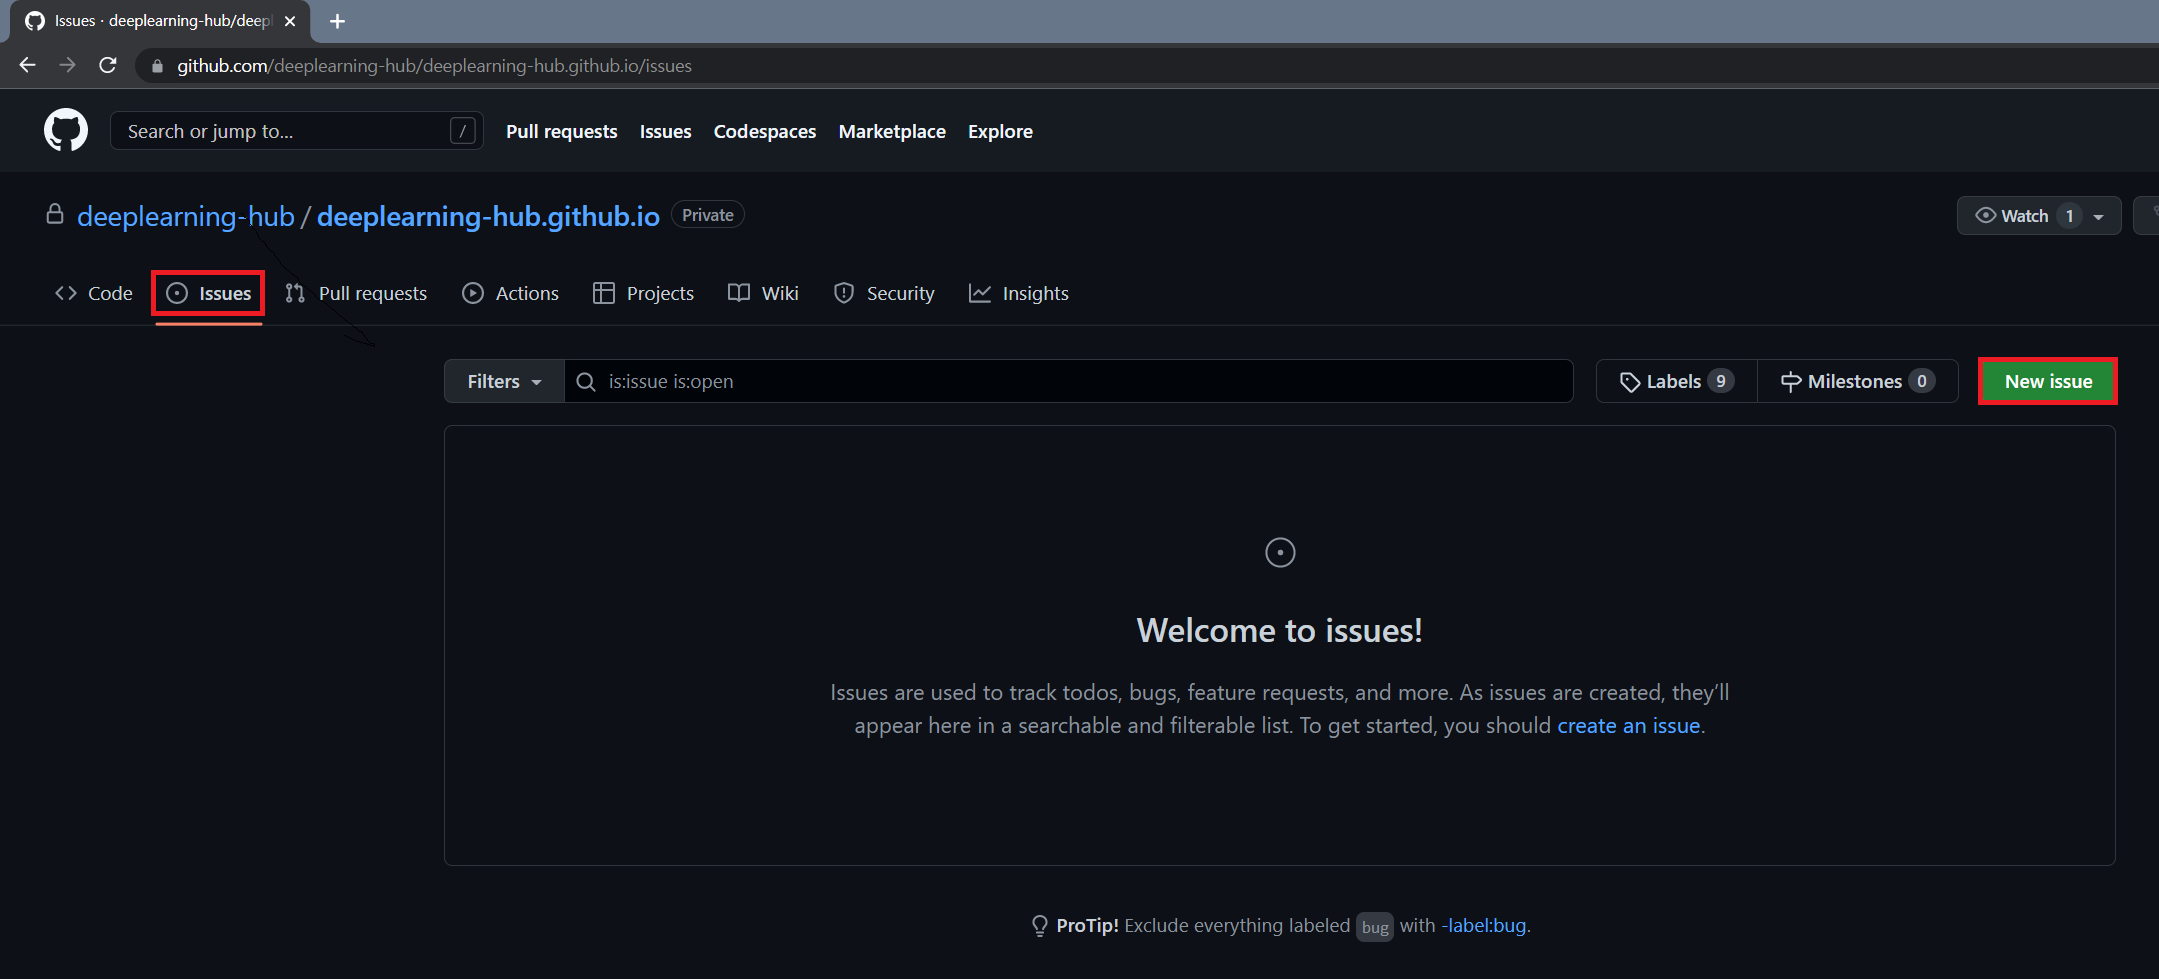
If you have any problem or error by this document please visit here to share your case or ideas to fix.
