3. Data recognition using deep learning
- To make a custom model, we will use Colab and YOLO in this tutorial. You don't need to have graphics cards in this case because Colab provides free GPU to train and validate your custom dataset.
- Colab is a Python development environment that runs in the browser using Google Cloud. If you don't have a google account, you will need to create an account.
- YOLO is one of popularly used vision AI methods incorporating lessons learned and best practices evolved over thousands of hours of research and development. If you would like to learn more details, you can find it from its website, here.
Tip
If you have a GPU and setup your own environment, you can do the following steps in your own jupyter notebook. We will make this instruction soon.
Setup a Colab environment
1. Go to Colab page to start.
Colab link: https://colab.research.google.com/
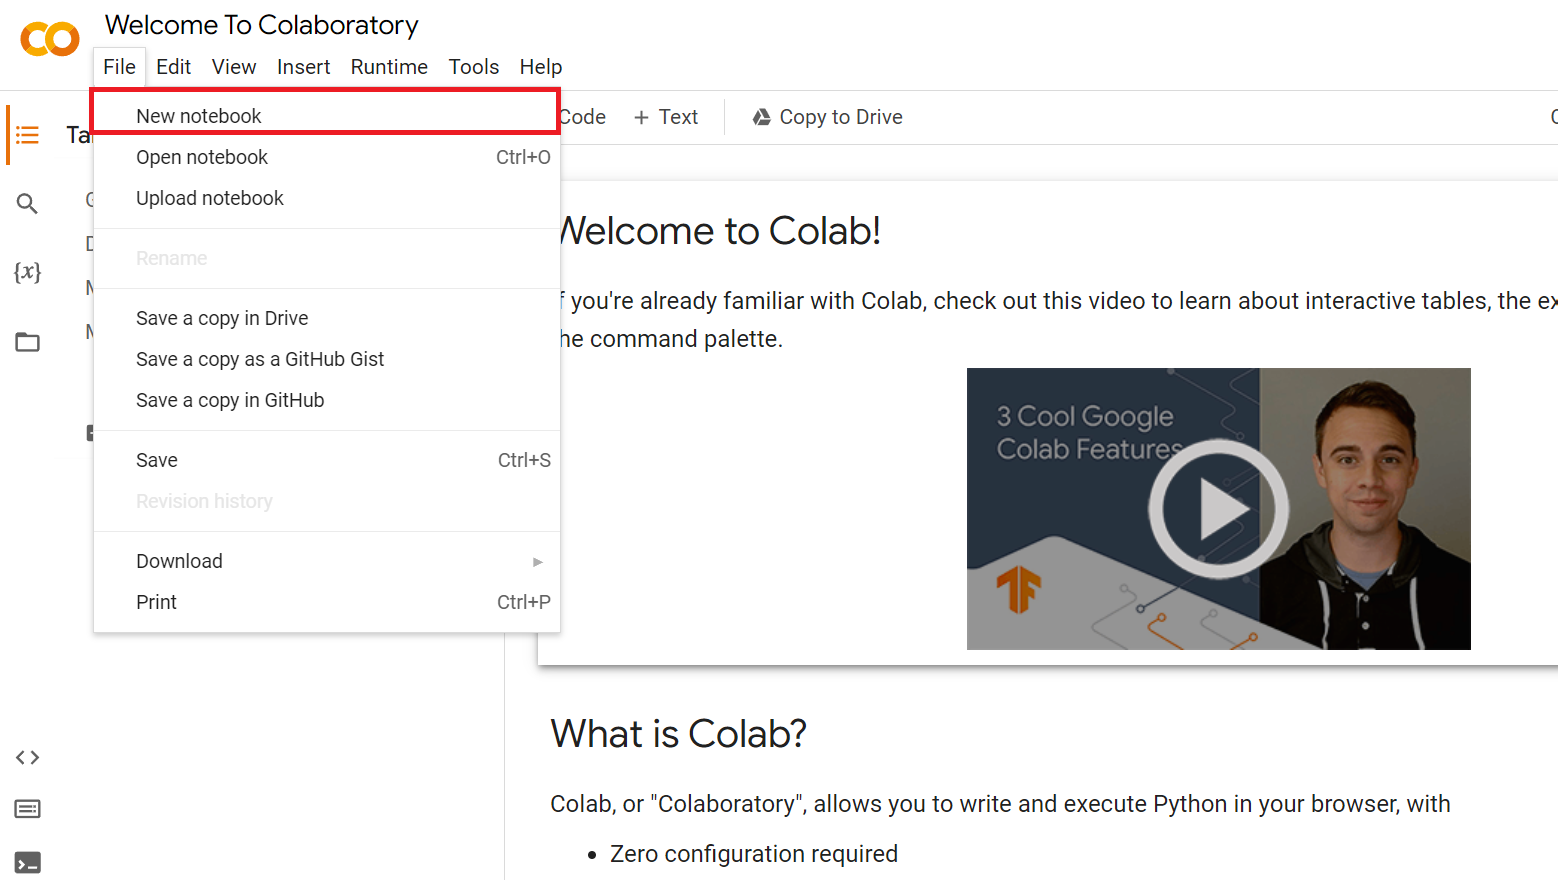
2. Click File->New notebook to create new notebook. Notebook is a one page to write codes as Python.
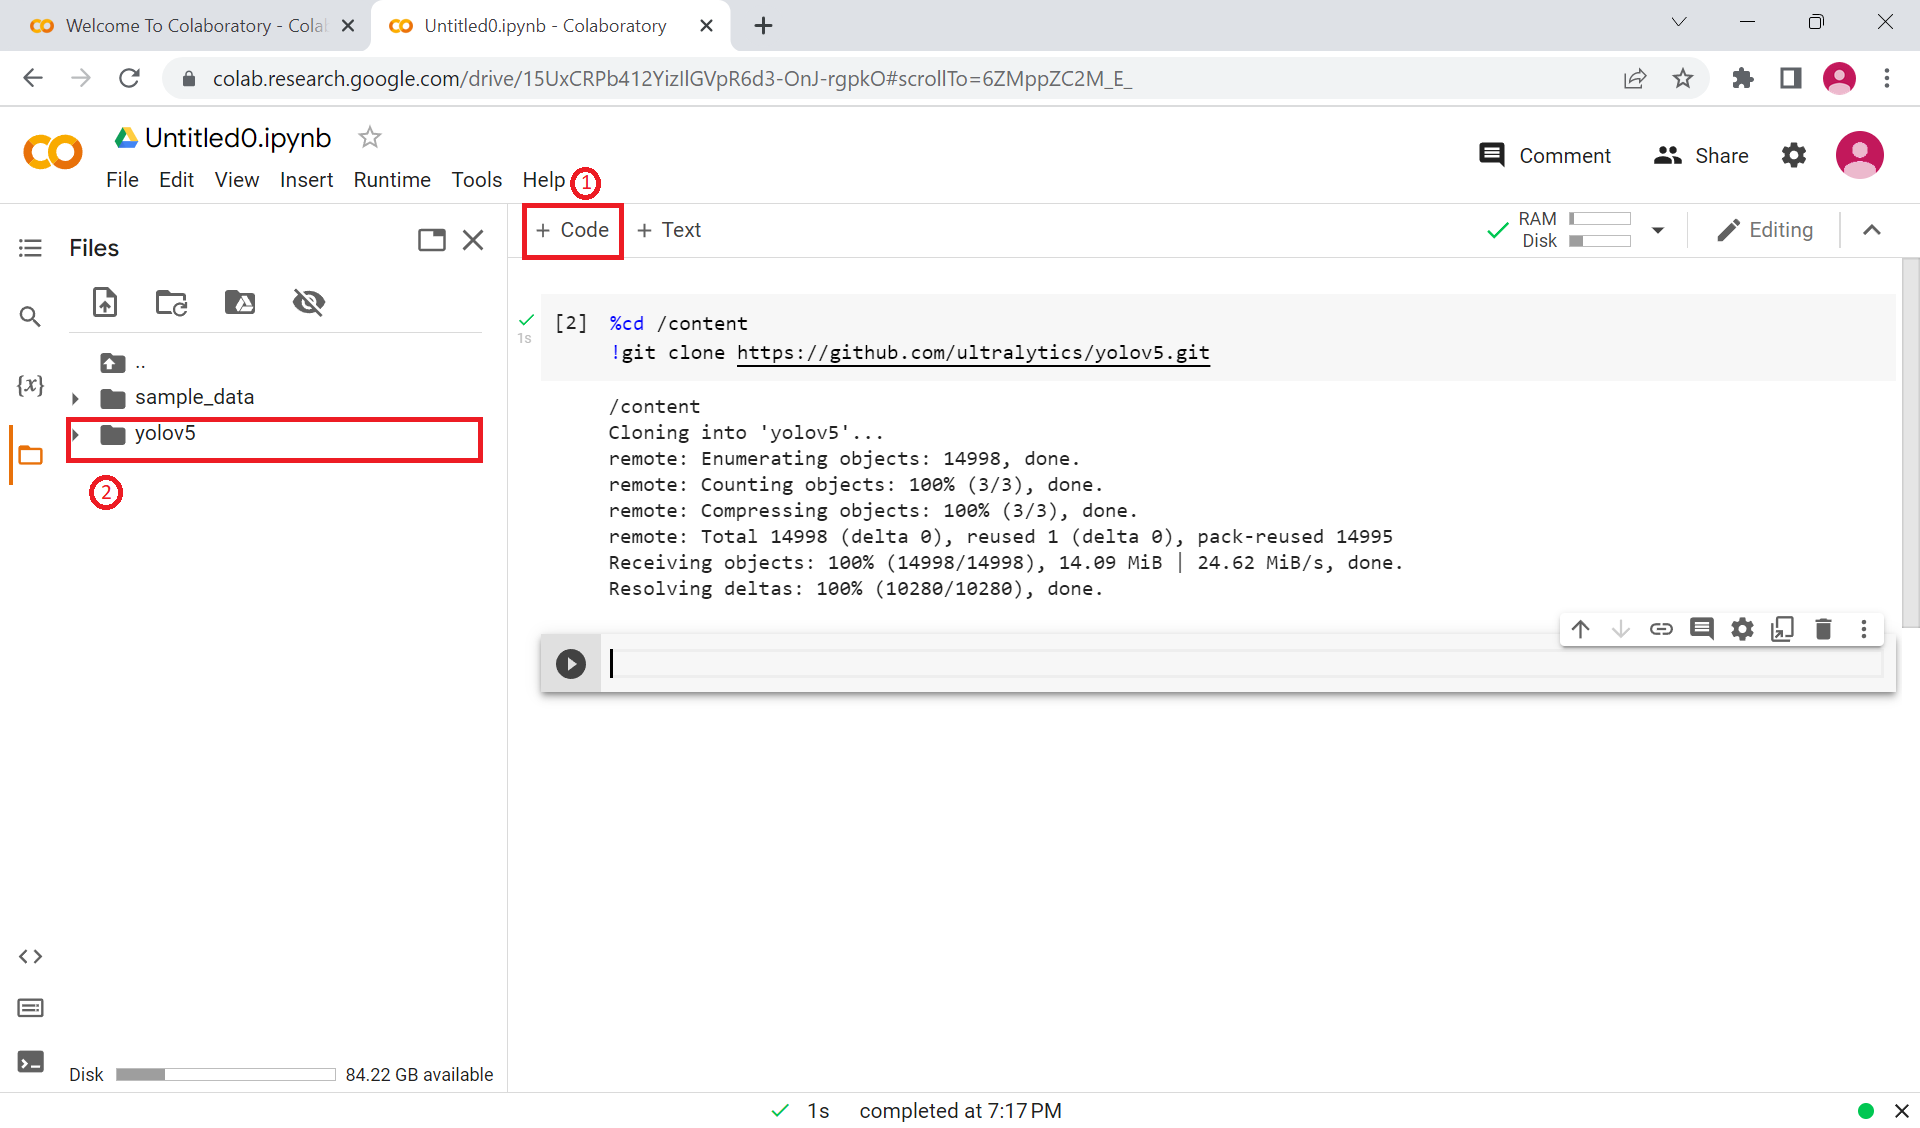
3-1. Click + Code button to create code block which called "cell" and type
%cd /content   #Change working directory.
!git clone https://github.com/ultralytics/yolov5.git   #Clone the Yolov5 folder from github.
Ctrl + Enter to run that cell.
3-2. When the download is finished you can see the Yolov5 folder.
Hotkeys for Colab.
| Key | Description |
|---|---|
Ctrl + Enter |
Runs cell that cursor is activated |
Shift + Enter |
Runs cell that cursor is activated and move to next cursor |
Alt + Enter |
Runs cell that cursor is activated after that create and move to new cell |
Ctrl + M + A |
Create new cell above activated cell |
Ctrl + M + B |
Create new cell below activated cell |
Ctrl + M + D |
Remove activated cell |
Ctrl + M + Y |
Change activated cell to code cell |
Ctrl + M + M |
Change activated cell to markdown cell |
Ctrl + M + Z |
Undo last action (inside a cell) |
Ctrl + M + H |
Open hoykey managing window |
If you use "MacBook" use Command Key instead Ctrl.
4. Create new cell and type
%cd /content/yolov5/   #Change working directory.
!pip install -r requirements.txt   #Install all the libraries that listed on text file.
5. Create new cell and type
!git clone https://github.com/deeplearning-hub/deeplearning-hub-dataset.git
%mv deeplearning-hub-dataset/dataset/ ./
Training data
6. Create new cell and type
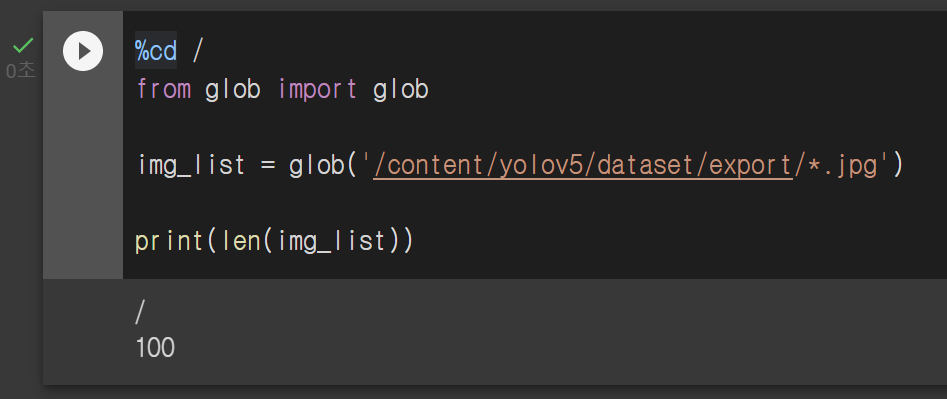
%cd /
from glob import glob

img_list = glob('/content/yolov5/dataset/export/*.jpg')   # Making list of images from our dataset.

print(len(img_list))   # Print out how many pictures are exist.
If you placed your dataset to different folder, you may fix the path.
7. Create new cell and type
from sklearn.model_selection import train_test_split

train_img_list, val_img_list = train_test_split(img_list, test_size=0.1, random_state=2000)

print(len(train_img_list), len(val_img_list))
It splits to two different list, one is for training, the other one is for validate.
If you want to change the ratio, you may change "test_size" option. 0.1 = 10%
8. Create new cell and type
with open('/content/yolov5/dataset/train.txt', 'w') as f:
  f.write('\n'.join(train_img_list) + '\n')
with open('/content/yolov5/dataset/val.txt','w') as f:
  f.write('\n'.join(val_img_list) + '\n')
Write two different text file for data.yaml file. Image path will be listed on the text files.
9. Create new cell and type
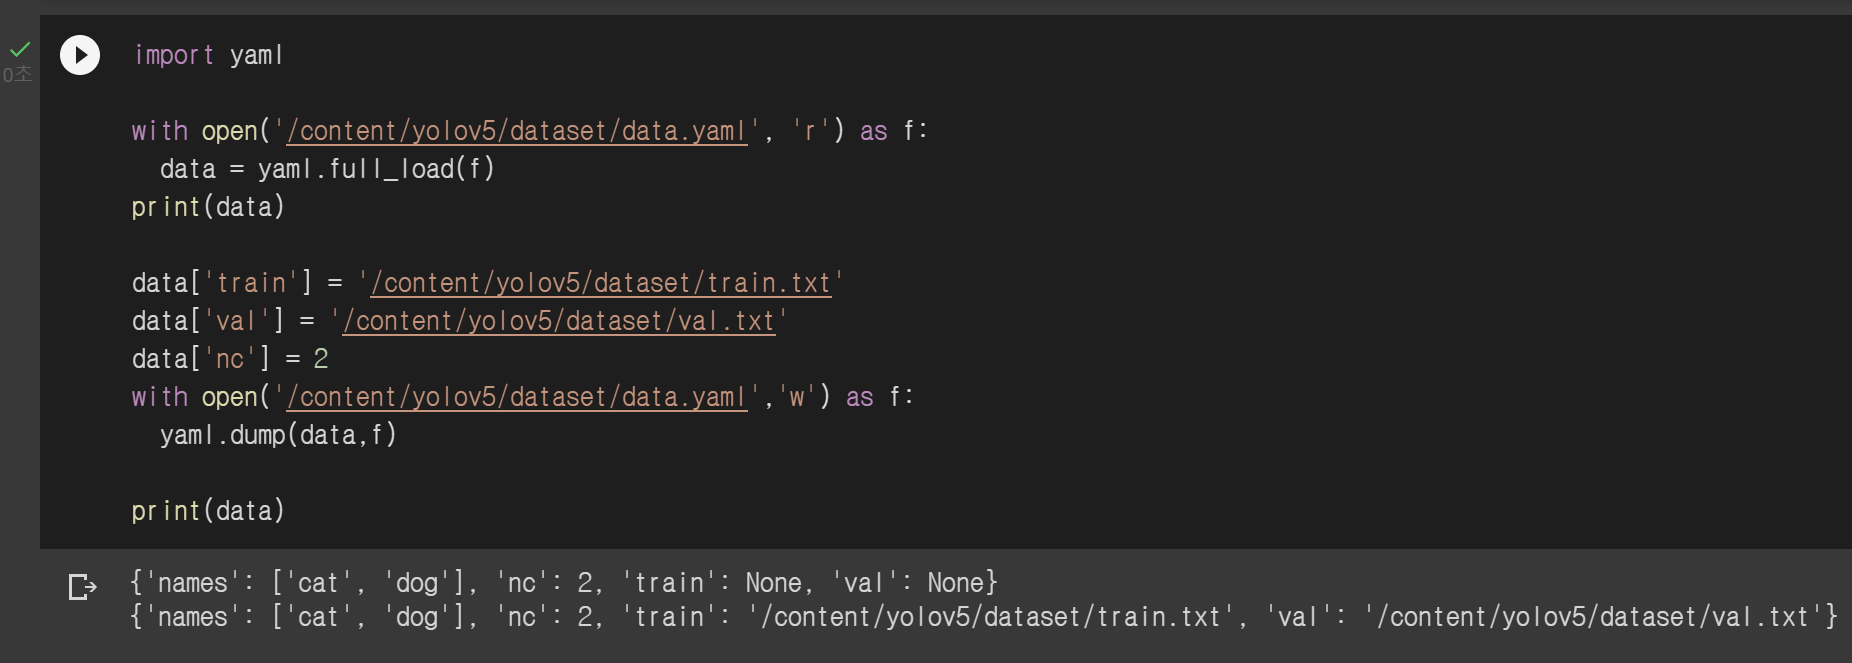
import yaml

with open('/content/yolov5/dataset/data.yaml', 'r') as f:
  data = yaml.full_load(f)
print(data)

data['train'] = '/content/yolov5/dataset/train.txt'
data['val'] = '/content/yolov5/dataset/val.txt'
data['nc'] = 2
with open('/content/yolov5/dataset/data.yaml','w') as f:
  yaml.dump(data,f)

print(data)
if your train.txt and val.txt are located in different path, you may fix it.
10. Create new cell and type
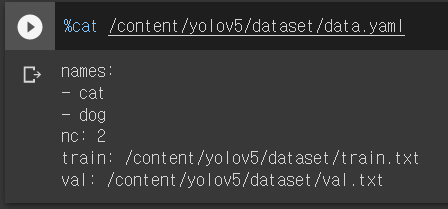
%cat /content/yolov5/dataset/data.yaml
data.yaml.
Find data.yaml file under /content/yolov5/dataset/ folder.
data.yaml file is specifying:
- where your training and validation data is
- the number of classes that you want to detect
- the names(labels) corresponding to those classes
so if you are customizing your model, you need to correct the contents of data.yaml file.
follow the coming up format.
- names: give hyphen and write your class name. One line is for one class. Orders, names, and case of your classes should be matched with your
classes.txtunder/content/yolov5/dataset/export/. - nc: number of your classes that you listed.
- train: path of
train.txtor train images. - val: path of
val.txtor validate images.
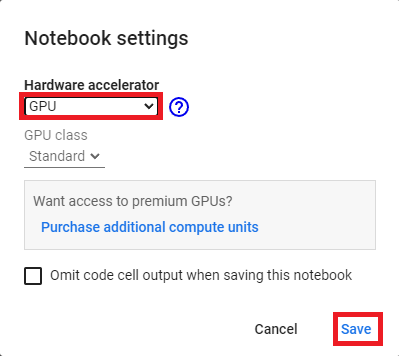
11. Click Runtime -> Change runtime type and change hardware accelerator to GPU to use GPU.
If you changed it, click "Save" to apply it.
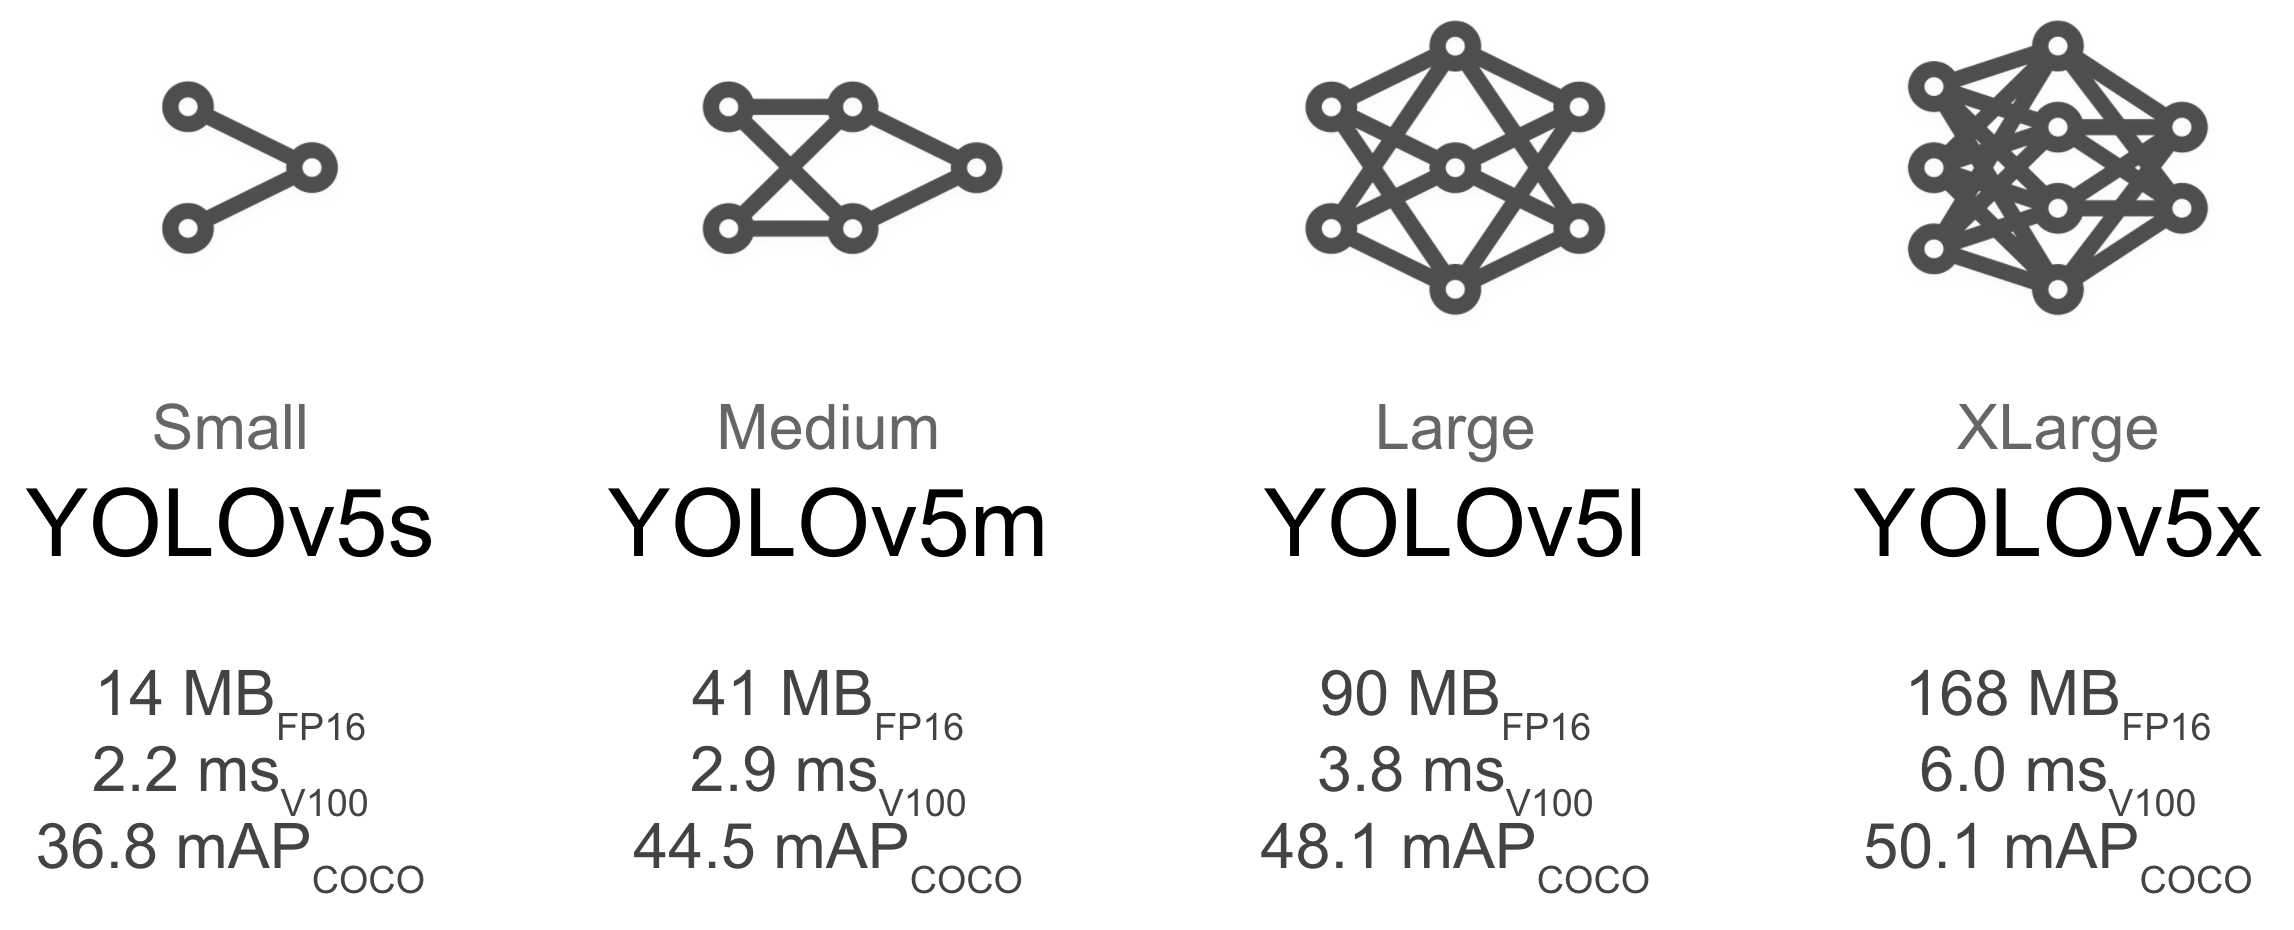
12. You may select one model to train among the 4 different models in yolov5.
Difference between yolov5 models is bigger model trains better than smaller model, but bigger model takes more time to train. On this test case, we will use YOLOv5s model to build it fast.
13. Create new cell and type
%cd /content/yolov5/
!python train.py --img 320 --batch 8 --epochs 100 --data /content/yolov5/dataset/data.yaml --cfg ./models/yolov5s.yaml --name results
| Option | Description |
|---|---|
--img |
define input image size, if your image size is different to give option, it will automatically resize image |
--batch |
determine batch size |
--epochs |
define the number of training epochs |
--data |
set the path to your .yaml file |
--cfg |
specify configuration that model you are going to use |
--weights |
specify a custom path to weights |
--name |
result names |
--nosave |
only save the final checkpoint |
--cache |
cache images for faster training |
Given dataset has only 100 pictures and their sizes are samll so it will not take that long, but if you prepared many pictures and if they are bigger, then it will take more time.
Once training is done, you can see the your own model from /content/yolov5/runs/train/results/weights/best.pt you can use model to detect objects.
Validating data
14. Create new cell and type
from IPython.display import Image
import os

listnum = 1

val_img_path = val_img_list[listnum]

!python detect.py --weights /content/yolov5/runs/train/results/weights/best.pt --img 320 --conf 0.1 --source "{val_img_path}"
/content/yolov5/runs/train/results/weights/
| Option | Description |
|---|---|
--source |
input images directory or single image path or video path |
--weights |
trained model path |
--conf |
confidence threshold |
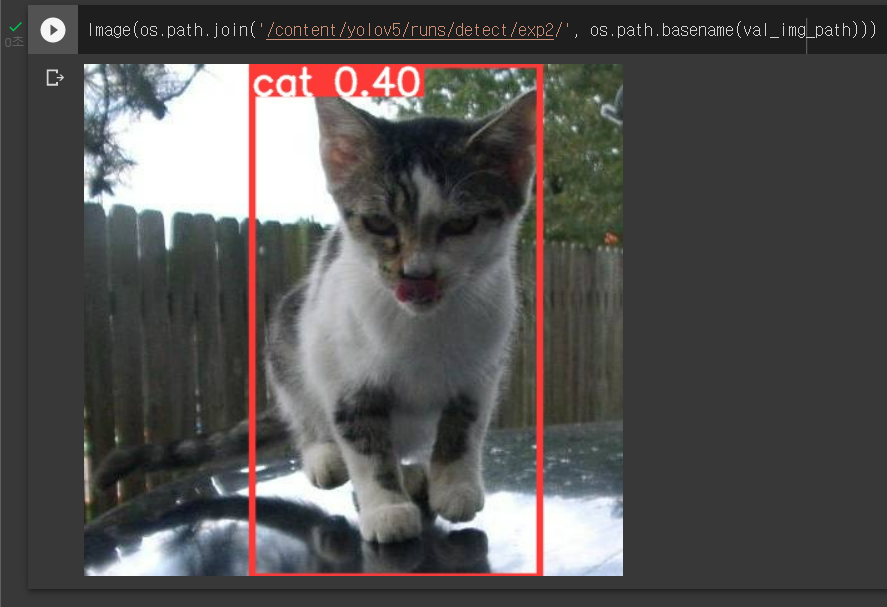
Once detection is finished, you can go to /content/yolov5/runs/detect/exp#/ and double click to check.
or type
# you need to change exp folder number to see img.
Image(os.path.join('/content/yolov5/runs/detect/exp#/', os.path.basename(val_img_path)))
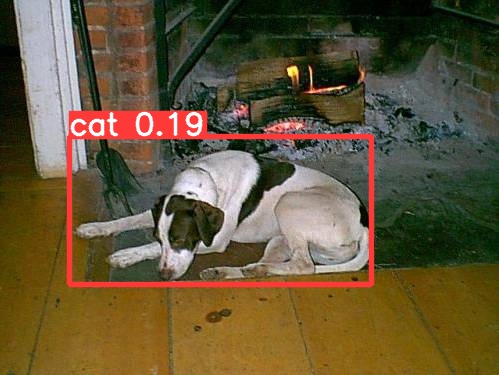
As you can see, some picture shows low conf percentage, or validation seems failed to recognize, because the number of images is too small.
Tip
How to increase conf percentage:
- Increase number of training picture.
- Use bigger model to train.
- If you hard to gain pictures, you may rotate pictures.
- Change background to simple color.
- Use fine tuning method to improve your model.
Keep challange to imporve your model.
