Setting up a Windows environment
- This page is for a Windows environment.
- If you would like a Linux environment, please click here.
- In this documentation, we will install 6 tools step by step.
Anaconda
Anaconda offers the easiest way to perform Python/R data science and machine learning on a single machine and some other useful tools.
Free download link for Anaconda : https://www.anaconda.com/
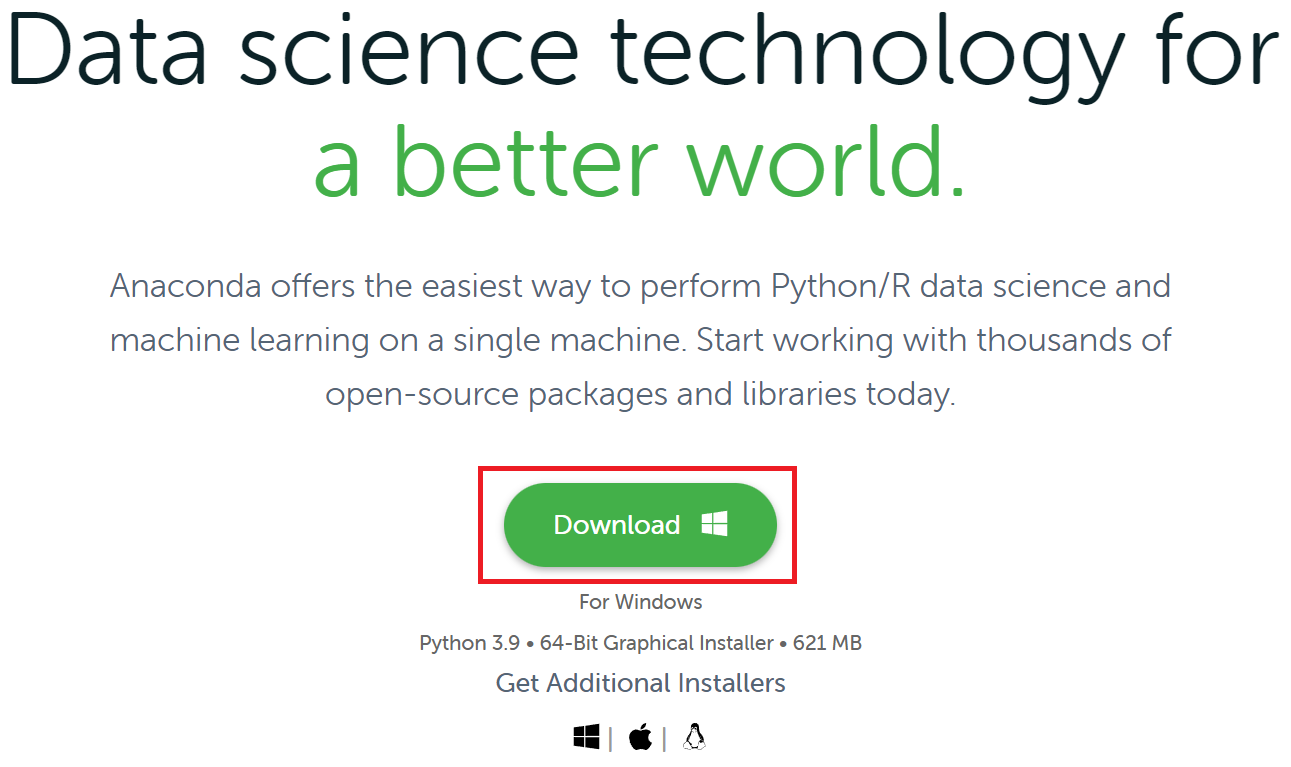
If you click the above link, you can see this page.
1. Click the "Download" button
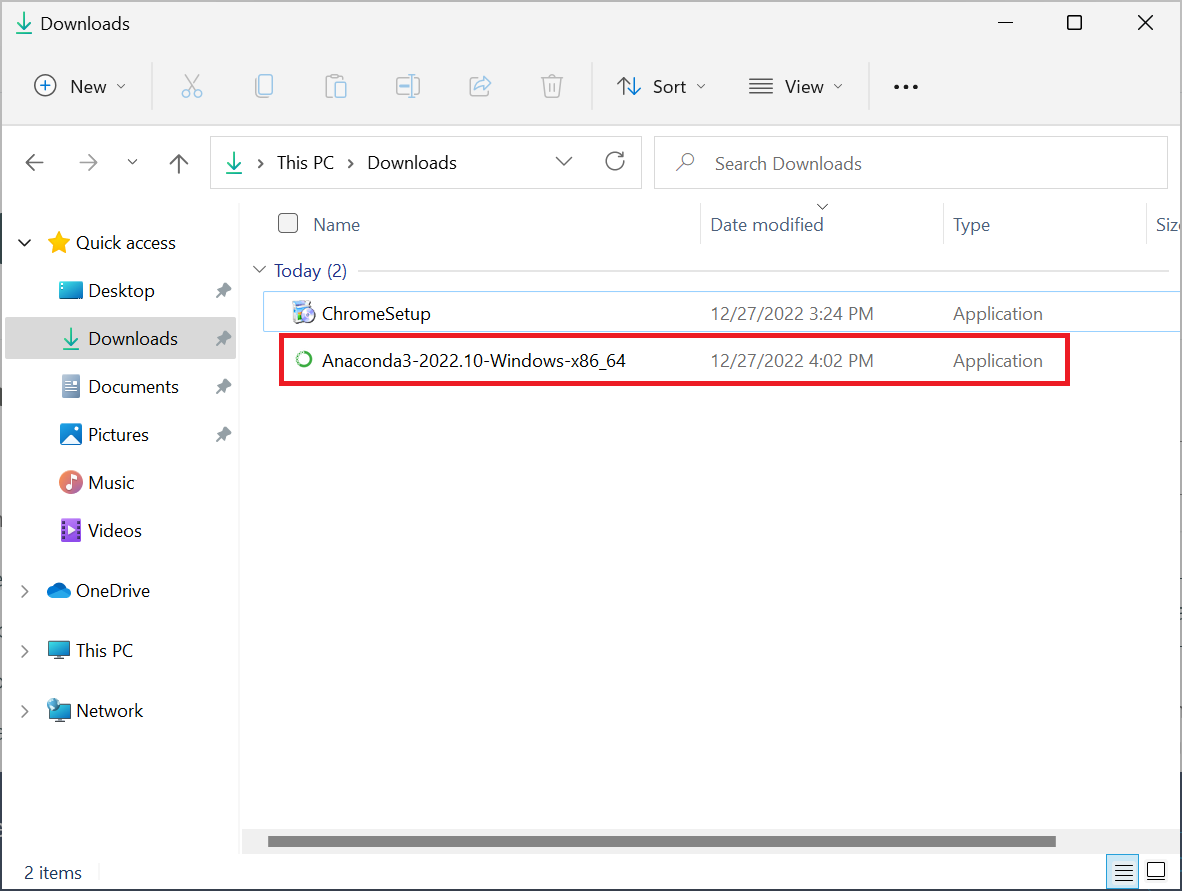
2. Go to the "Downloads" folder and do double click to start installation.
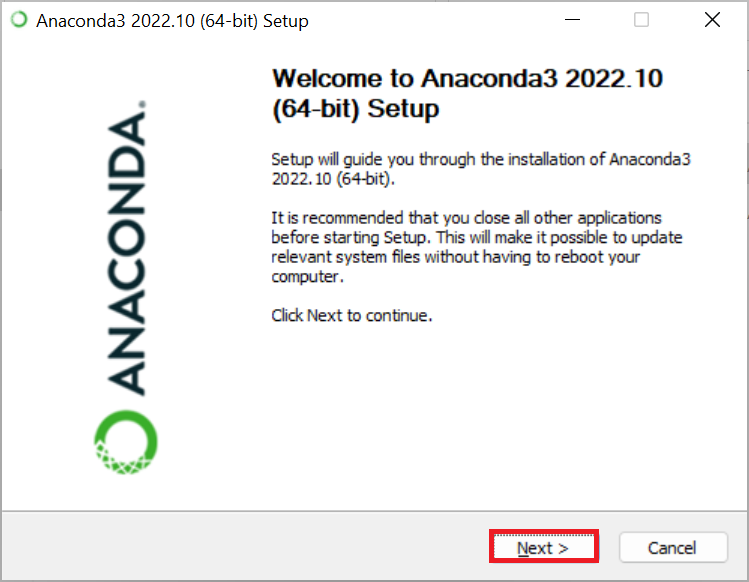
3. Click "Next" button
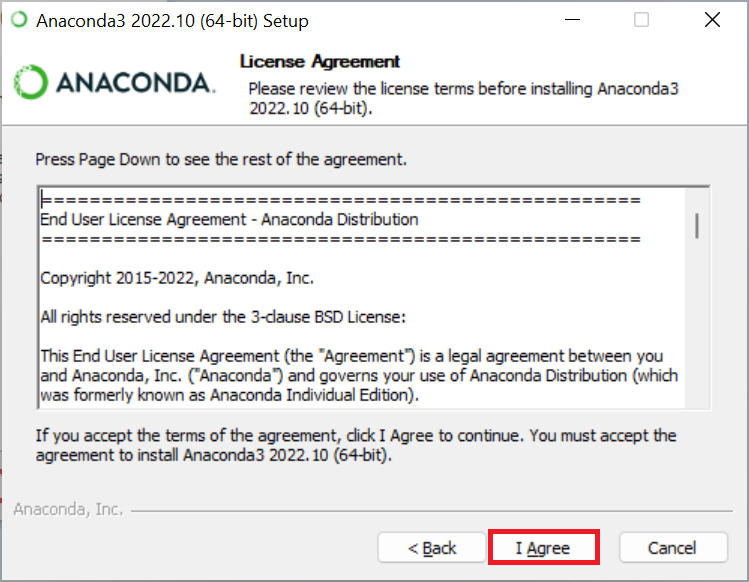
4. Read the License Agreement and once you finish to read and agree, then click "I Agree" button.
Warning
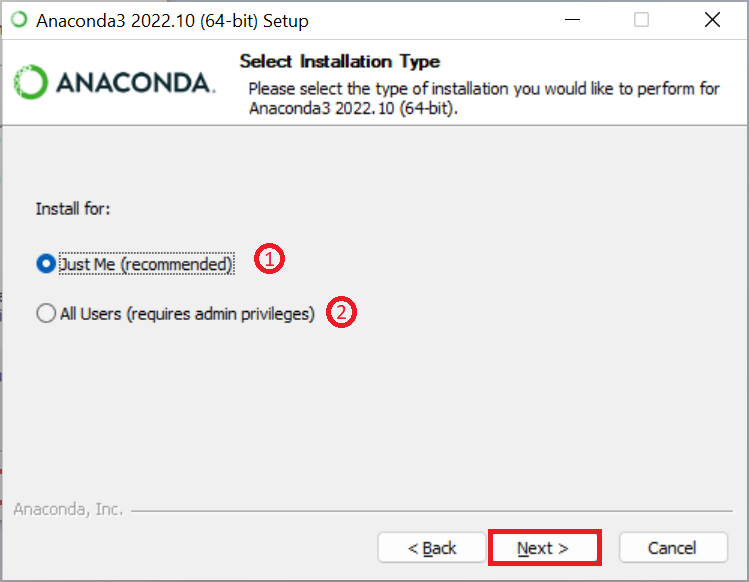
"All Users" option is for advanced user. A path of installation will be changed, because of that, you need to run the command prompt(CMD) with administrator privileges, when you tried to install or upgrade some packages.
Recommandation is "Just Me" option.
5. If you don't have specific reason to setup a enviroement yourself, you may choose "Just Me" option, it will setup all the settings automatically.
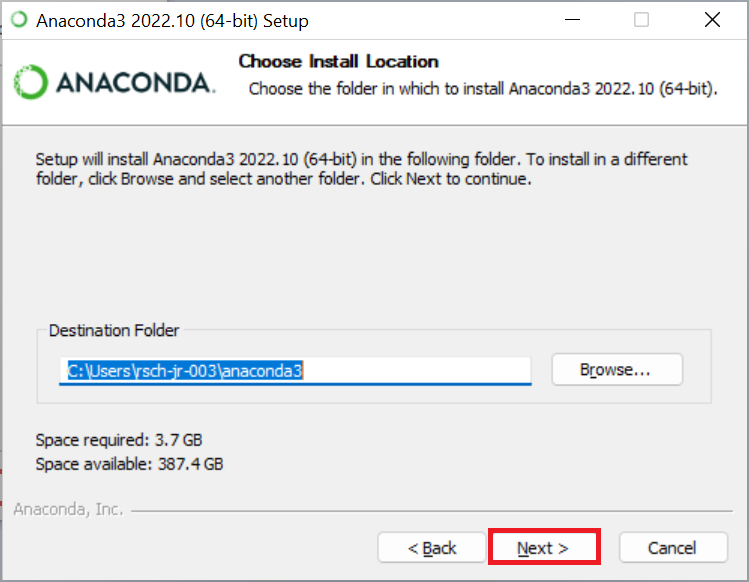
6. If you want to install in a different folder, click "Browse" button to select another folder. If you don't want to change, then just click "Next" button.
Warning
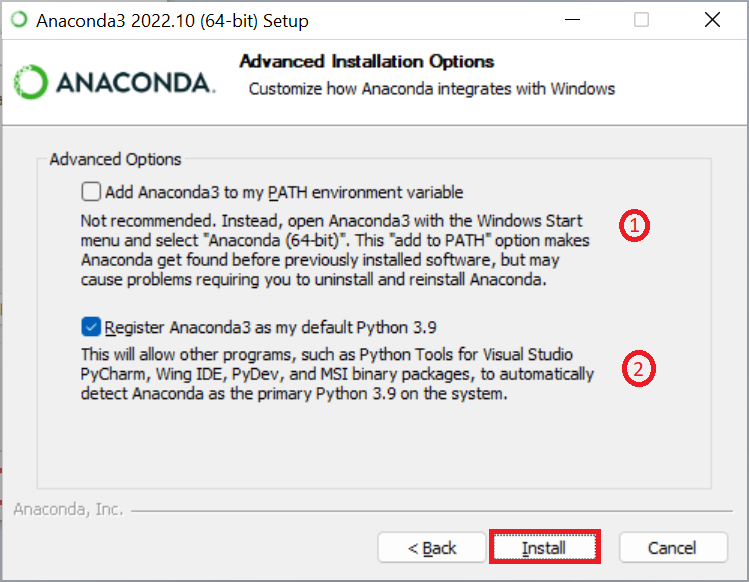
"Add Anaconda3 to my PATH environment variable" option will setup environment automatically, but if you installed python before or python is installed, then you don't need to check first option, otherwise please check first option.
Second option let the Anaconda interlock with Python. Second option is recommanded.
7. Please read above warning carefully, and once you finish to select the options, click "Install" button. It will take some time.
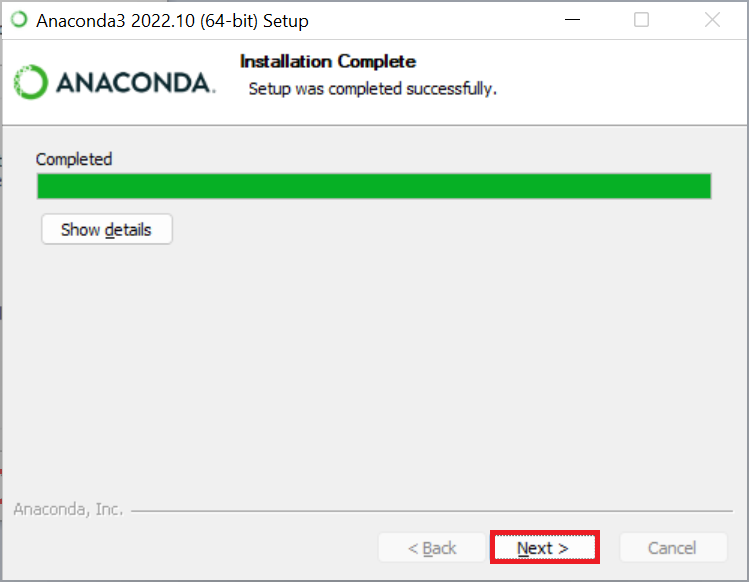
8. When installation is done, click "Next" button.
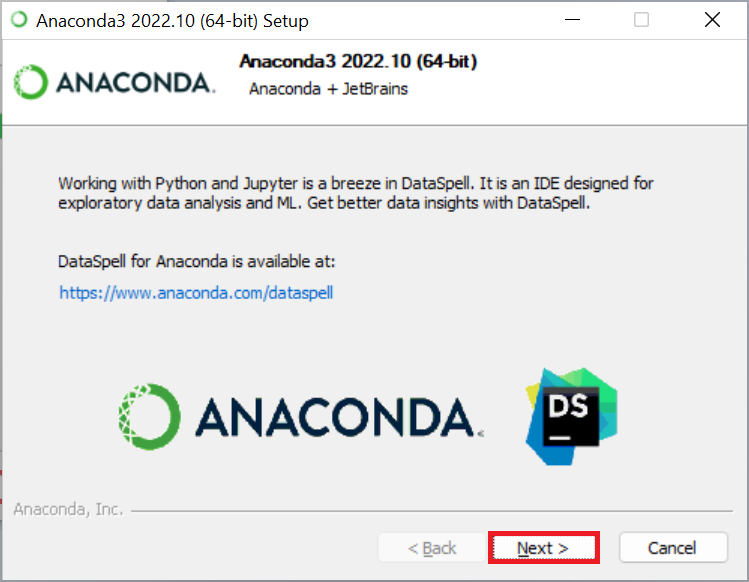
9. Click "Next" button.
Tip
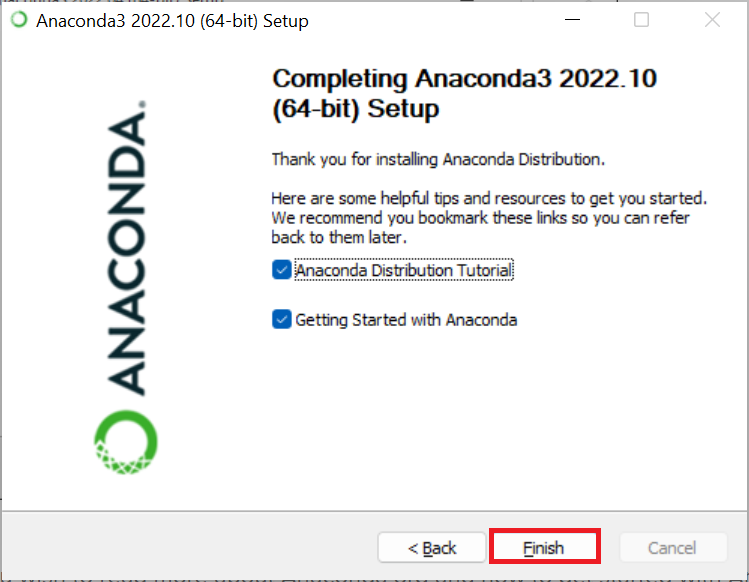
If you would like to read a tutorial, you can check the first option.
10. Click "Finish" button.
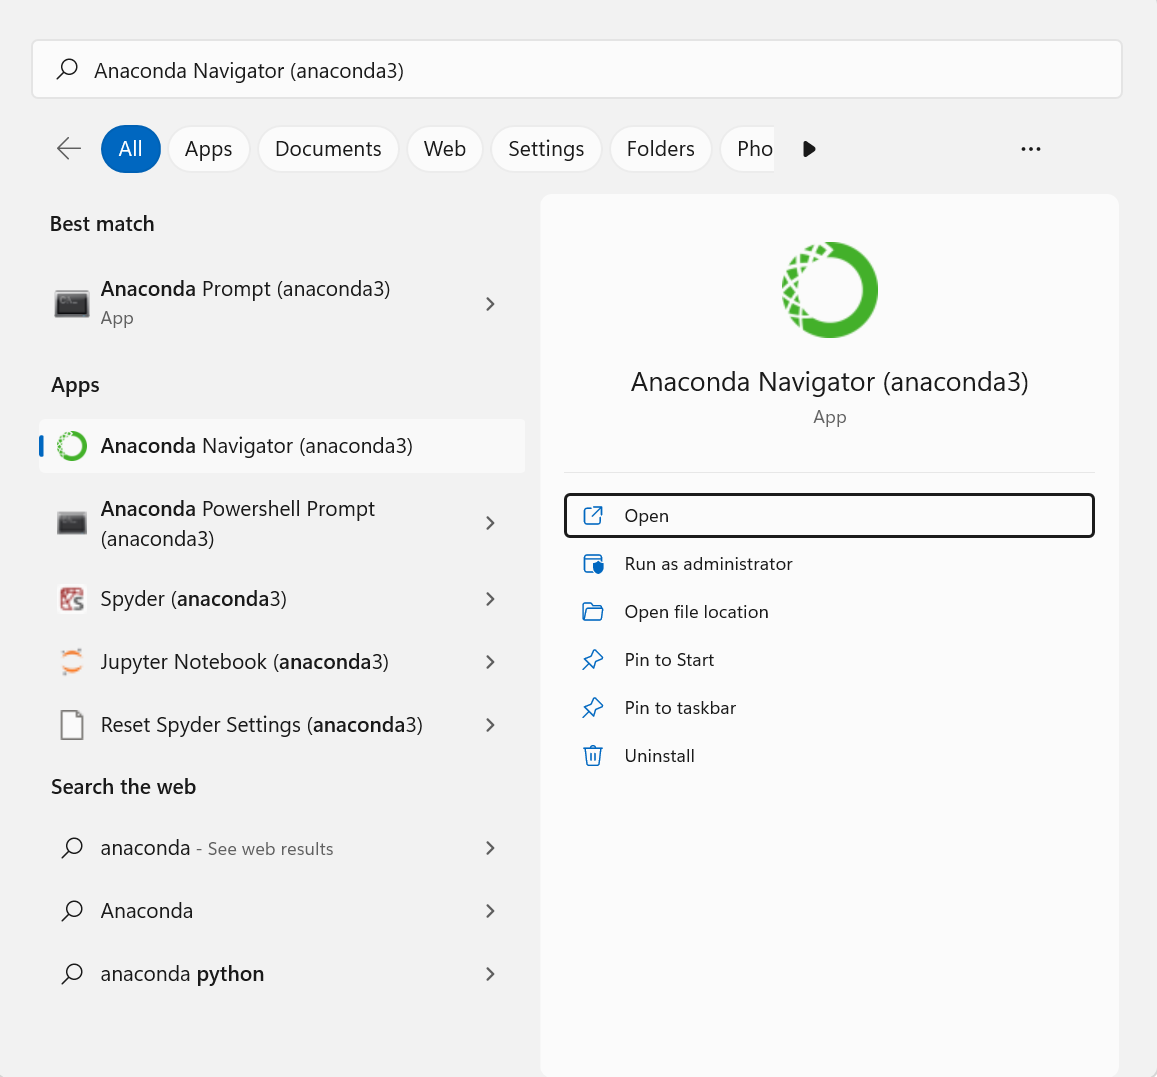
11. Press the Window logo key, and check that Anaconda Navigator is properly installed.
If you don't see this app, you may search it by typing its name.
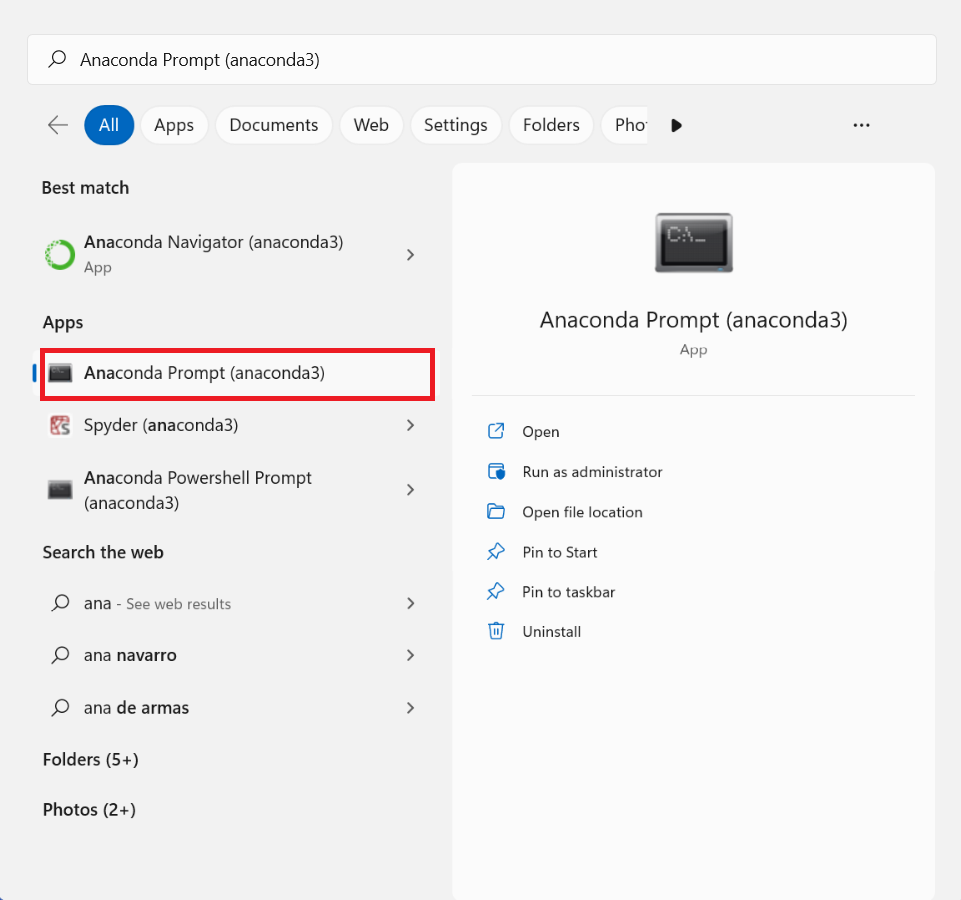
12. Press the Window logo key. Find and run the Anaconda Prompt
13. You may type python --version on the Anaconda Prompt, then you can check the python version.
Tip
The actual python version may differ in your machine.
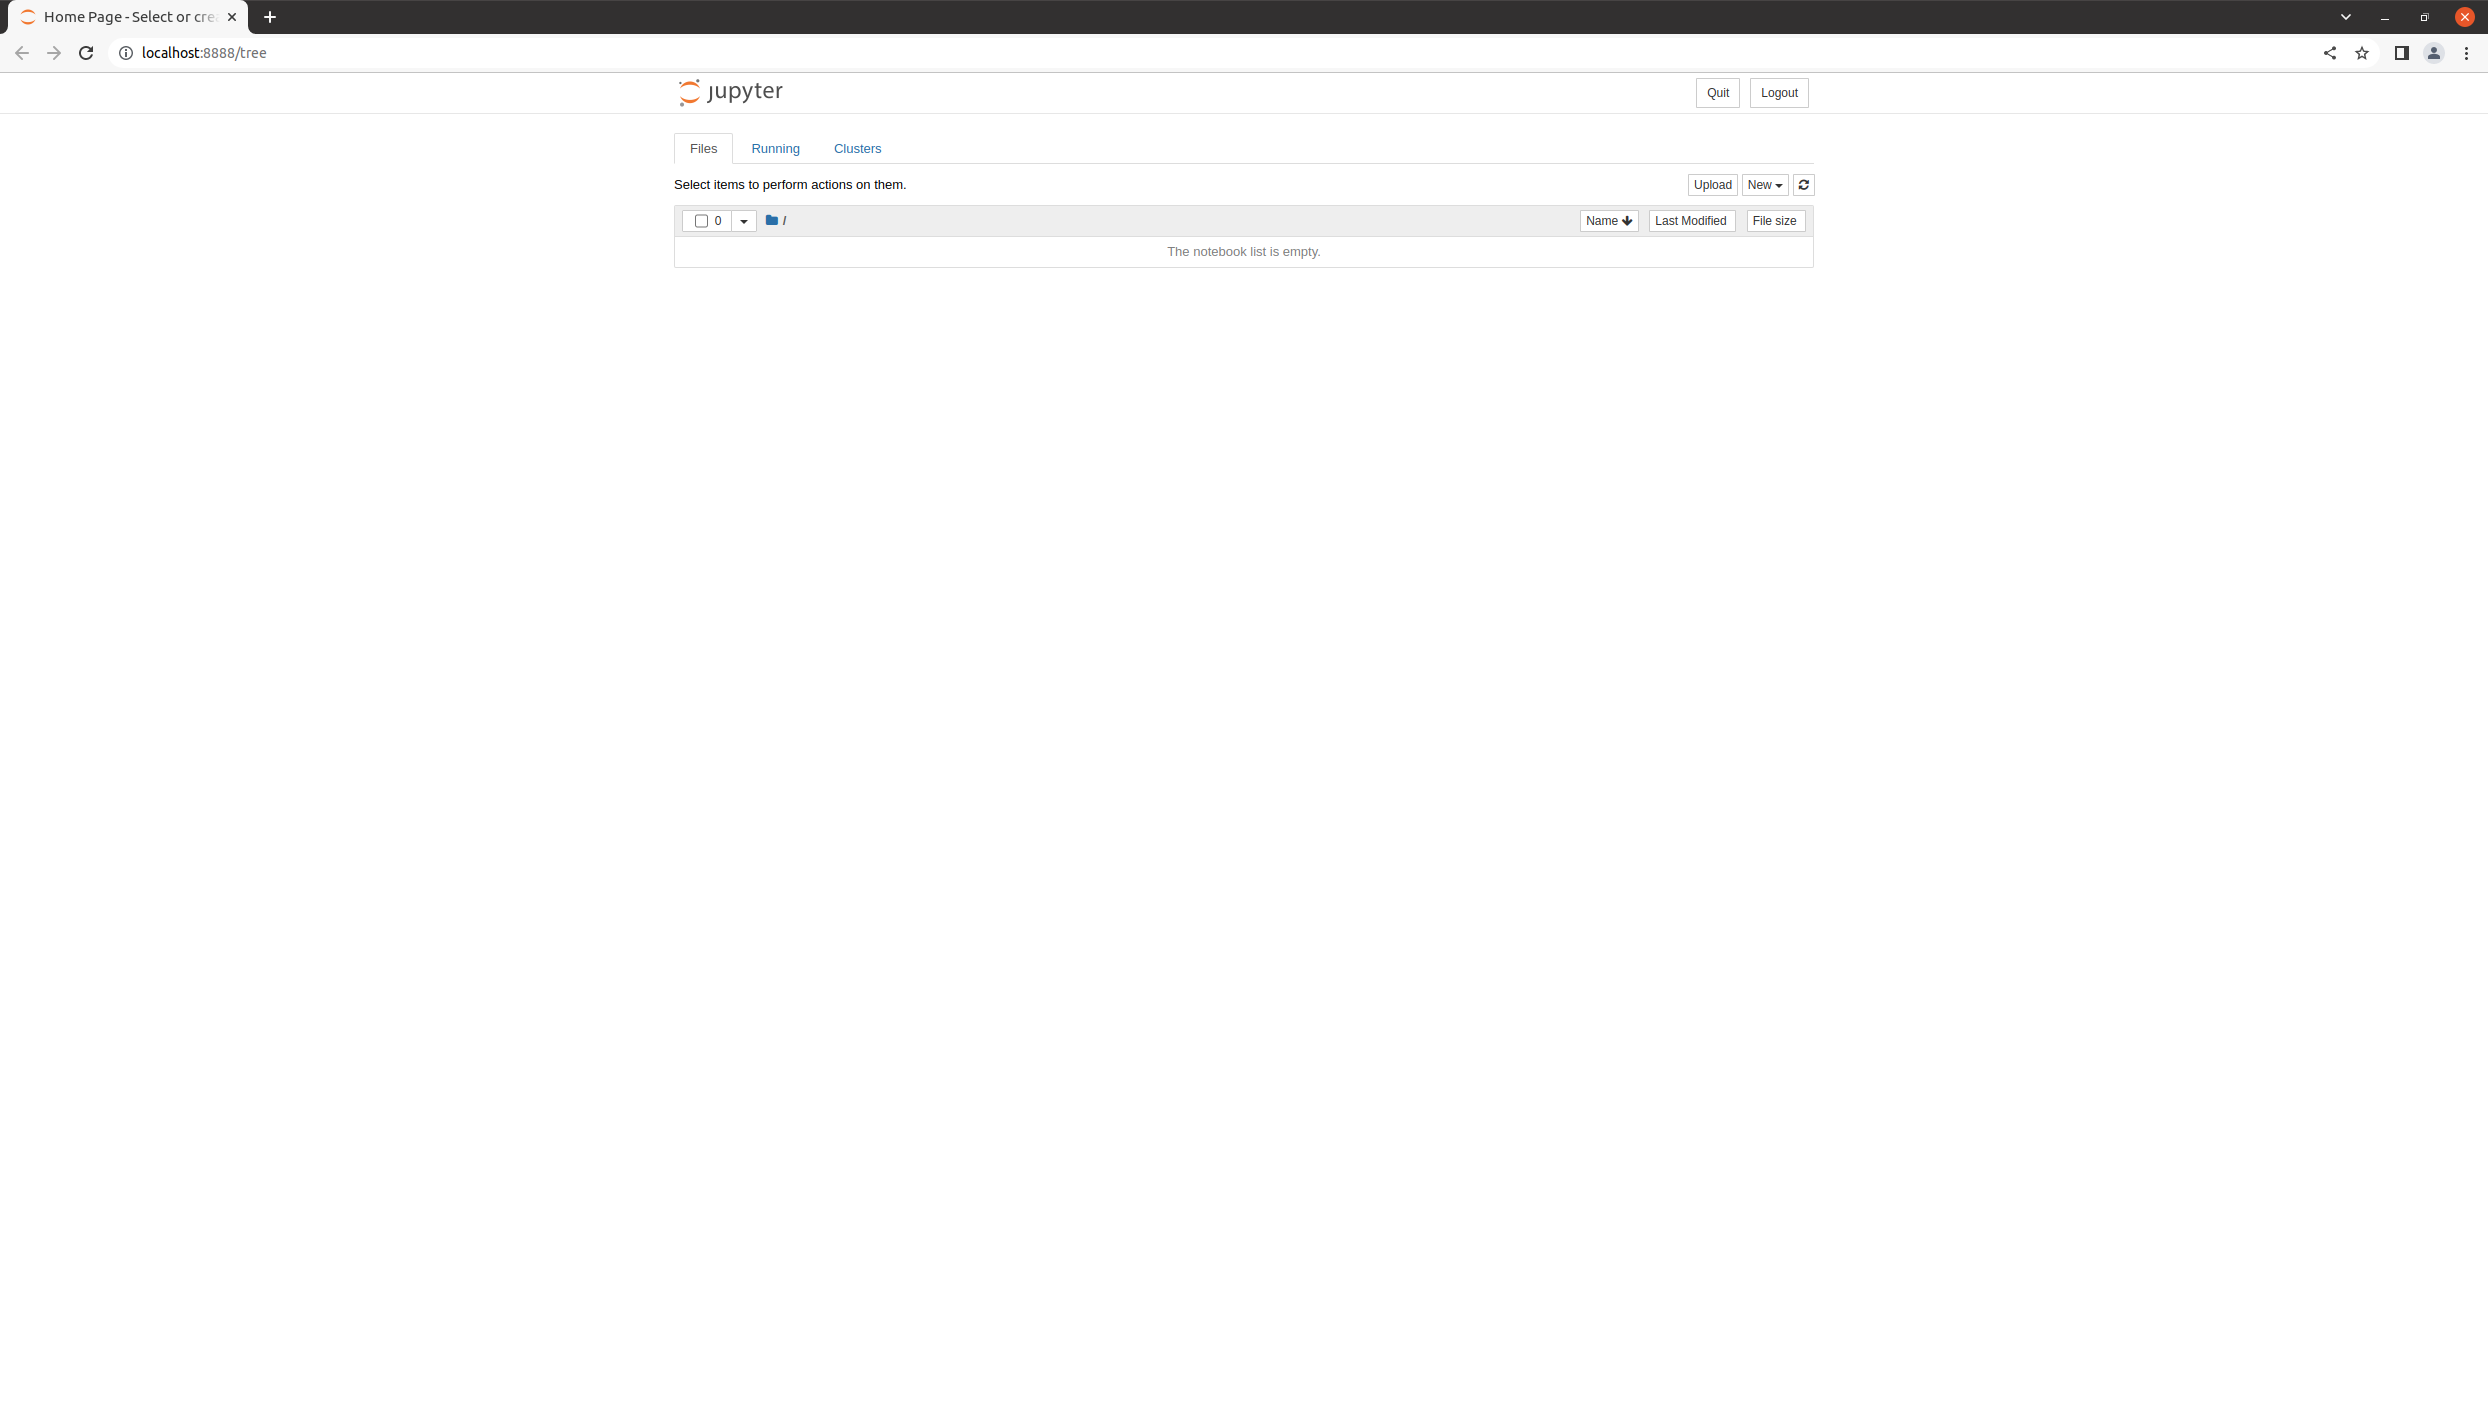
14. Press the Window logo key and type jupyter notebook, then run it. then you can see the picutre below.
If you see the picture above, installation is done.
Tensorflow
Tensorflow is an open-source software library for machine learning and AI.
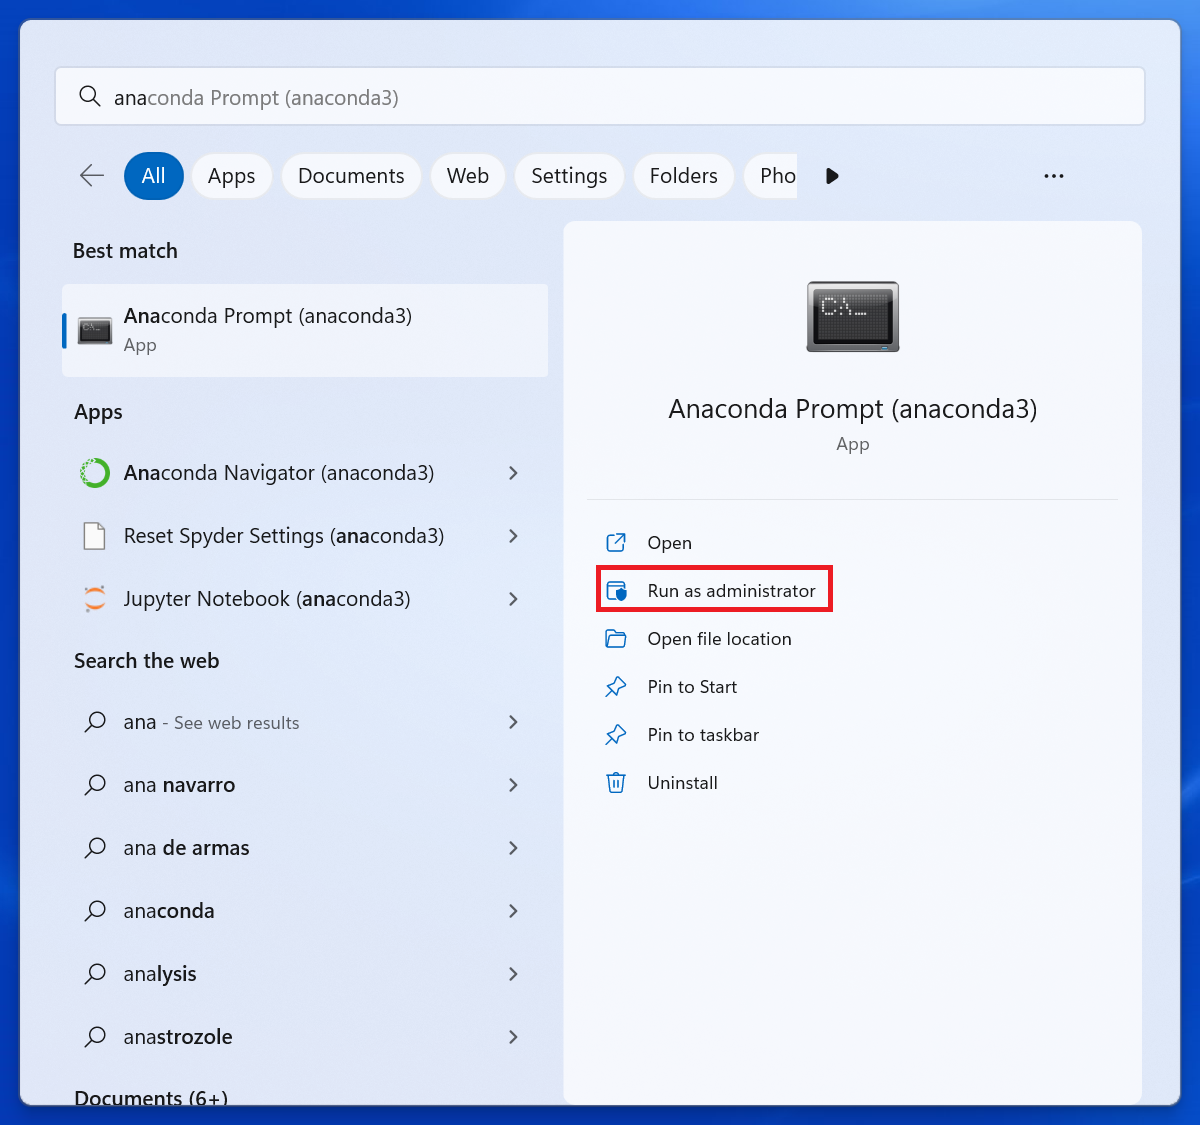
1. Press the Window logo key. Search and run the Anaconda Prompt as the administrator by clicking "Run as administrator".
If you don't see this option, you can right-click the icon. Then you can see and click the "Run as administrator" menu.
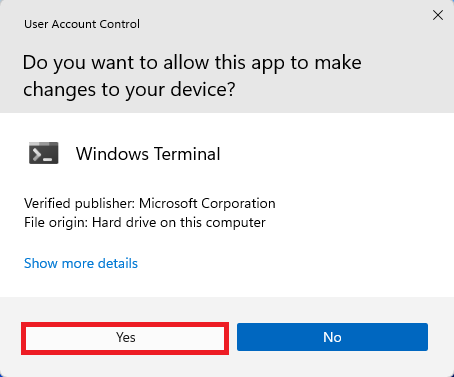
2. When you get this prompt, click the "Yes" button.
3. Then you will get a terminal window. Let us type the following command.
pip install tensorflow
pip freeze
pip freeze lists all the libraries or packages that you have installed.
If you can find tensorflow==x.x.x, You are ready to move forward to the next step.
CUDA
CUDA (Compute Unified Device Architecture) is a parallel computing platform and application programming interface that allows software to use paralle processing using NVIDIA GPUs.
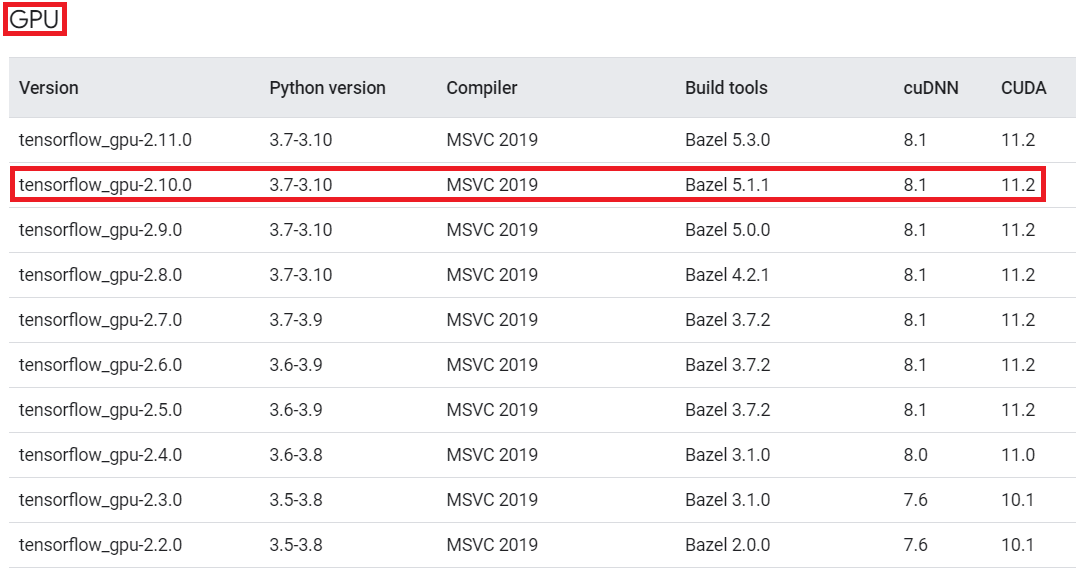
1. Please visit the following web page and check the versions of CUDA and cuDNN that compatible with the tensorflow-gpu (tensorflow) and python versions from https://www.tensorflow.org/install/source_windows#tested_build_configurations
Recently the tensorflow package replaced the tensorflow-gpu package. Since we use a GPU, we can check the tensorflow-gpu version even though the python package name is tensorflow.
-
My version:
- Python: 3.9
- tensorflow_gpu-2.10.1 (tensorflow-2.10.1)
-
So we need to download the following versions.
- cuDNN: 8.1
- CUDA 11.2
2. If you find right version of CUDA for your environment then you can download CUDA Toolkit from
https://developer.nvidia.com/cuda-toolkit-archive
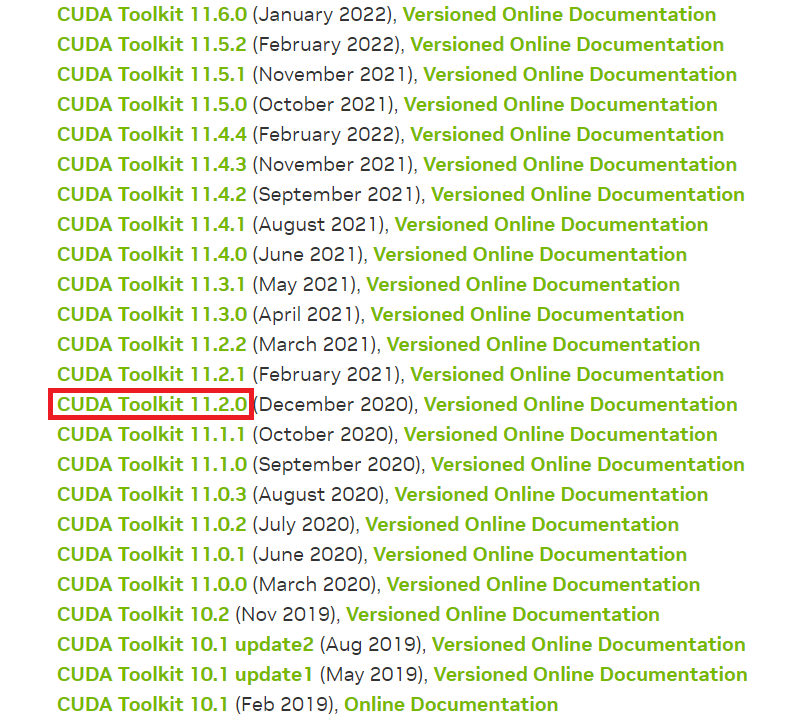
3. Find the matched version.
Warning
The version number should be exactly the same when you are trying to download. ex) 11.2.0 (o) 11.2.1 (x)
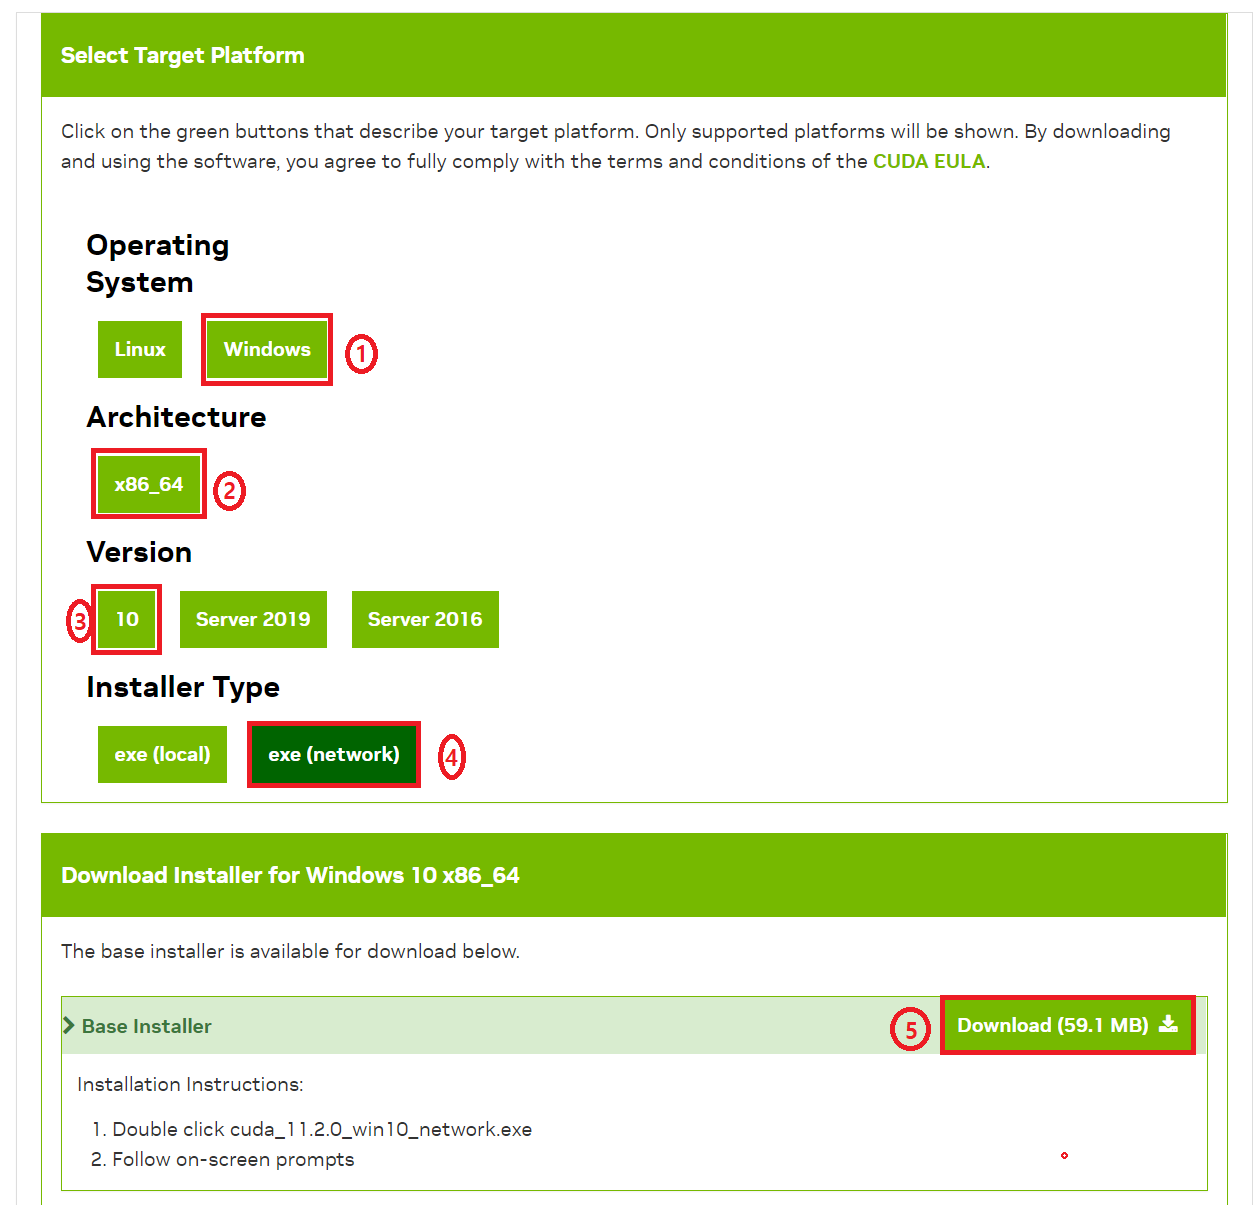
4. Follow the numbers to download
Tip
You may see only the Windows "10" option. If you are using Windows 11, choose the Windows 10.
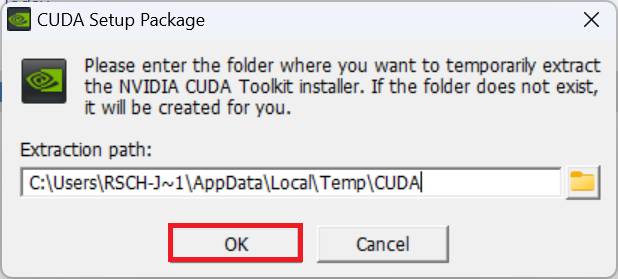
5. Click "OK" button.
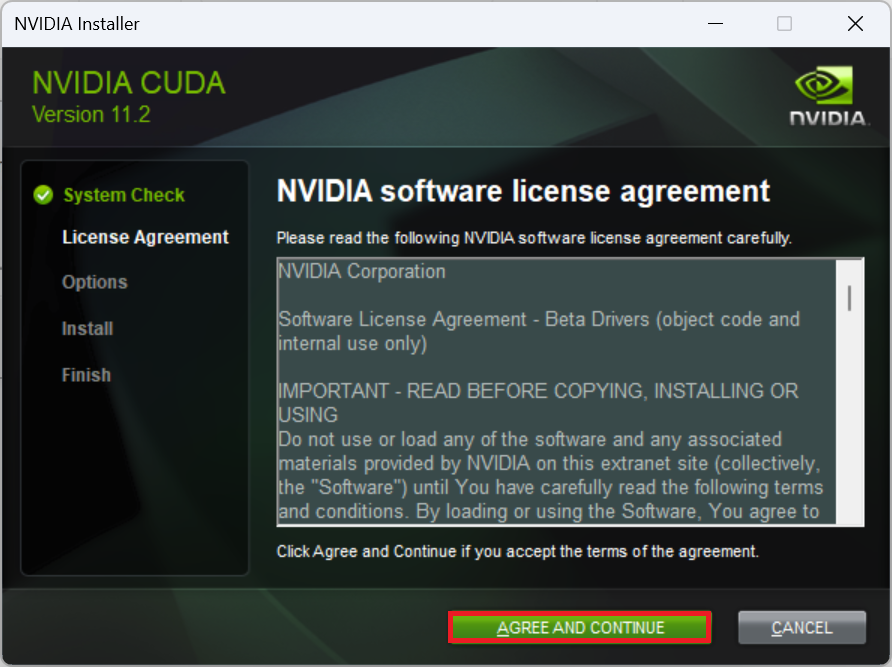
6. Click "AGREE AND CONTINUE" button.
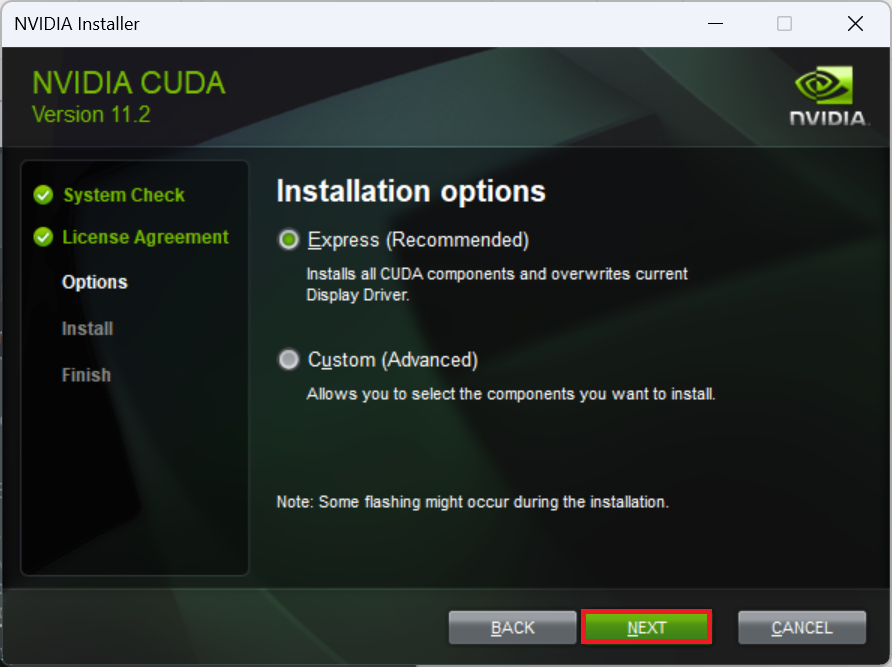
7. Click "Next" button.
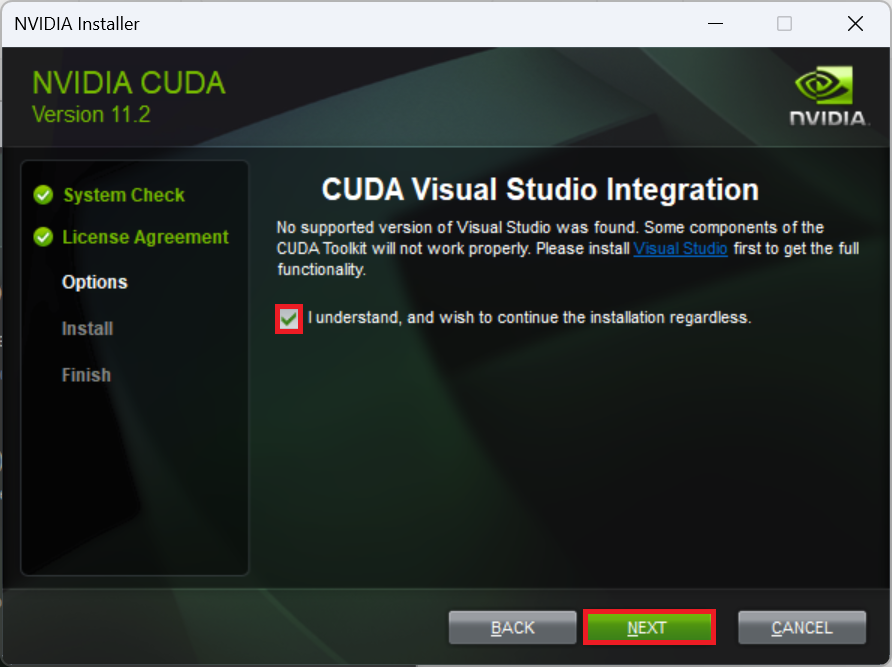
8. Mark on check box then click "Next" button.
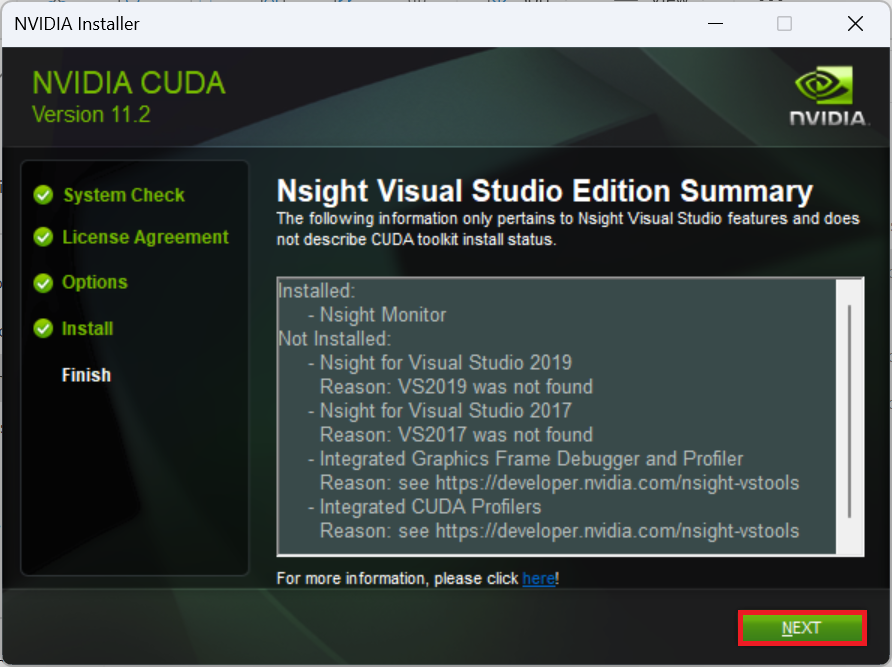
9. Click "Next" button. It will takes some time.
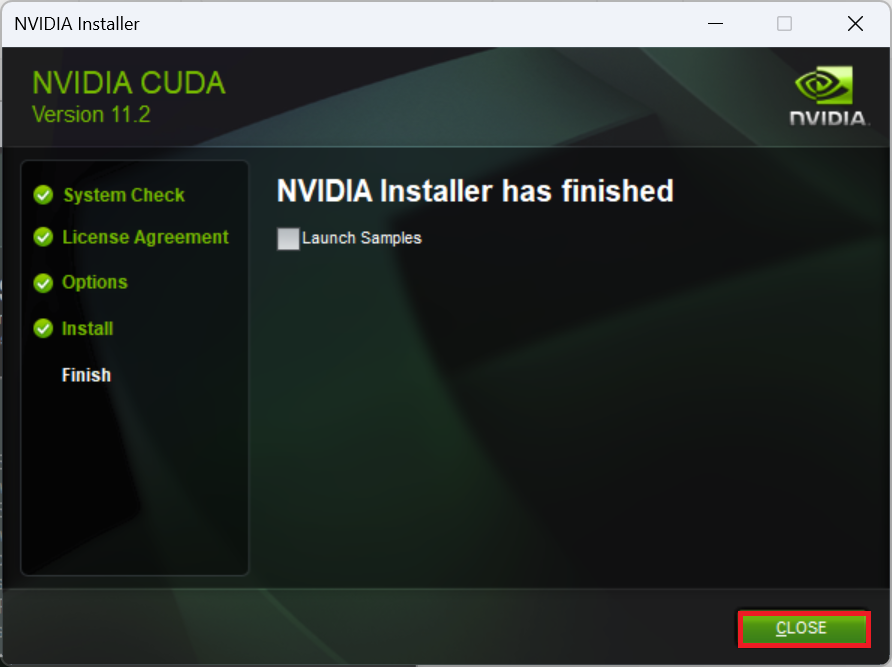
10. Click "Close" button.
cuDNN
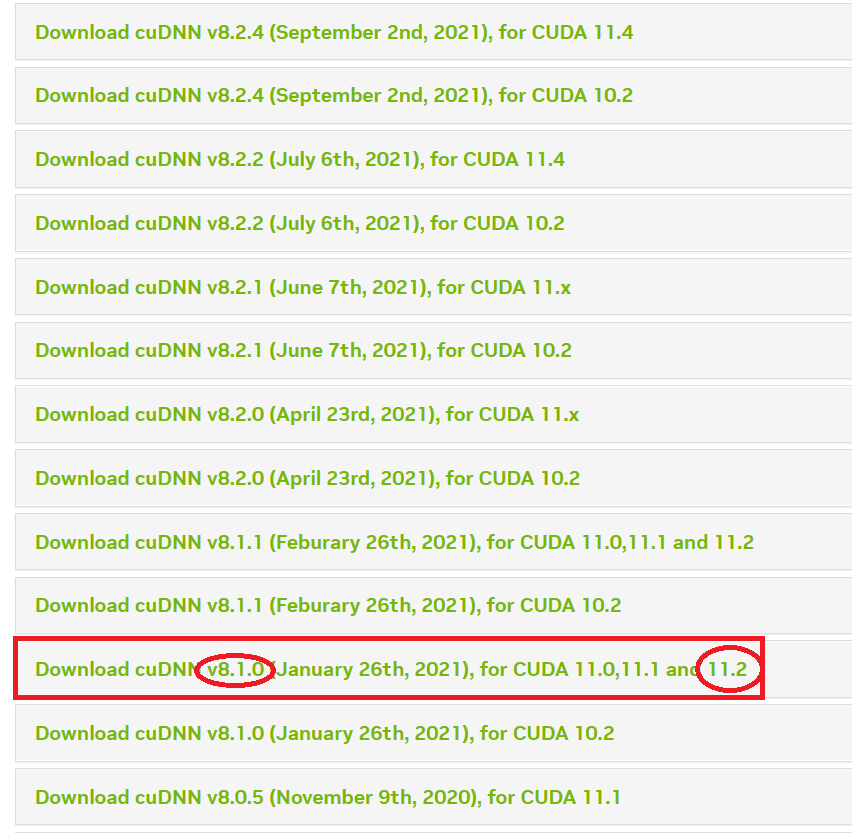
1. You can download cuDNN from https://developer.nvidia.com/rdp/cudnn-archive
2. Find matched item from the list.
Warning
All the versions should be exactly the same, when you are trying to download. ex) 11.2.0 (o) 11.2.1 (x)
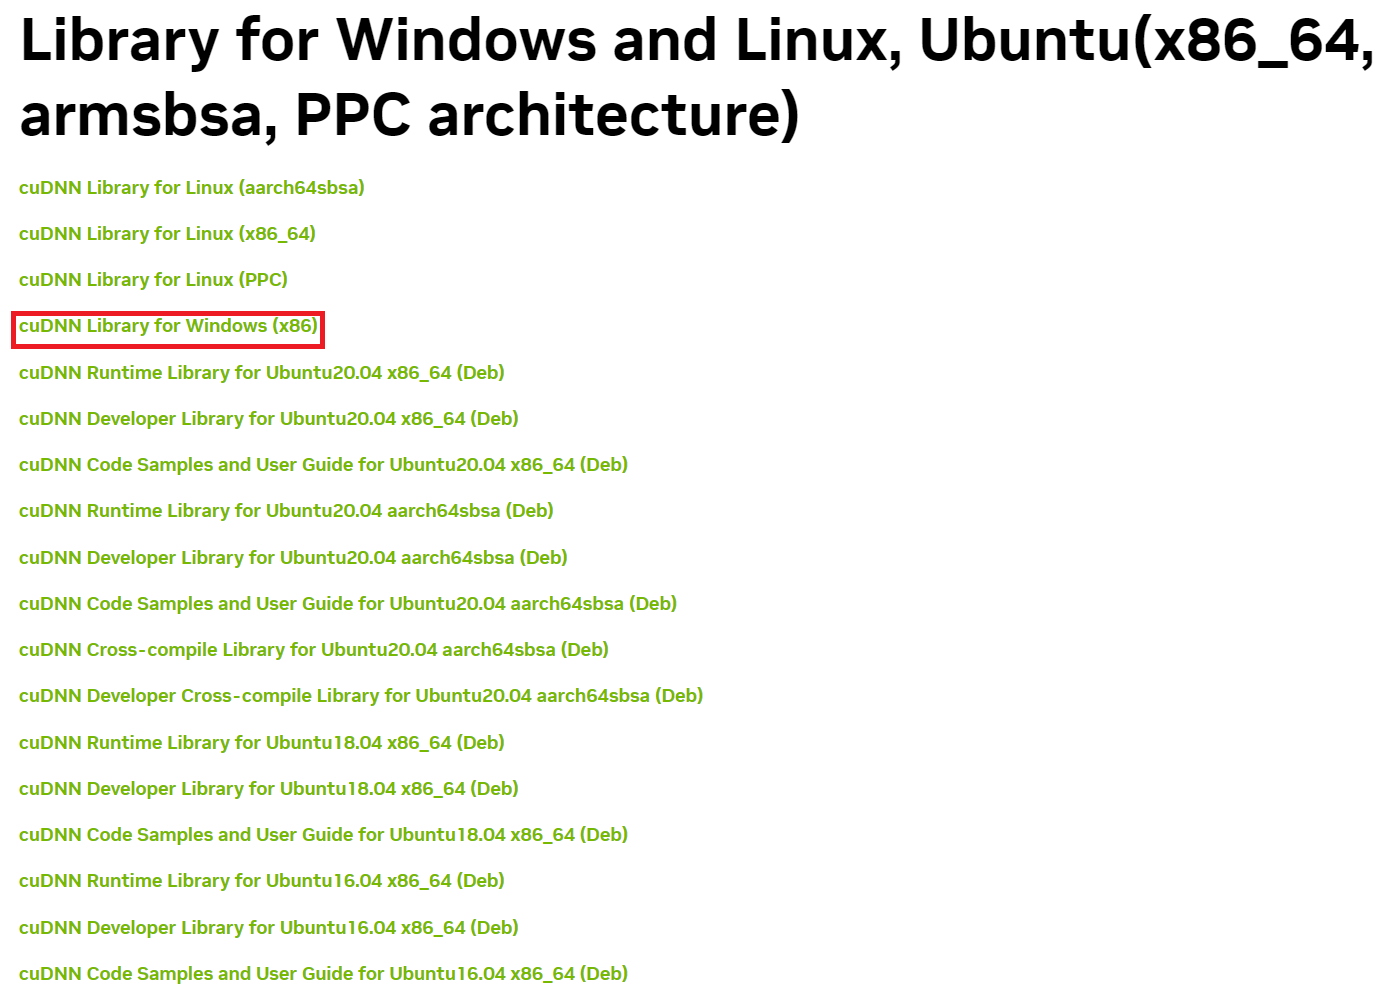
3. Download Windows version. There may be only x86(32 bit version) option for Windows even though your computer is 64bit (x86-64).
Please just choose x86.
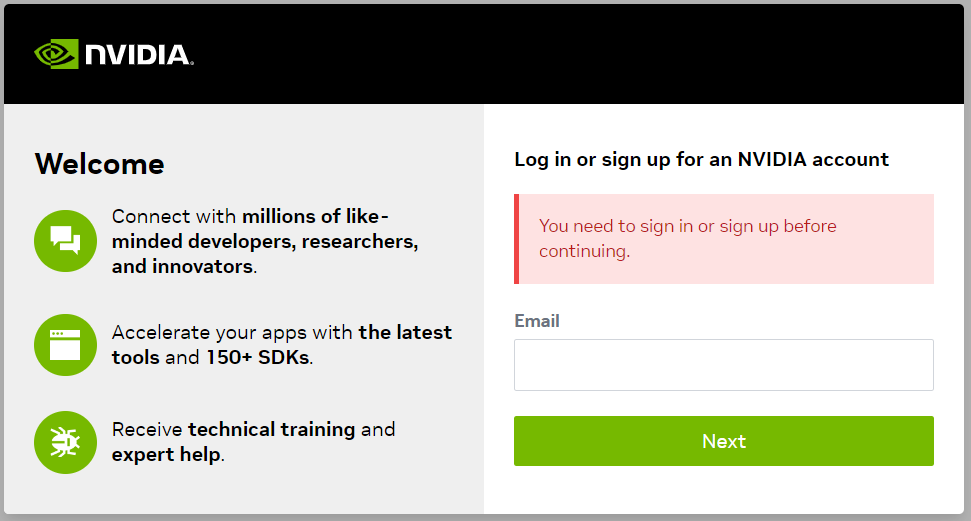
4. When you try to download cudnn, you need a NVIDIA account. If you don't have it, you should create a new account.
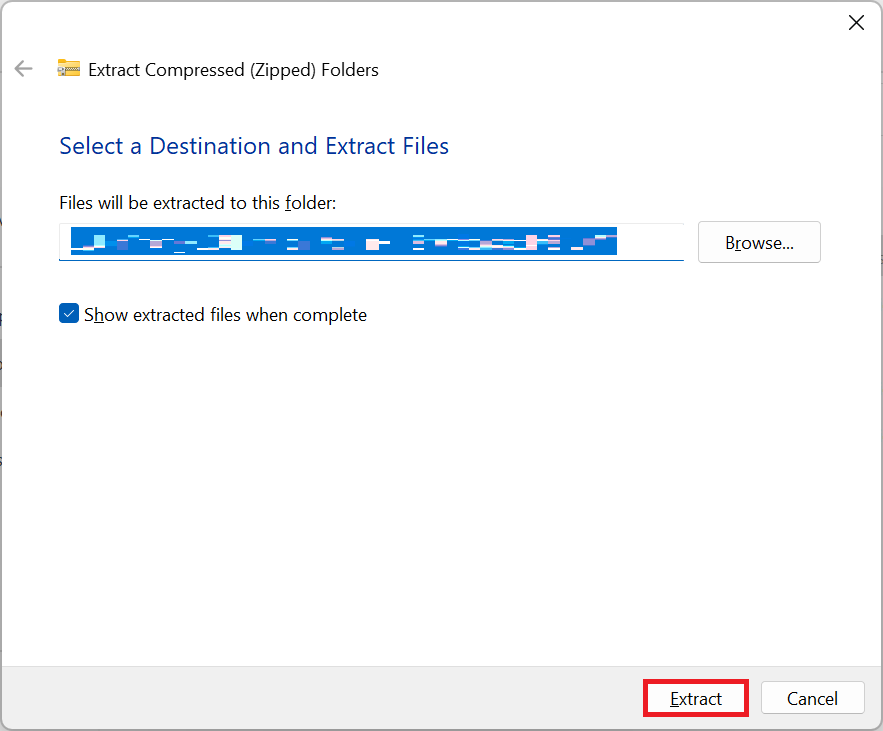
5. Once you finished to download. Extract the zip file.
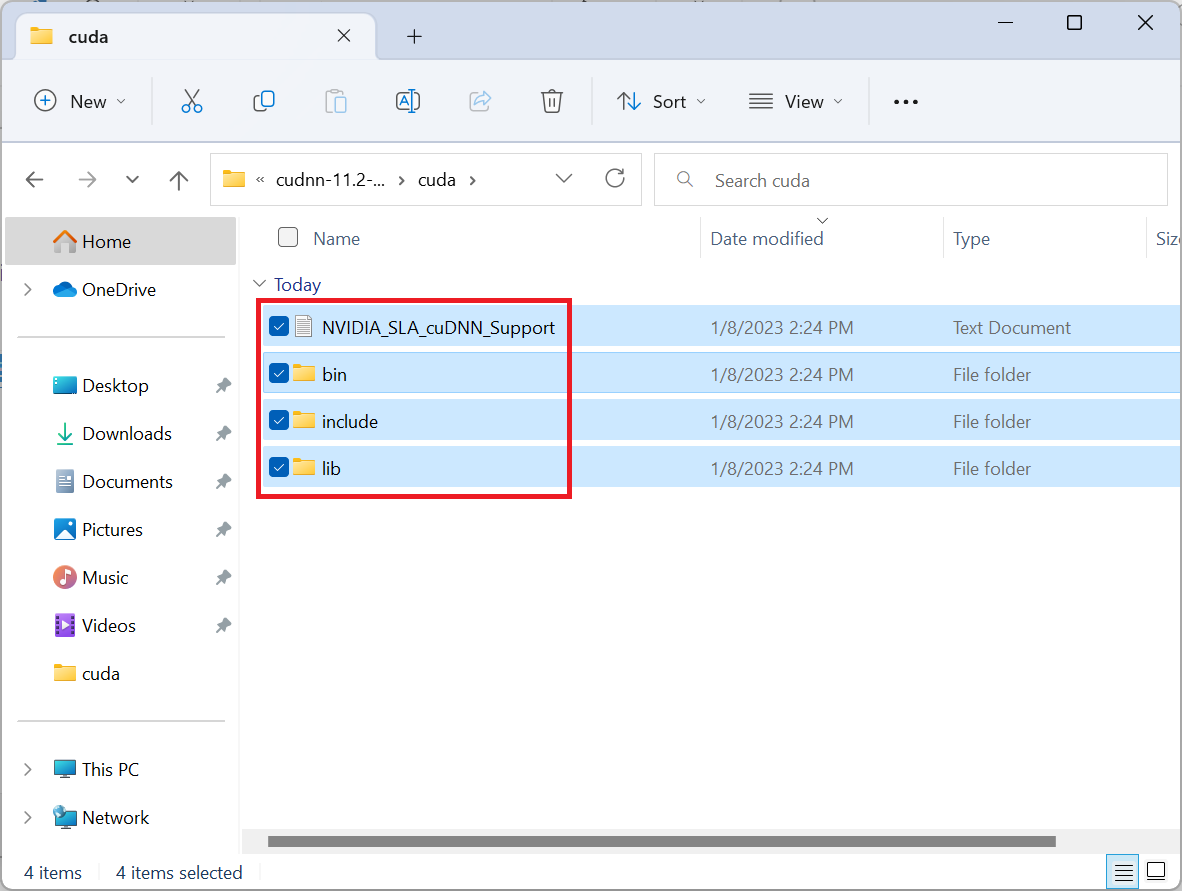
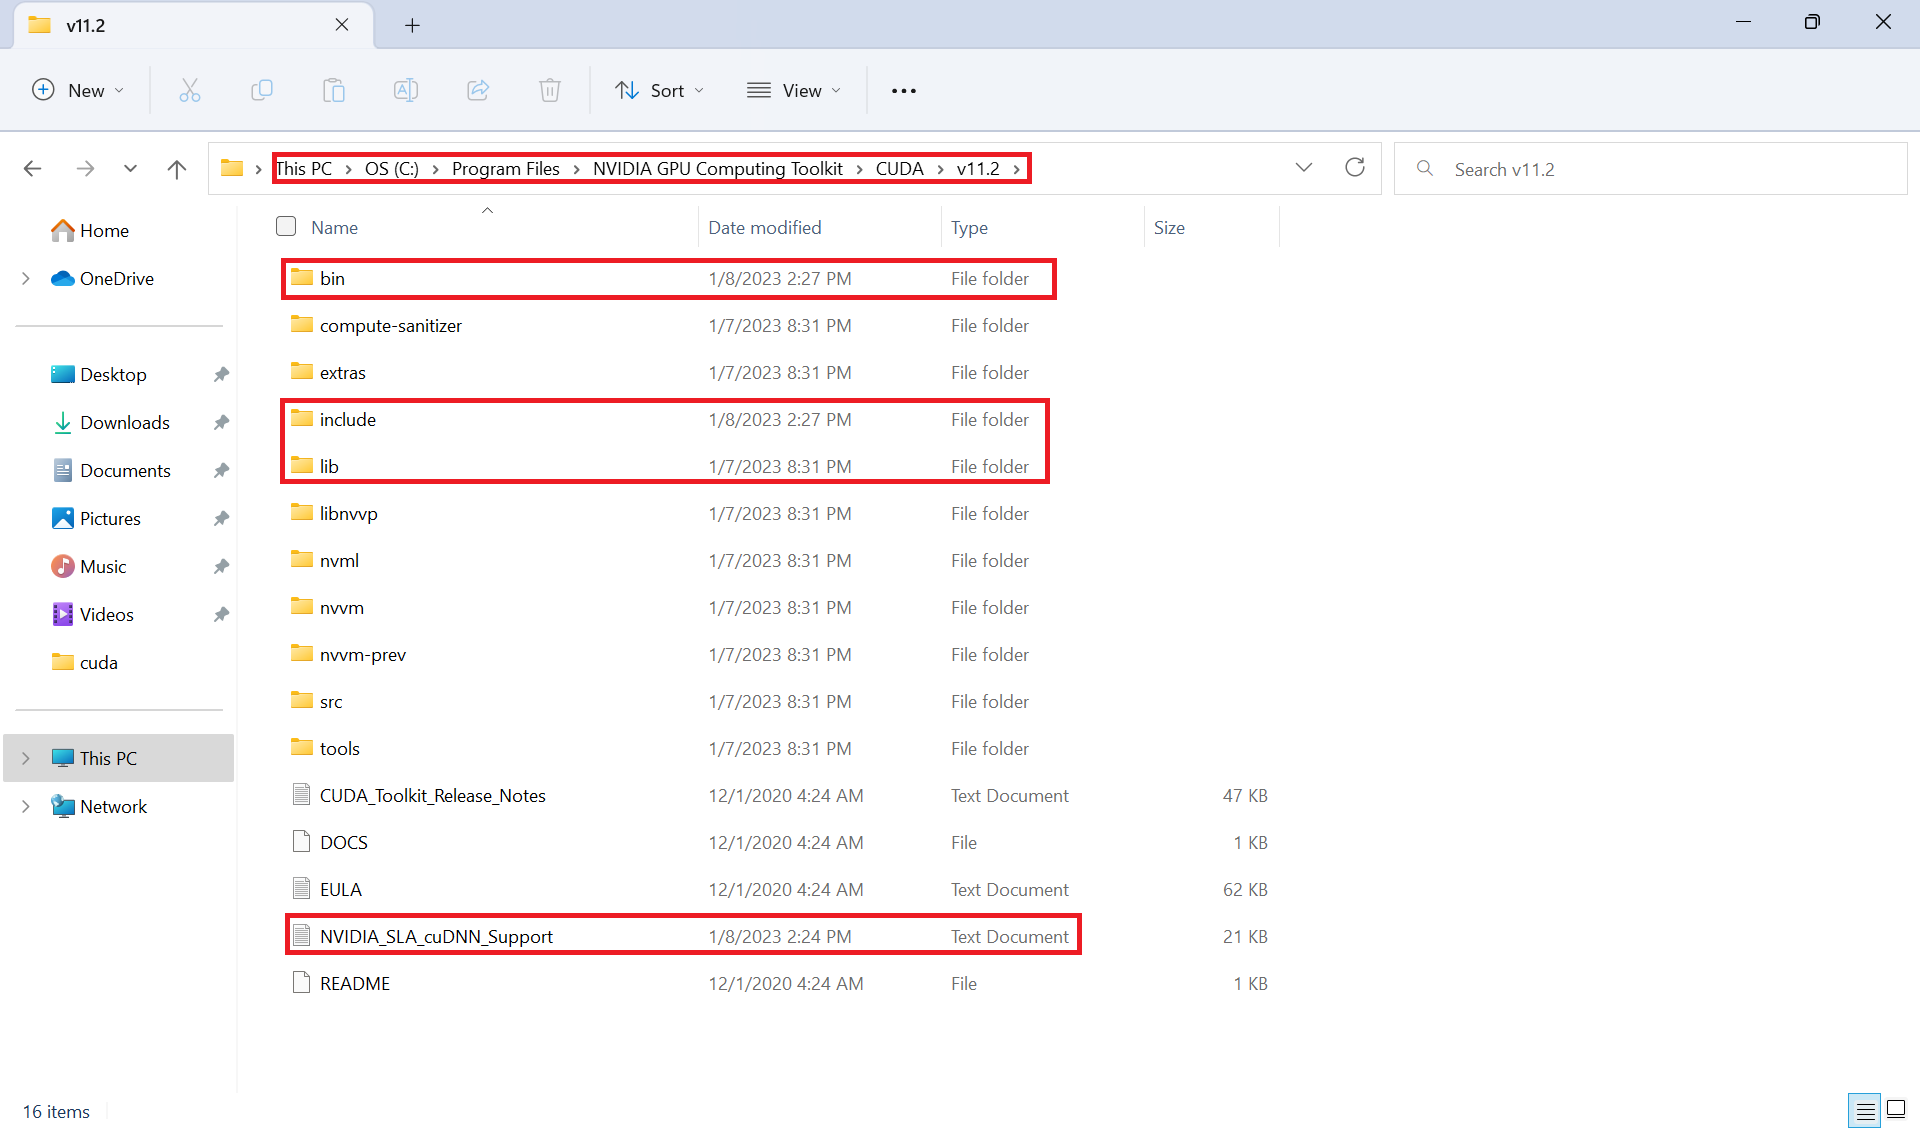
6. Copy all the files under extracted folder, and paste to
C:\Program Files\NVIDIA GPU Computing Toolkit/CUDA/v(version number)
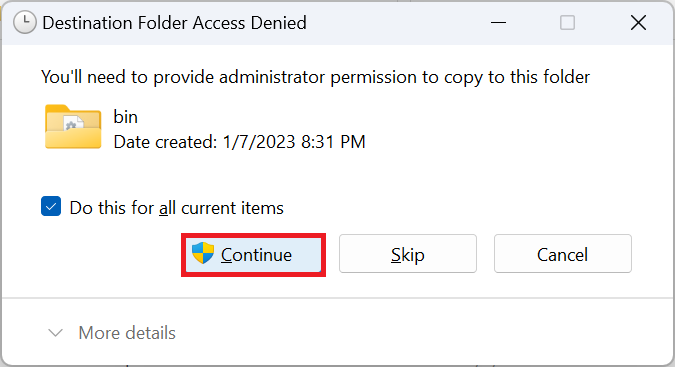
7. Click "Continue" button. Also you should overwrite the files.
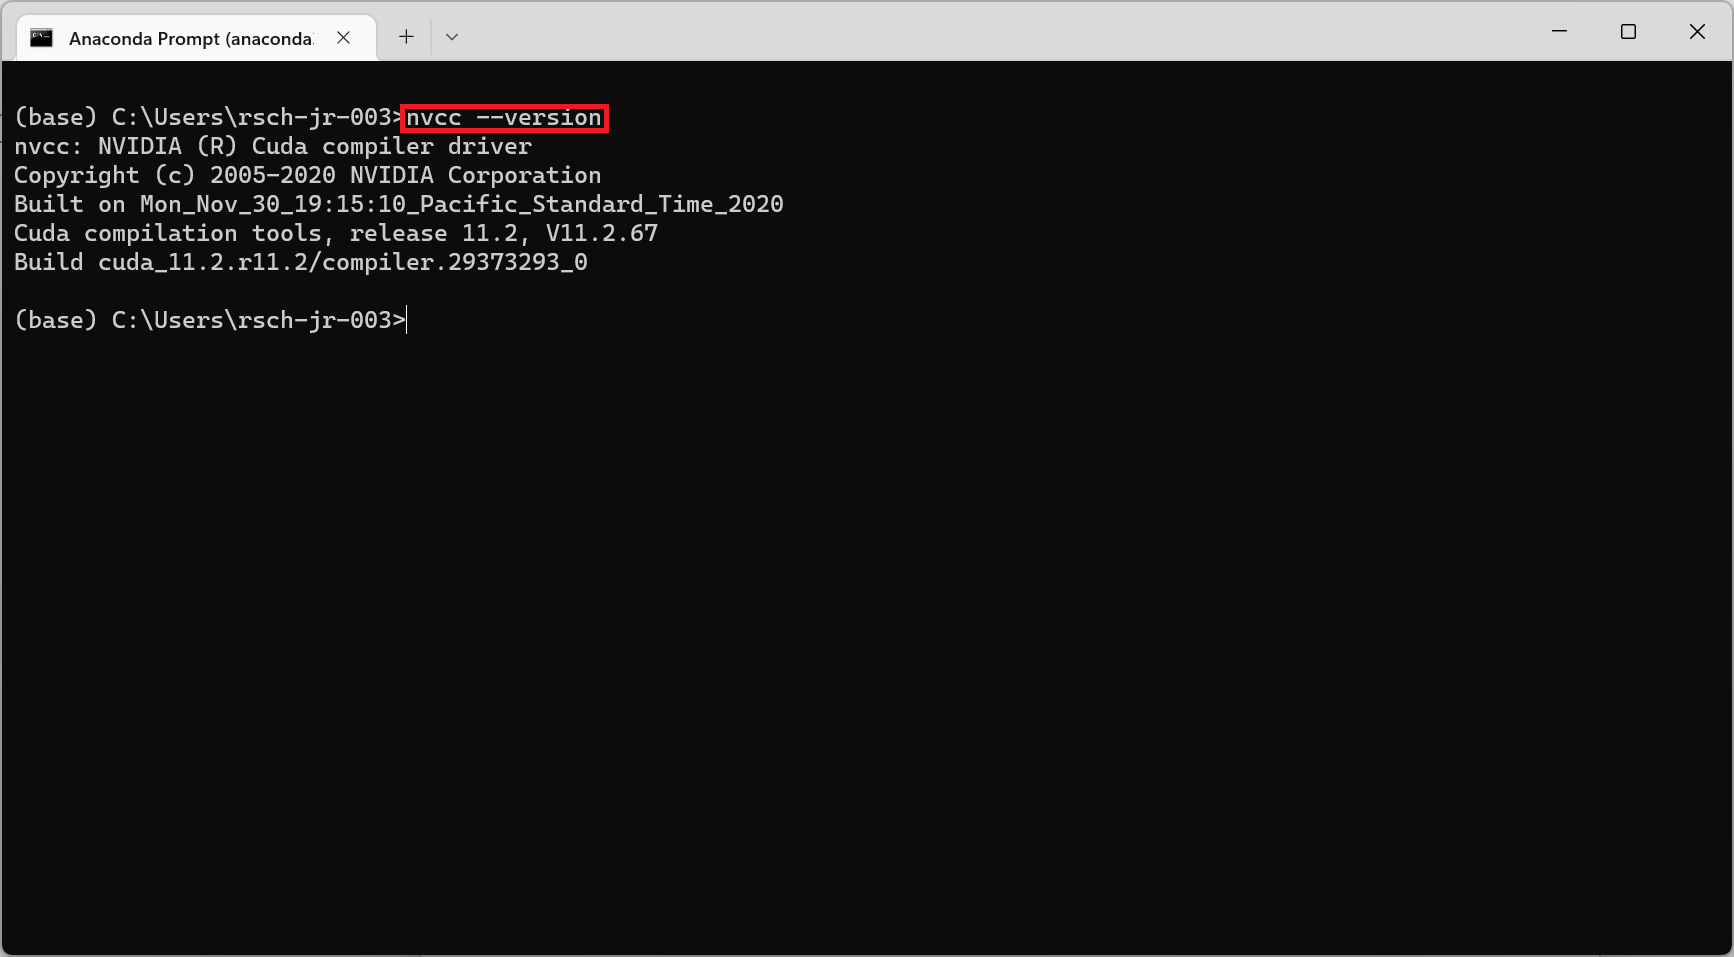
8. Run Anaconda Prompt or CMD to verify that the installation is successful. You may type nvcc --version. If you can see the above screenshot. Your installation is successful.
Pytorch
Pytorch is An open source machine learning framework that accelerates the path from research prototyping to production deployment.You can check more details from https://pytorch.org/
1.Go to https://pytorch.org/get-started/locally/ to check command for fitted version of your environment.
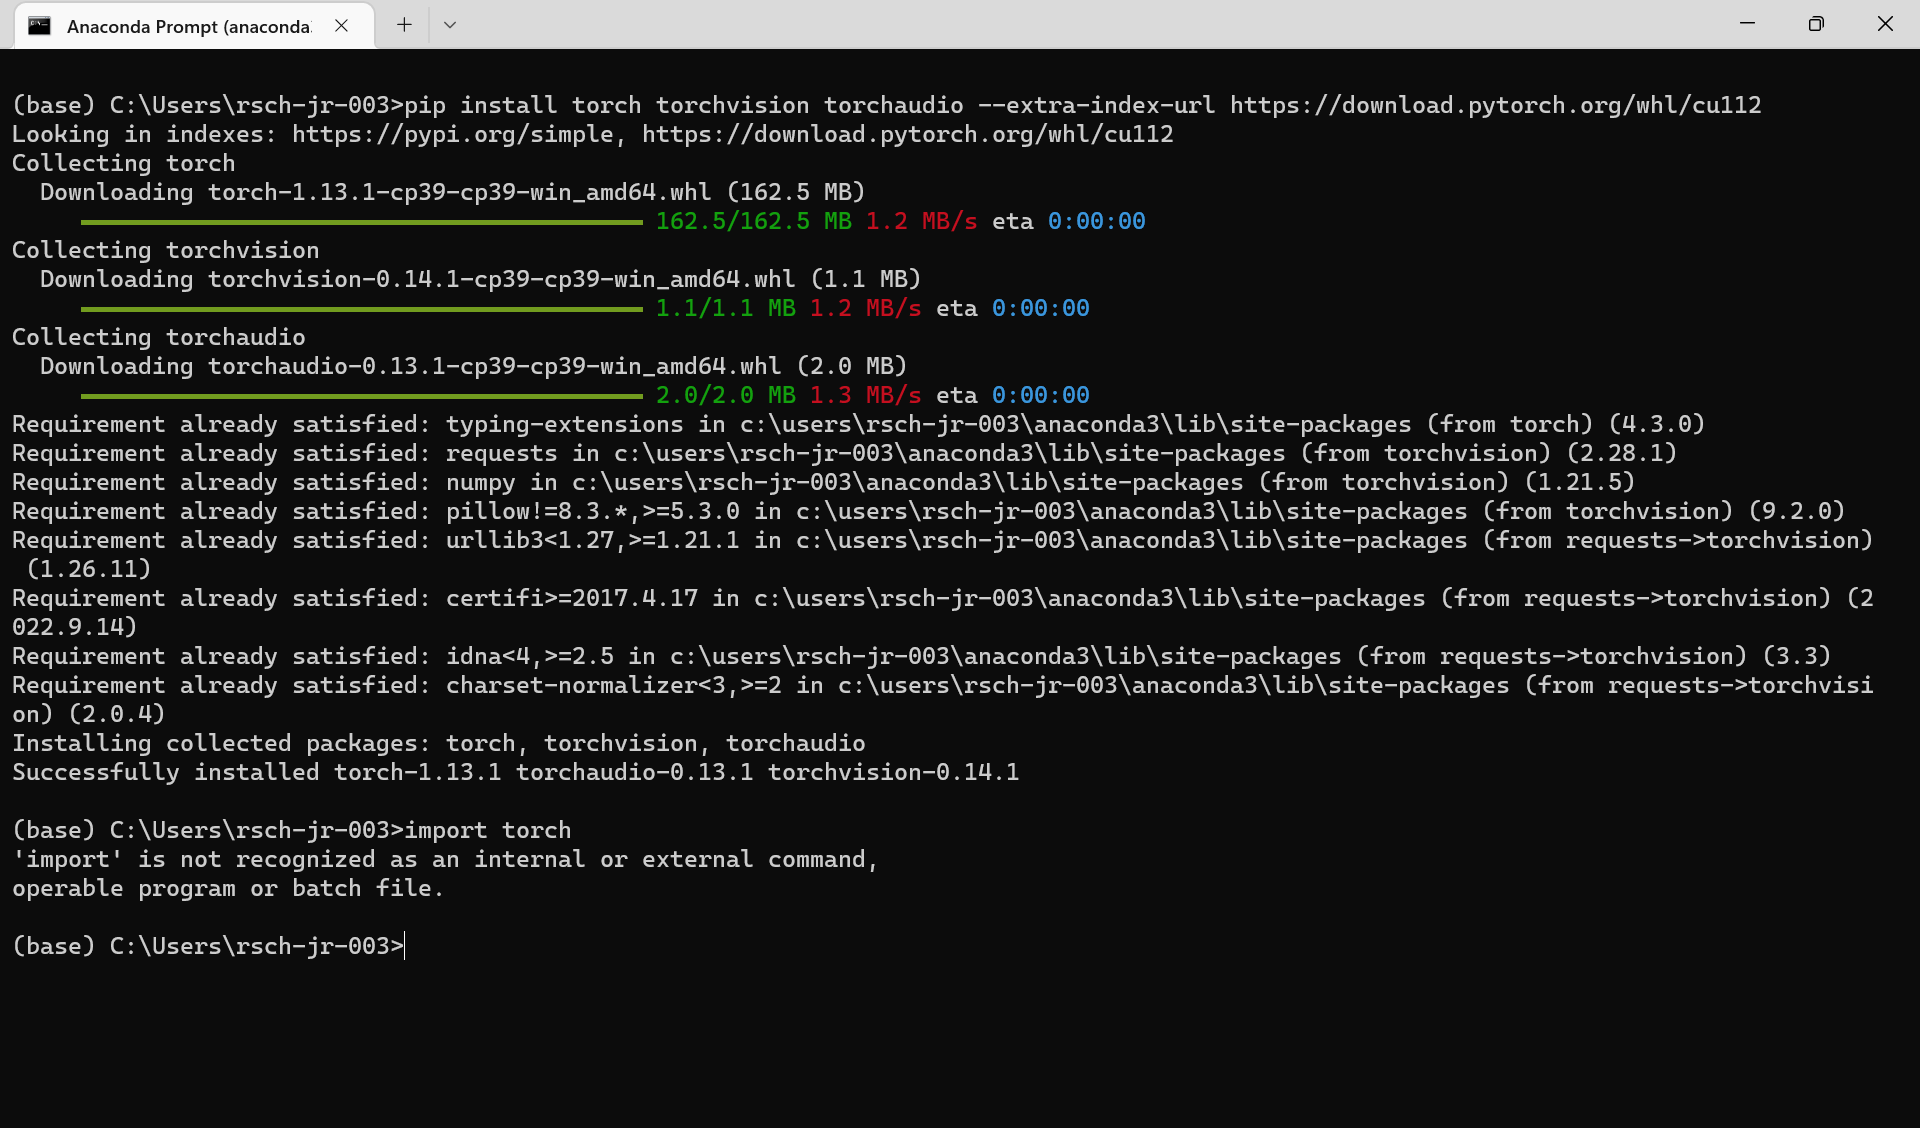
2. Run Anaconda Prompt and type
pip install torch torchvision torchaudio --extra-index-url https://download.pytorch.org/whl/cu112
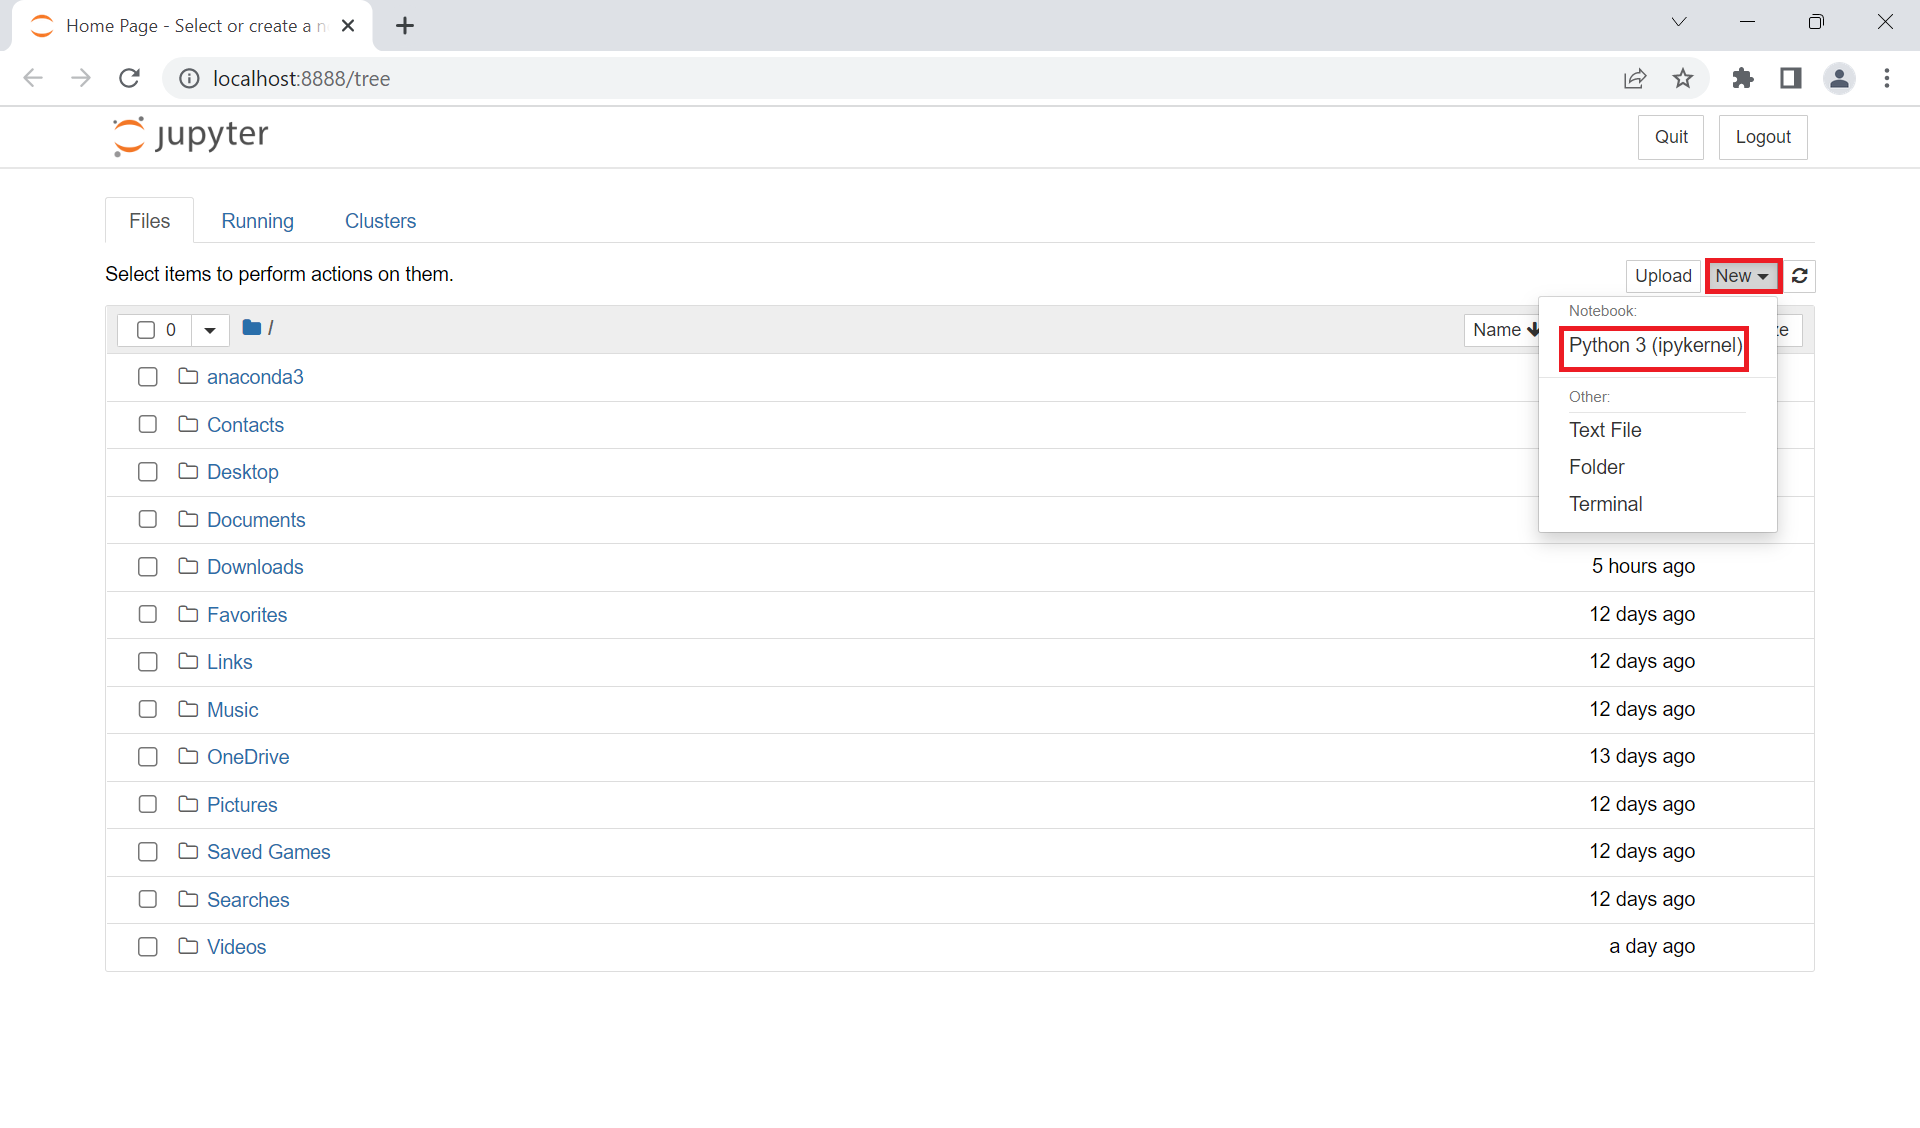
2. Once the installation is done, run jupyternotebook.
3. Create a new code page.
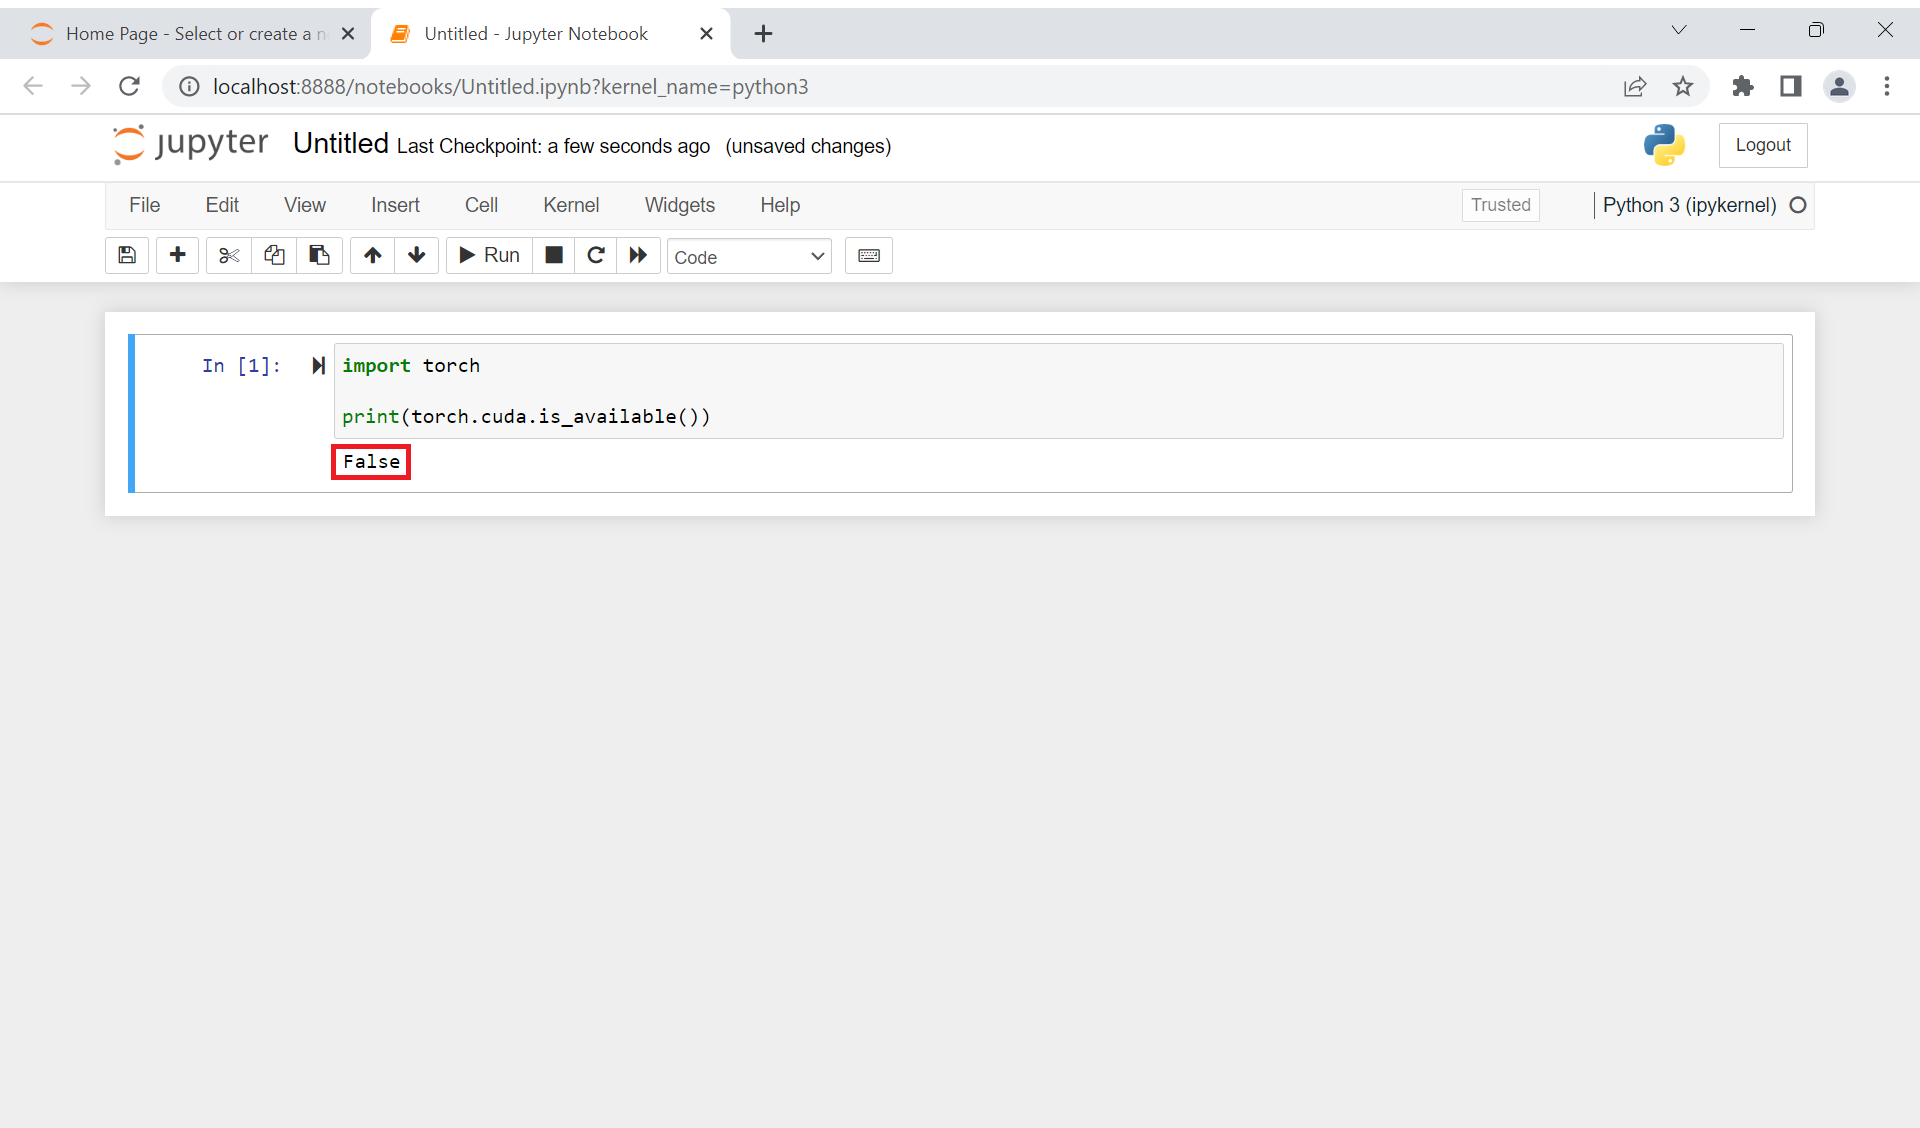
You may type
import torch
print(torch.cuda.is_available())
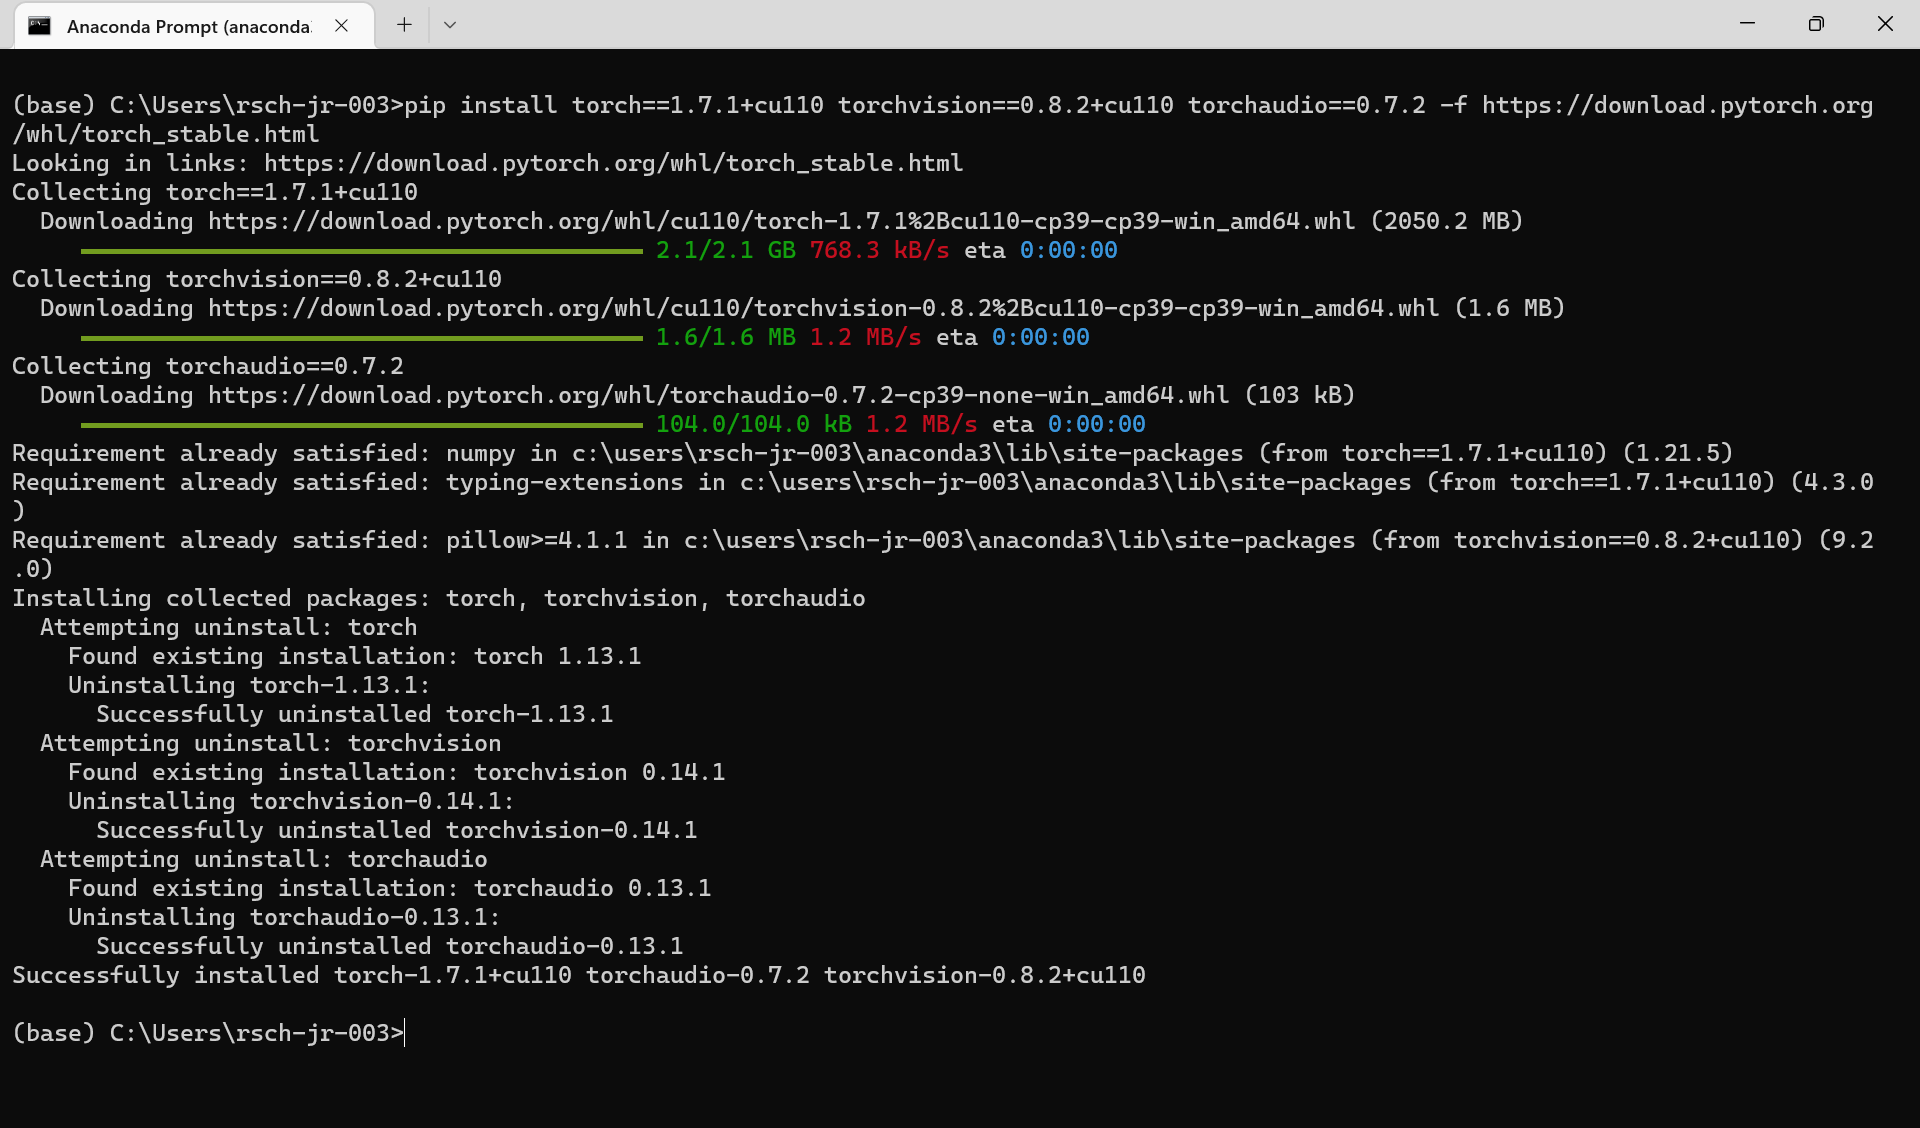
pip install torch==1.7.1+cu110 torchvision==0.8.2+cu110 torchaudio==0.7.2 -f https://download.pytorch.org/whl/torch_stable.html
4. If result prints out "True", all the installation is successful.
Image labeling tool
LabelImg is a graphical image annotation tool, which supports YOLO and CreateML formats for image labeling. You can find more details from https://github.com/heartexlabs/labelImg
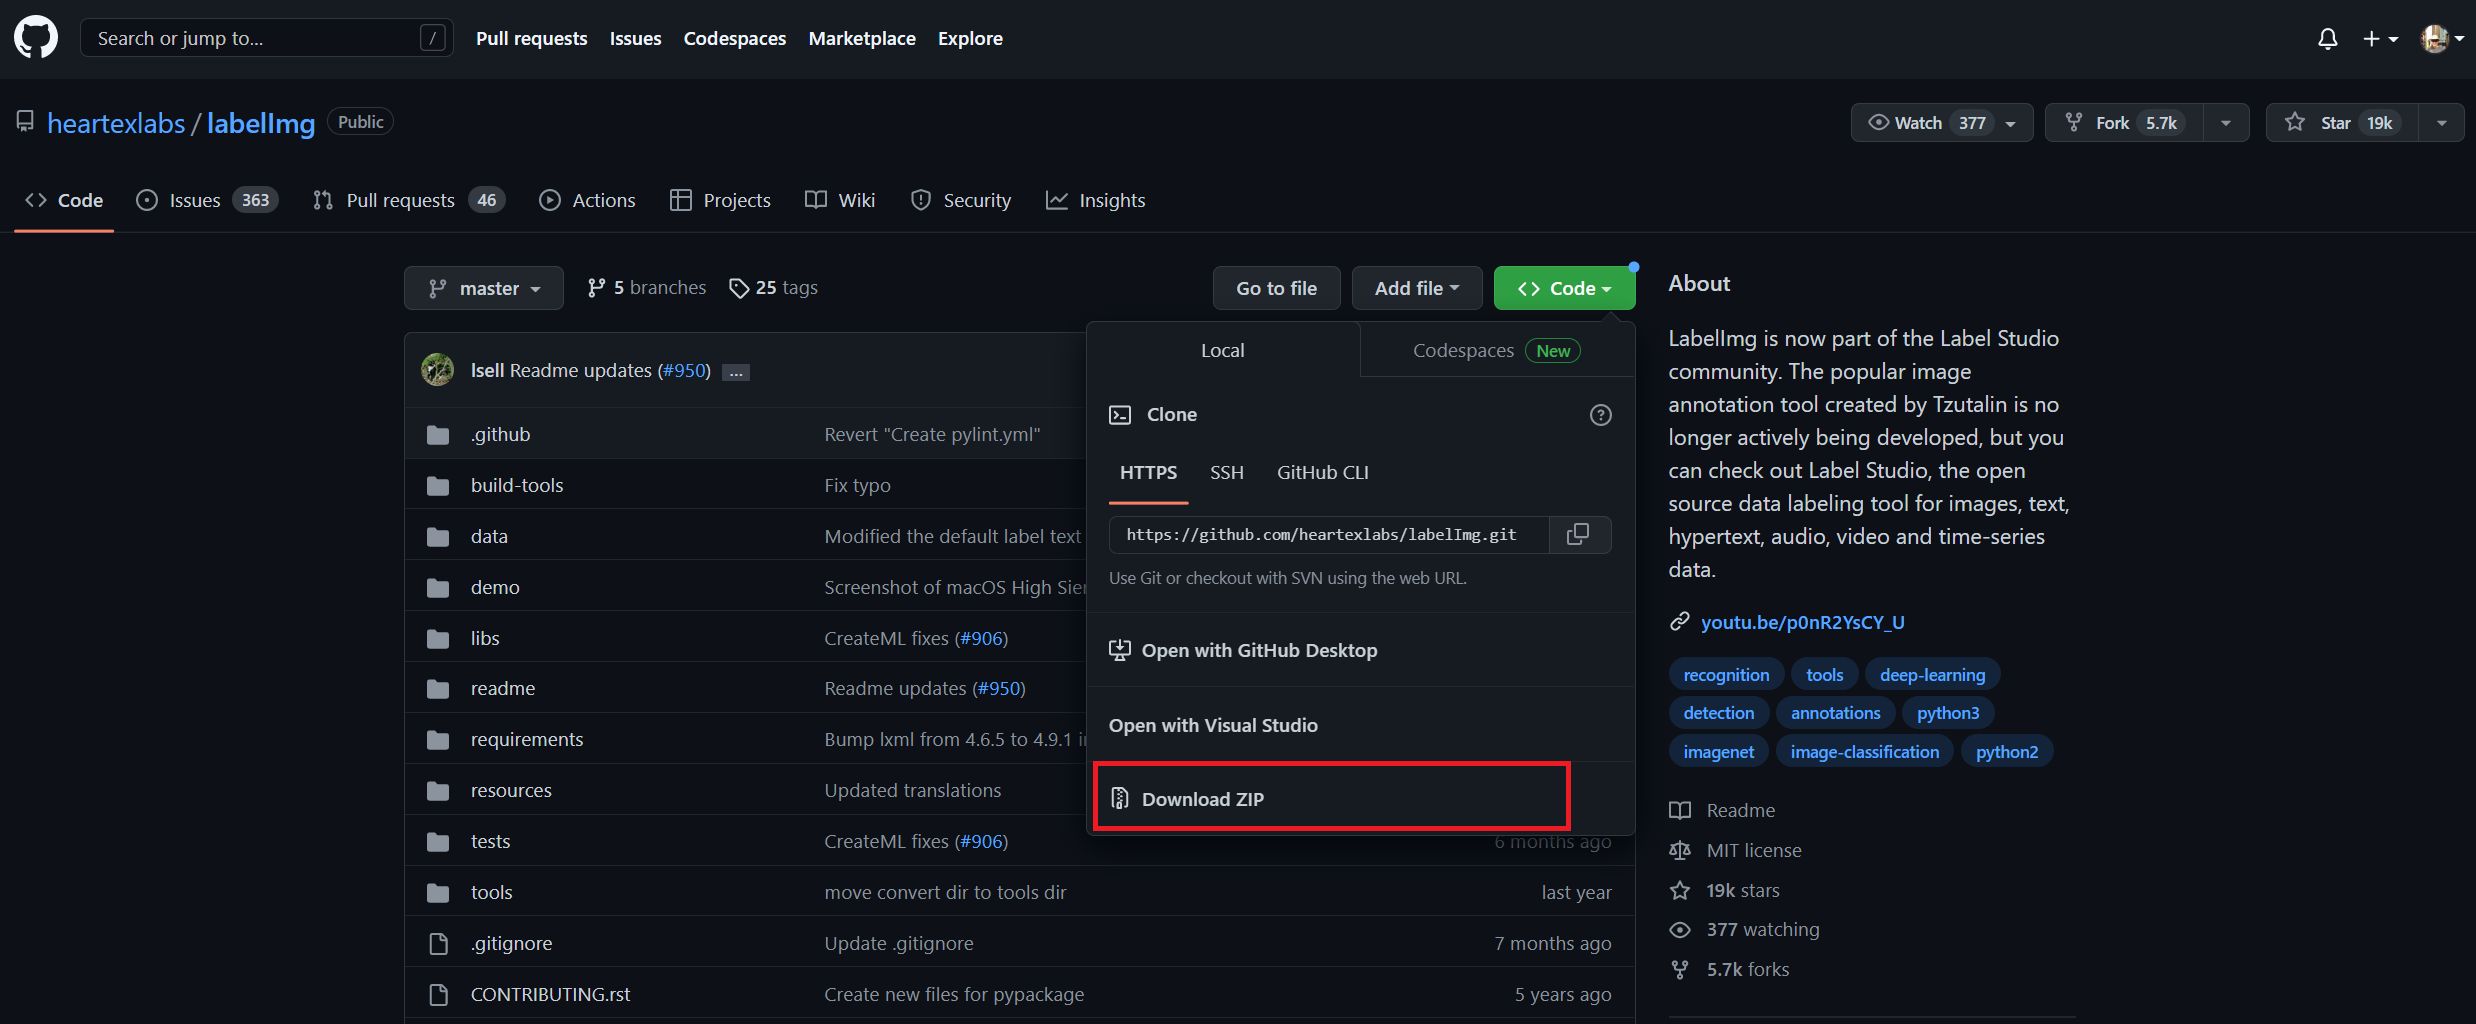
1. Go to the above link and click "<> Code" button.
2. Then click the "Download ZIP".
3. Extract the zip file, and move labelimg-master folder under C:\
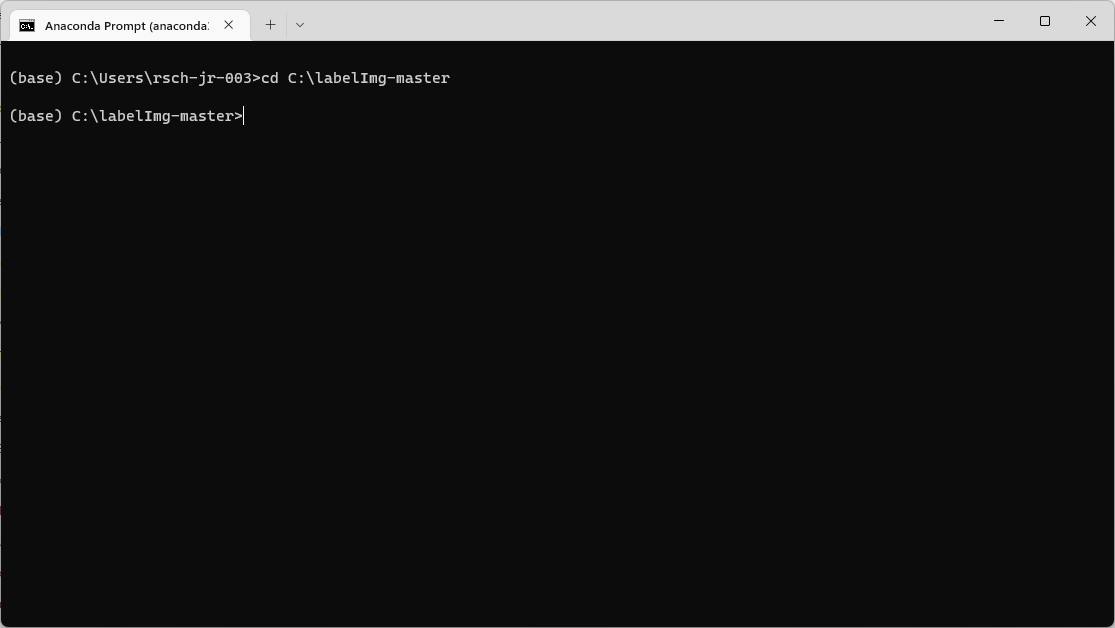
4. Run Anaconda Prompt and go to the place where labelimg-master folder is placed
cd C:\labelImg-master
If you placed labelimg-master folder to other place, you may go to that folder.
5. Type below commands on Anaconda prompt
conda install --yes pyqt=5
conda install --yes -c anaconda lxml
pyrcc5 -o libs/resources.py resources.qrc
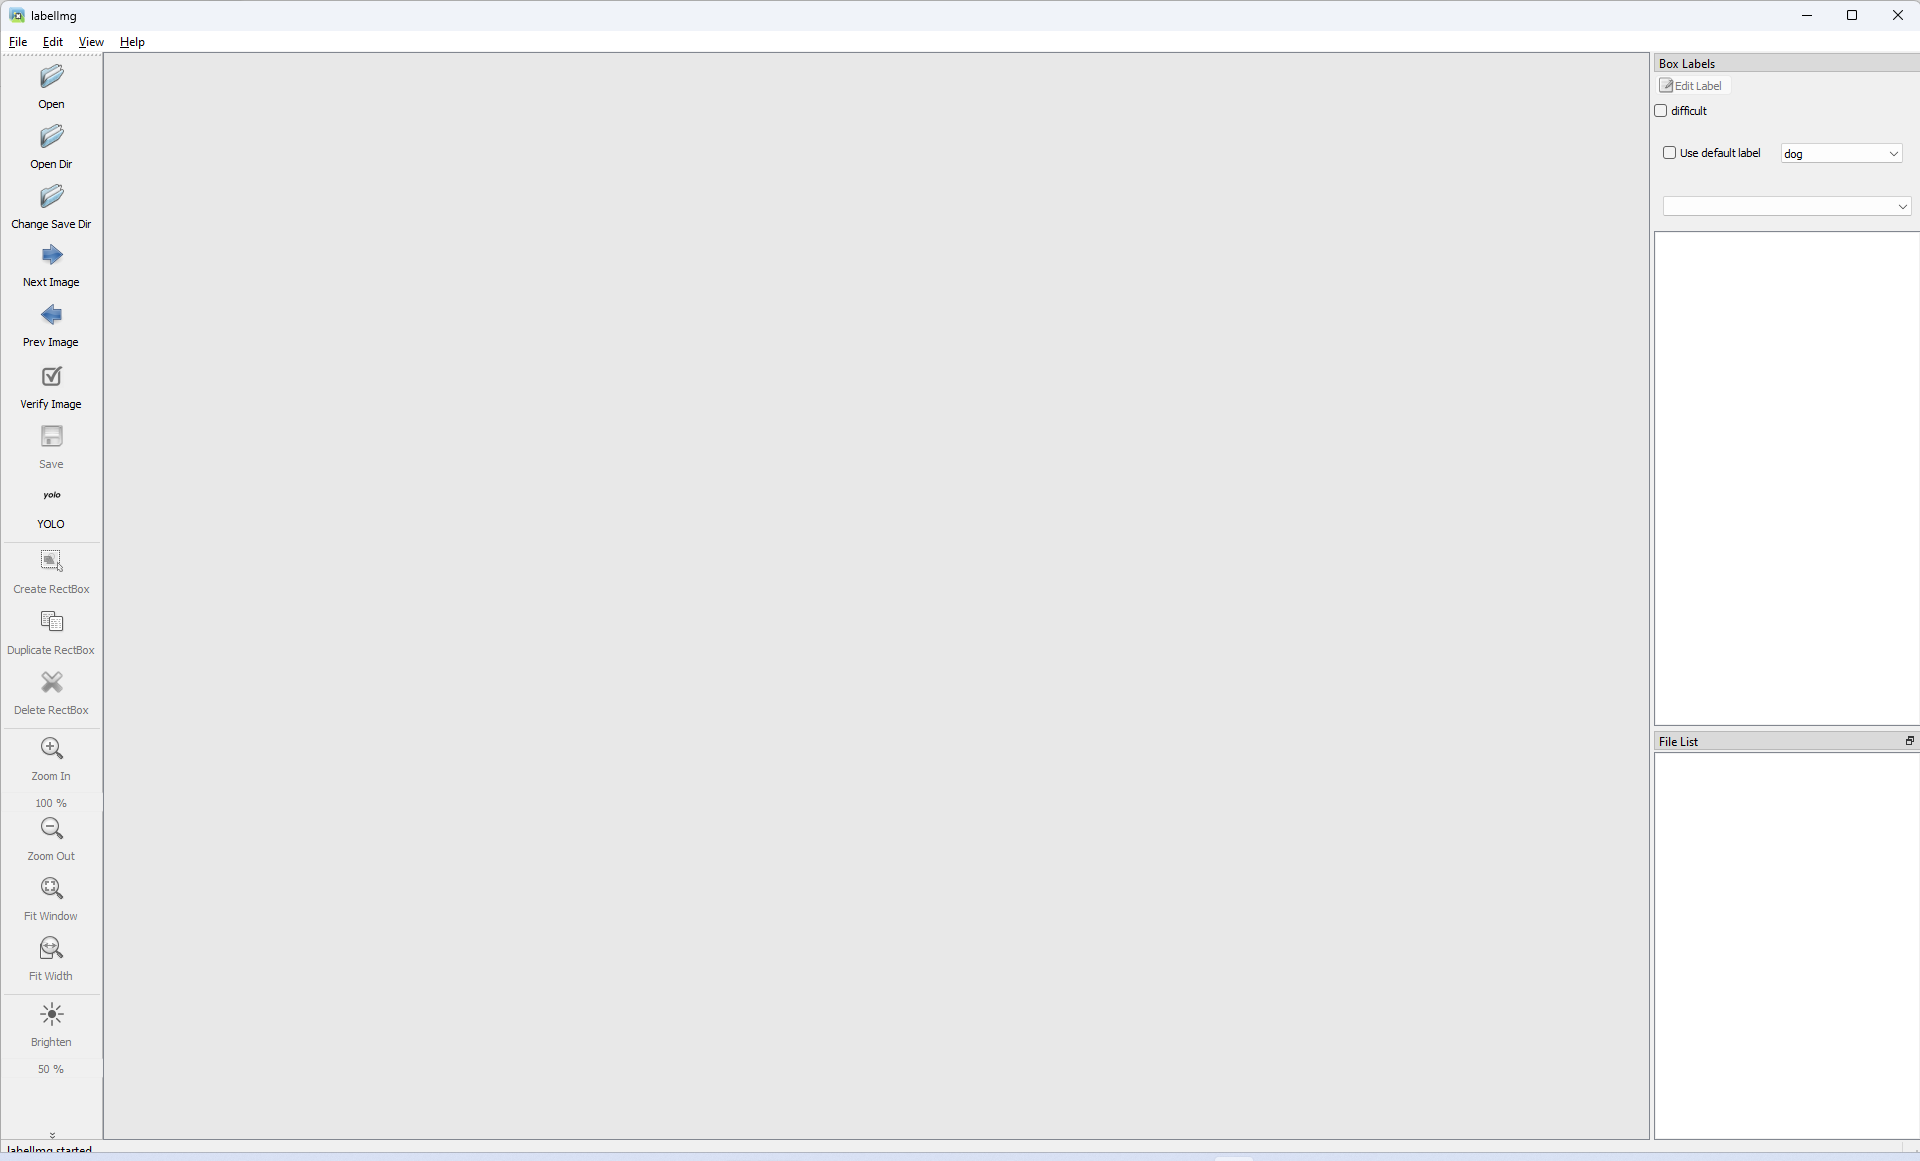
python labelImg.py
If you can see this window, the installation of basic tools is complete.
After you finish installing the image labeling tool, please proceed to the next steps of 2. data preparation and 3. data recognition with deep learning.
Troubleshooting
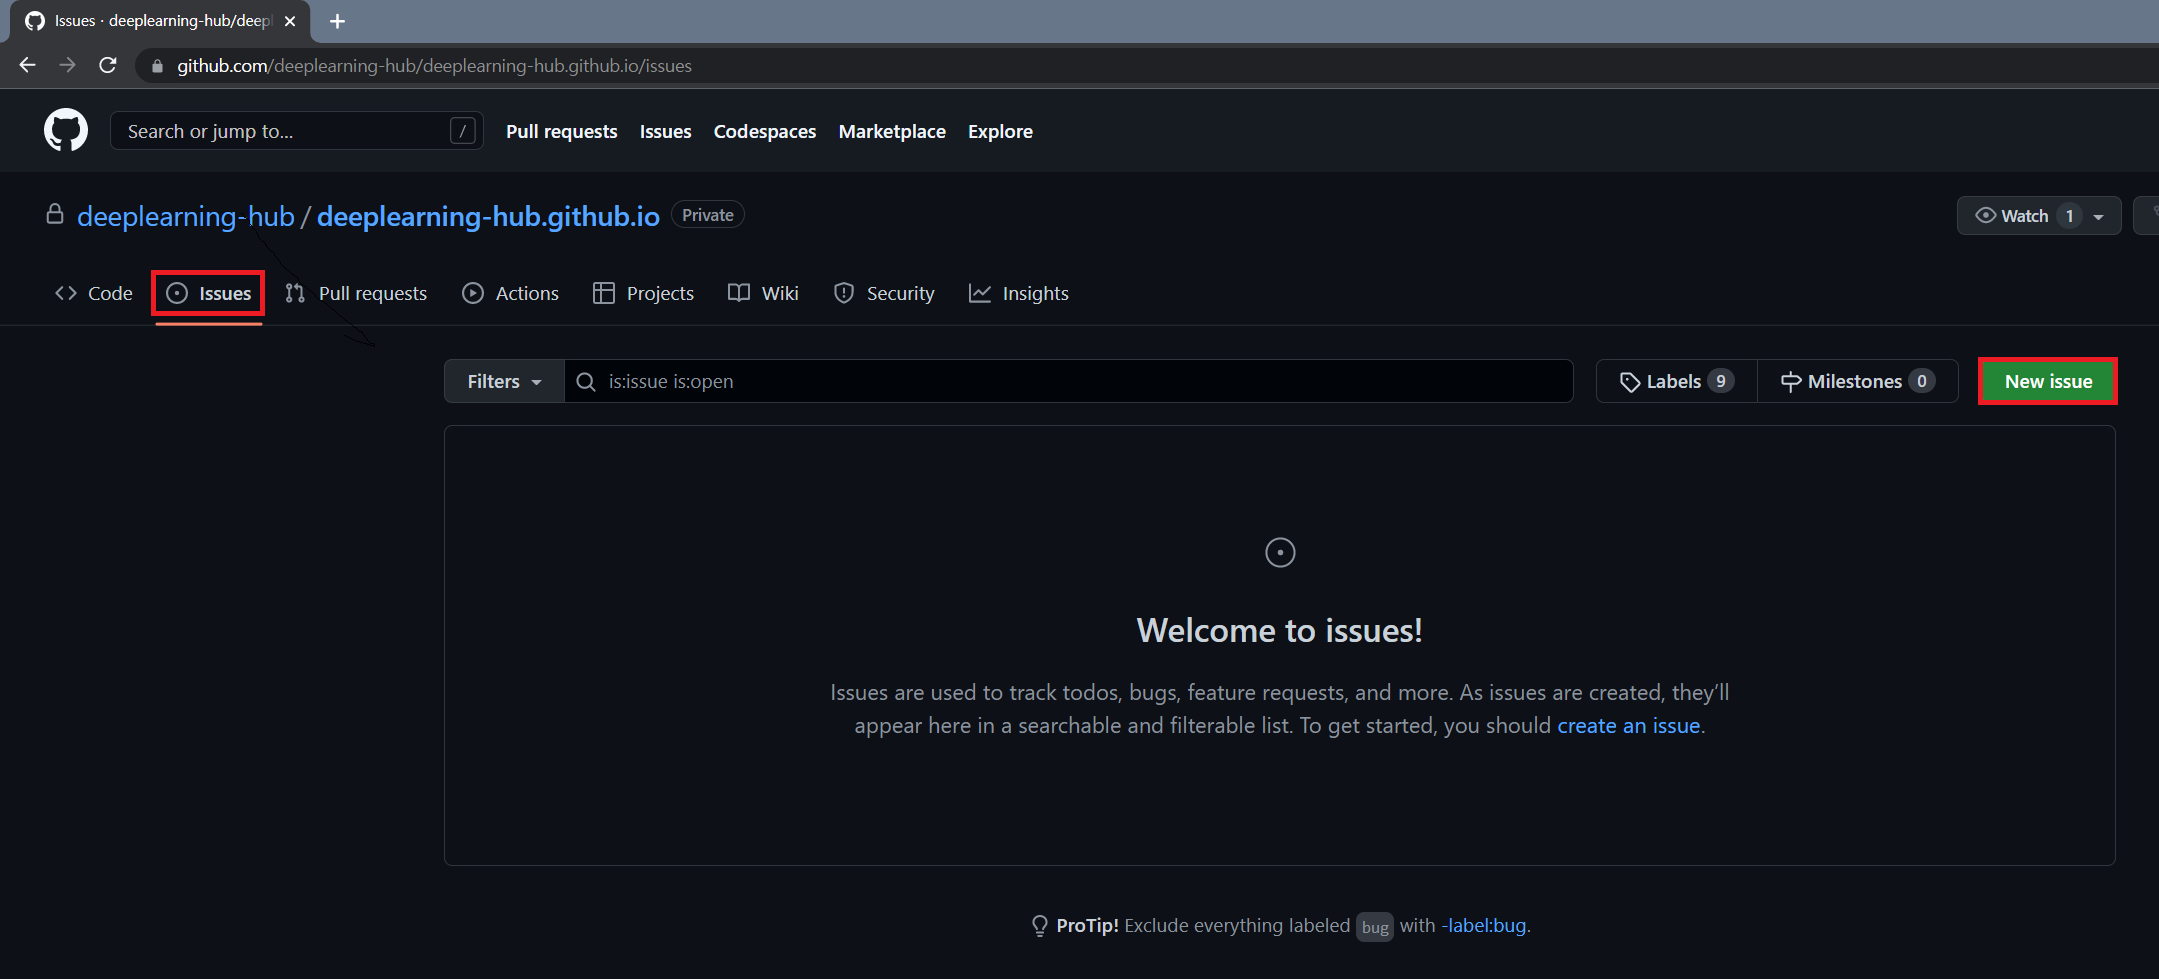
- If you have any problem or error while you are following the instructions in this document, please visit the following link and share your case or the idea to fix along with screenshots. Thank you.
