Info
If you did not install labelimg yet, you can do it in the previous step here.
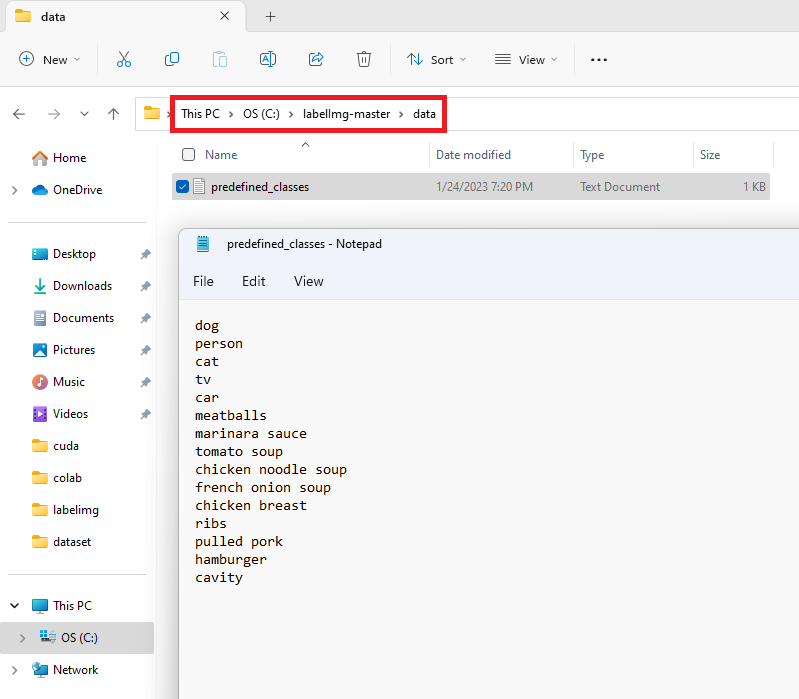
1. Under labelimg folder, you may find "data/predefined_classes.txt" and define the list of calsses that will be used for your training.
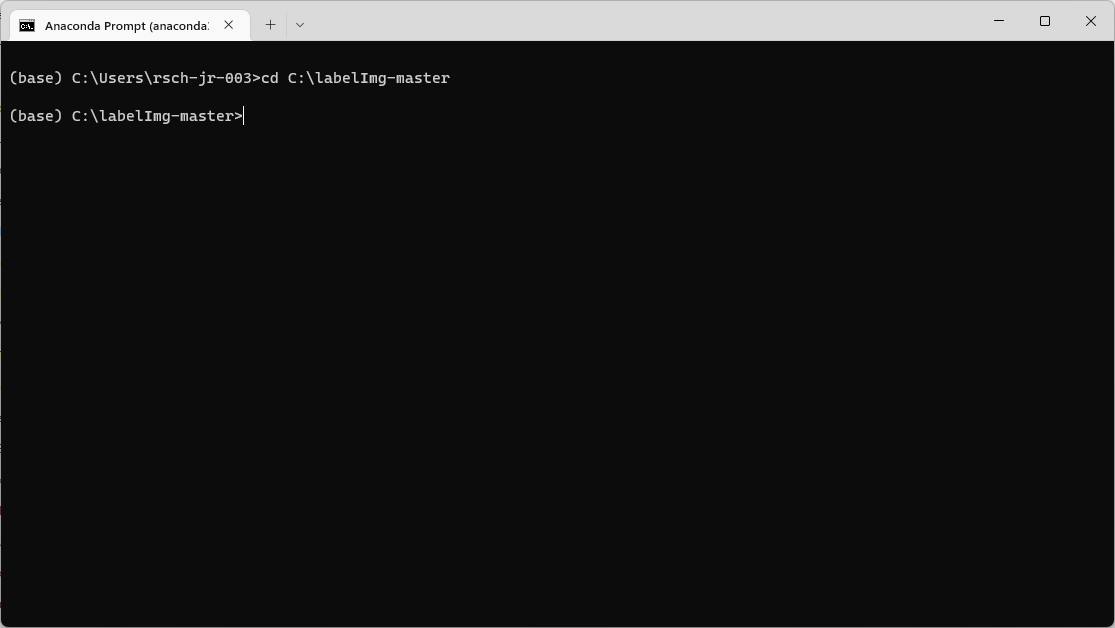
2. Run Terminal or Anaconda Prompt and change working directory to where labelimg-master folder is placed.
Type below command to excute labelImg program.
python labelImg.py
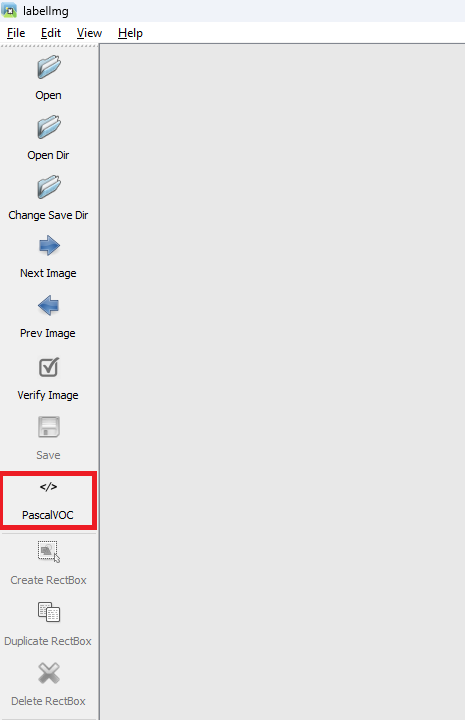
3. You may use "Open/OpenDir" button to process single or multiple images.
On this document, Yolo is used to train model, so Yolo is picked.
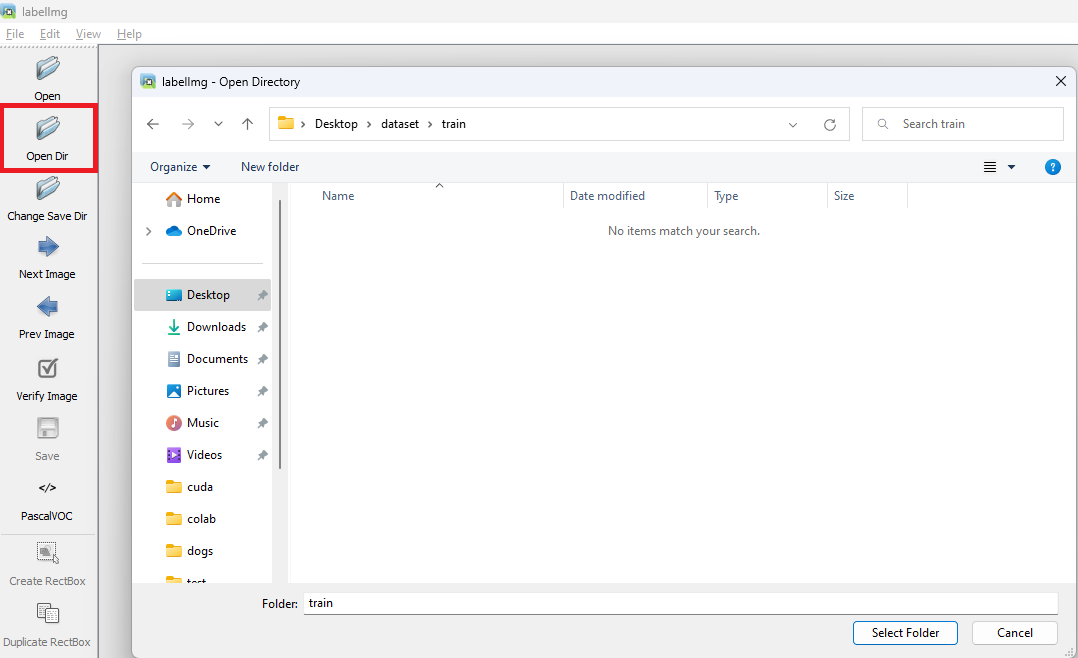
4. Click "Open Dir" button to open directory that your custom pictures are placed.
You can download the prepared images to test from here.
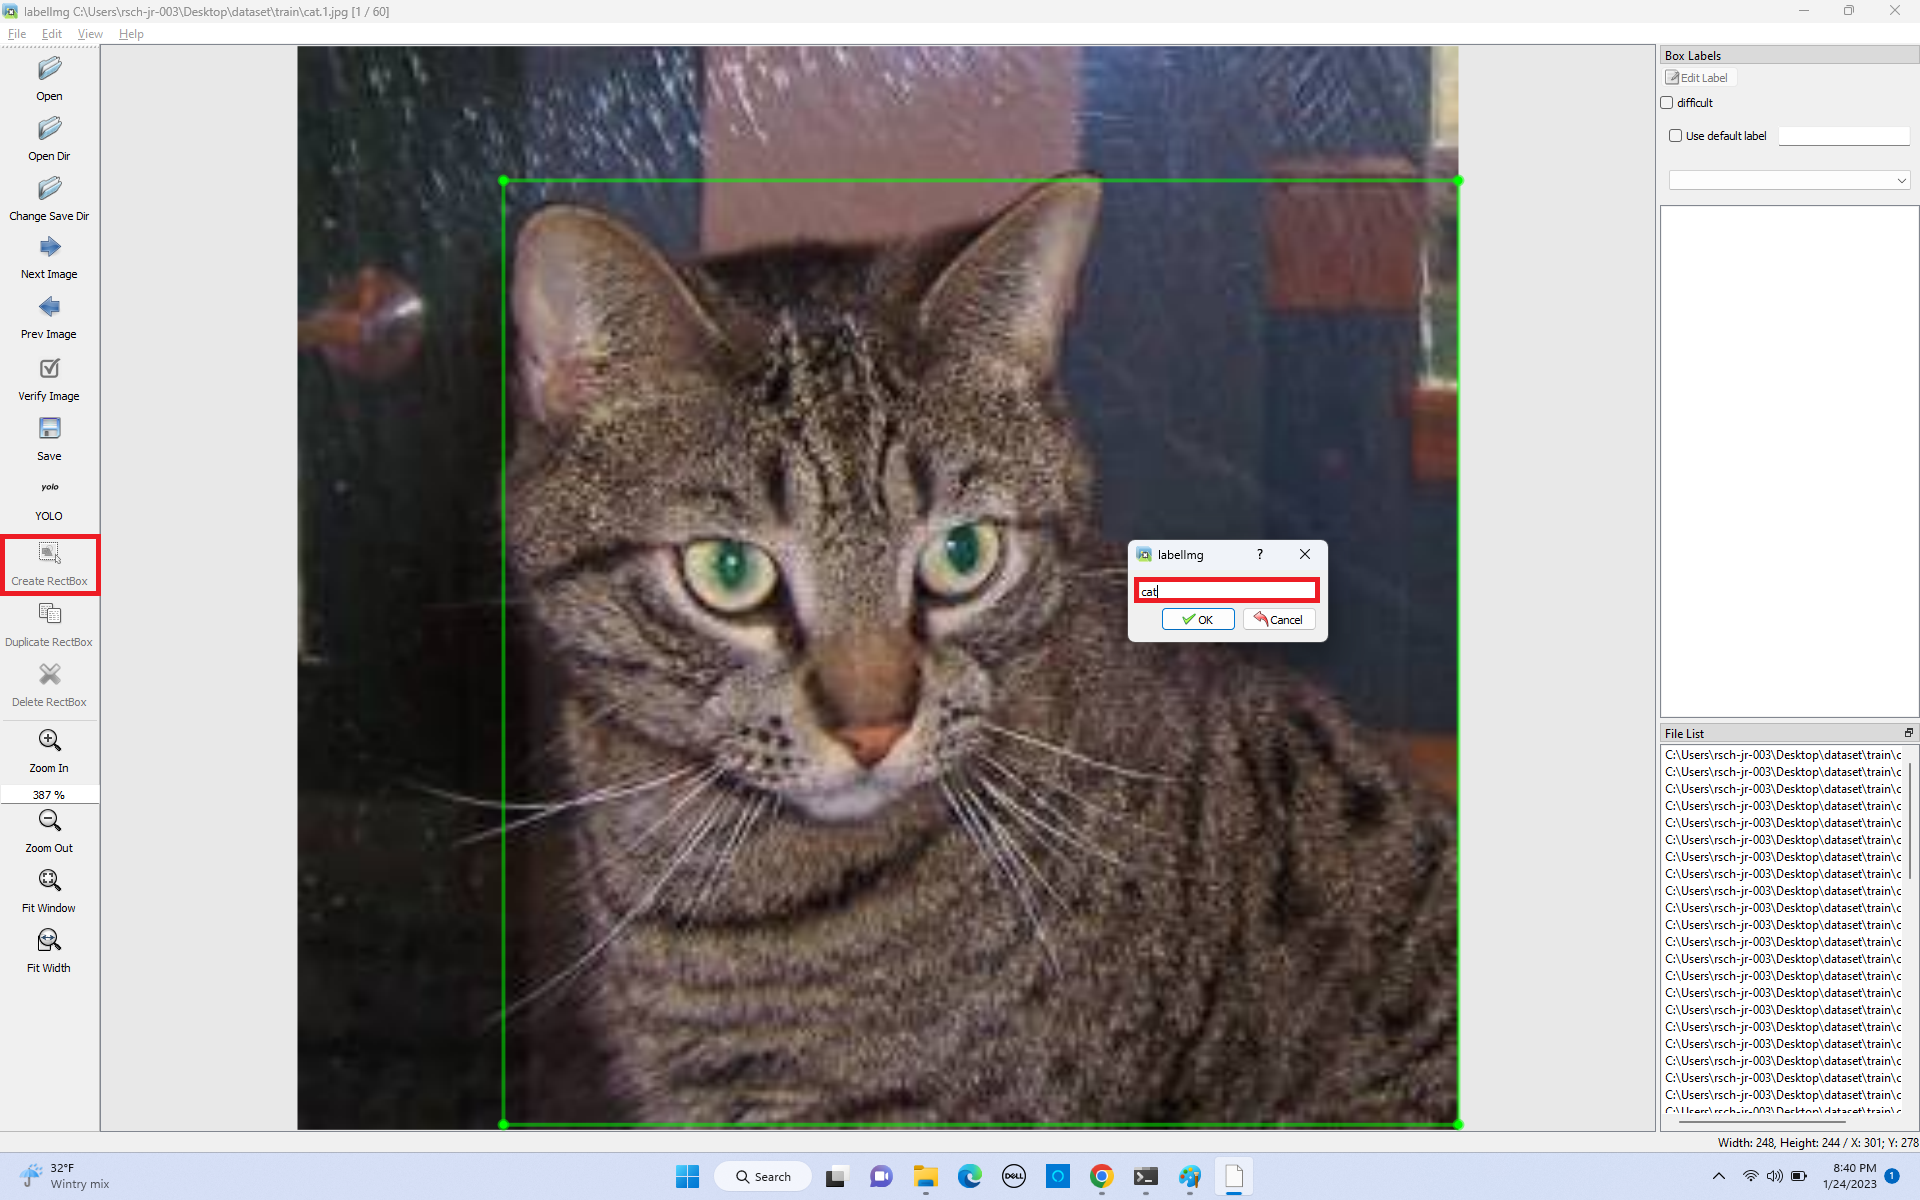
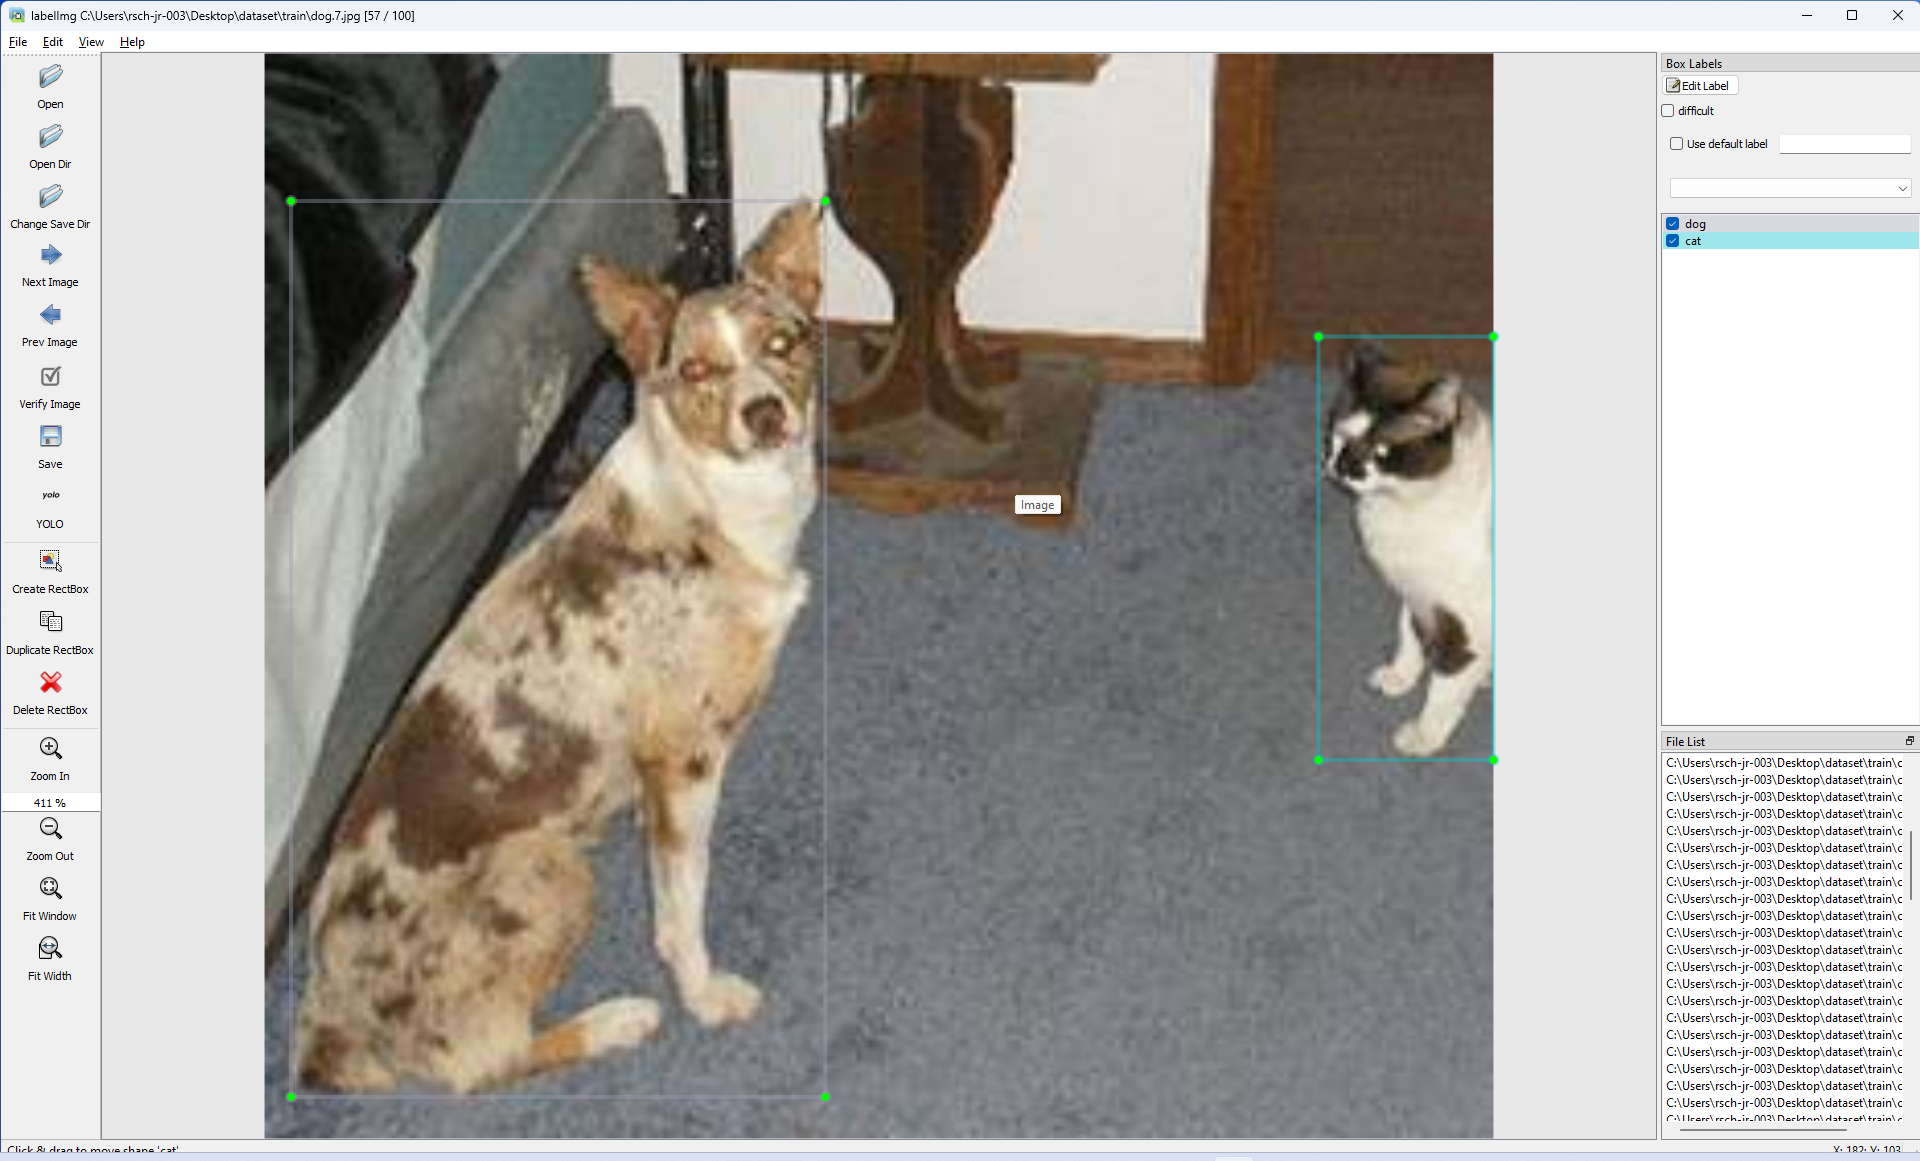
5. Click "Create RectBox" button to start making labels.
- 5-1. Click where the object is started, and drag out until the end of boundary.
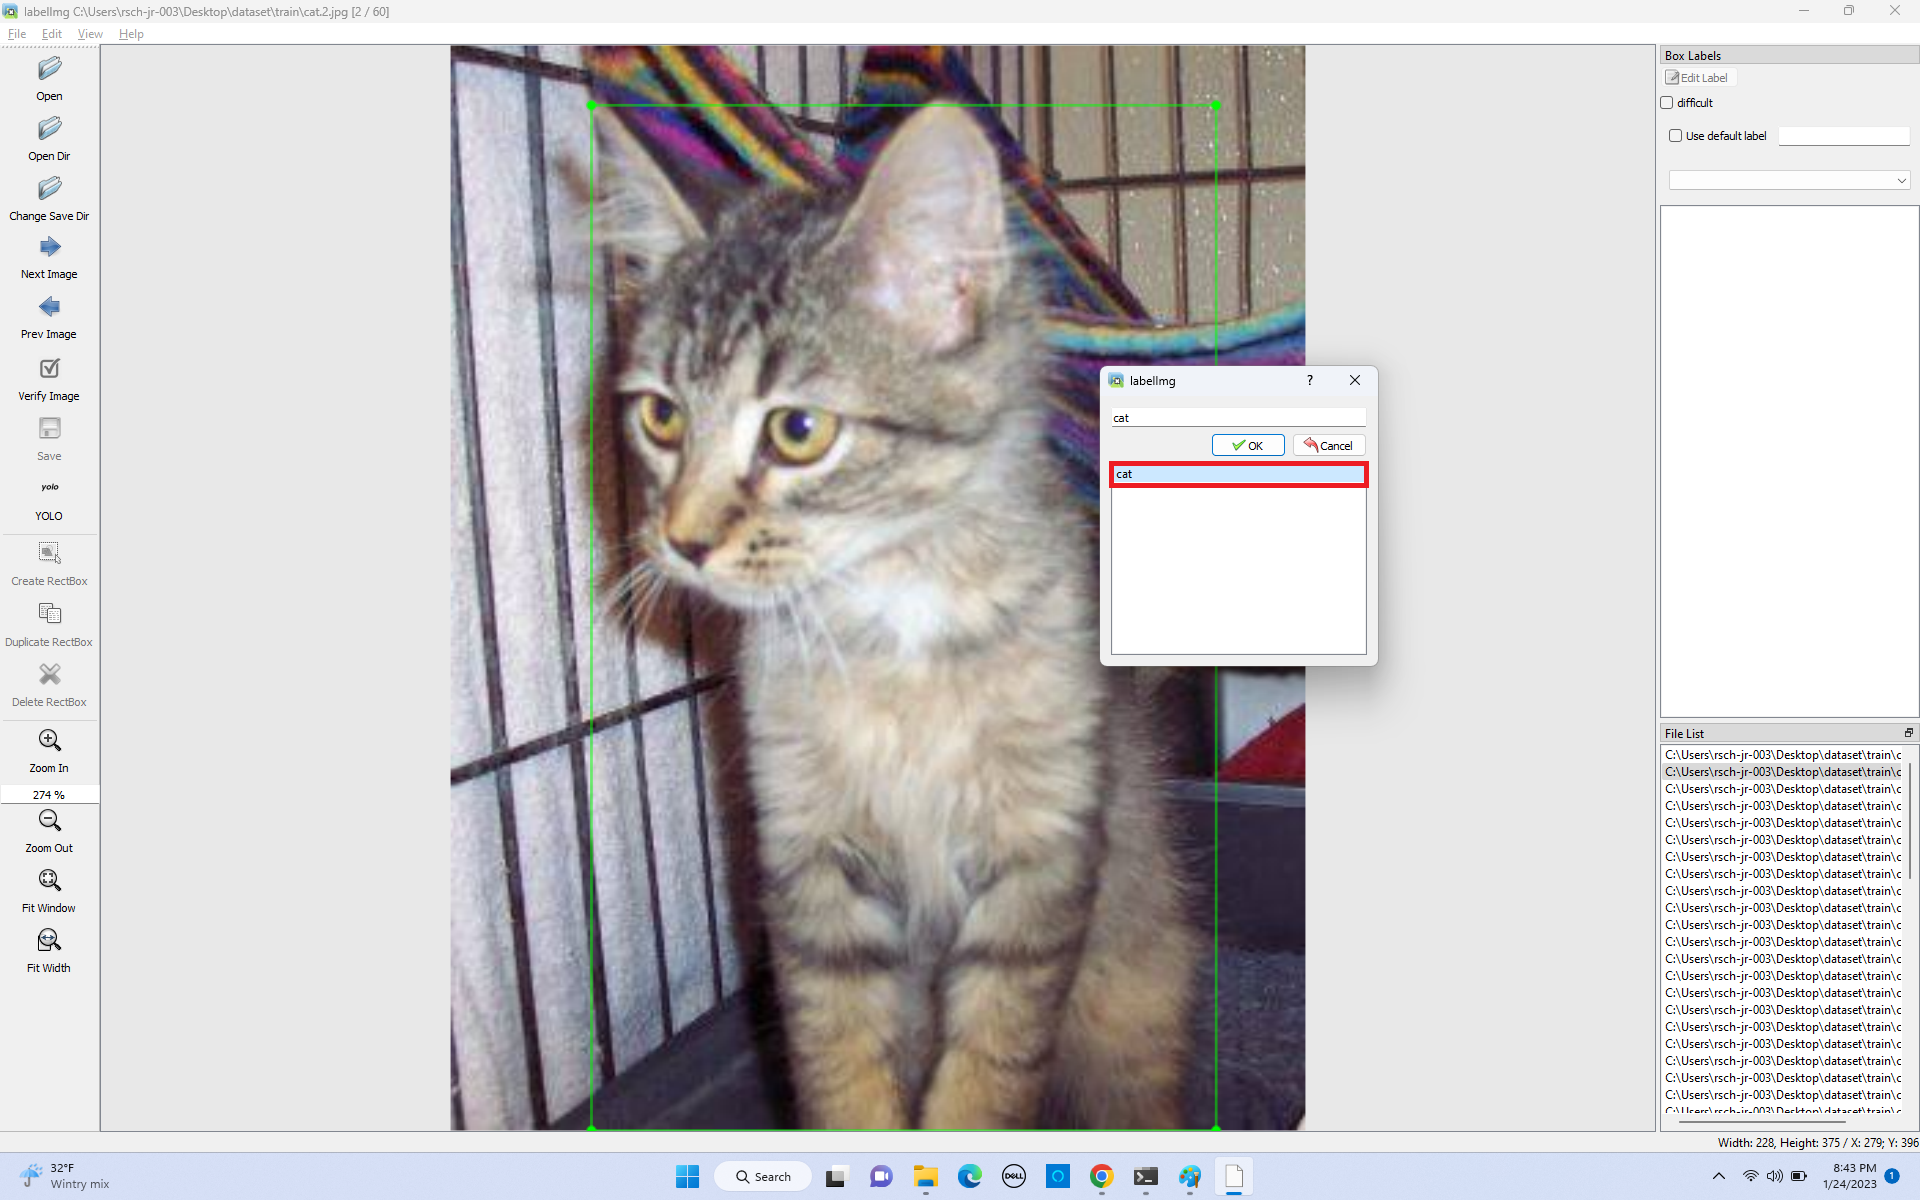
- 5-2. Click the correct label from the list.
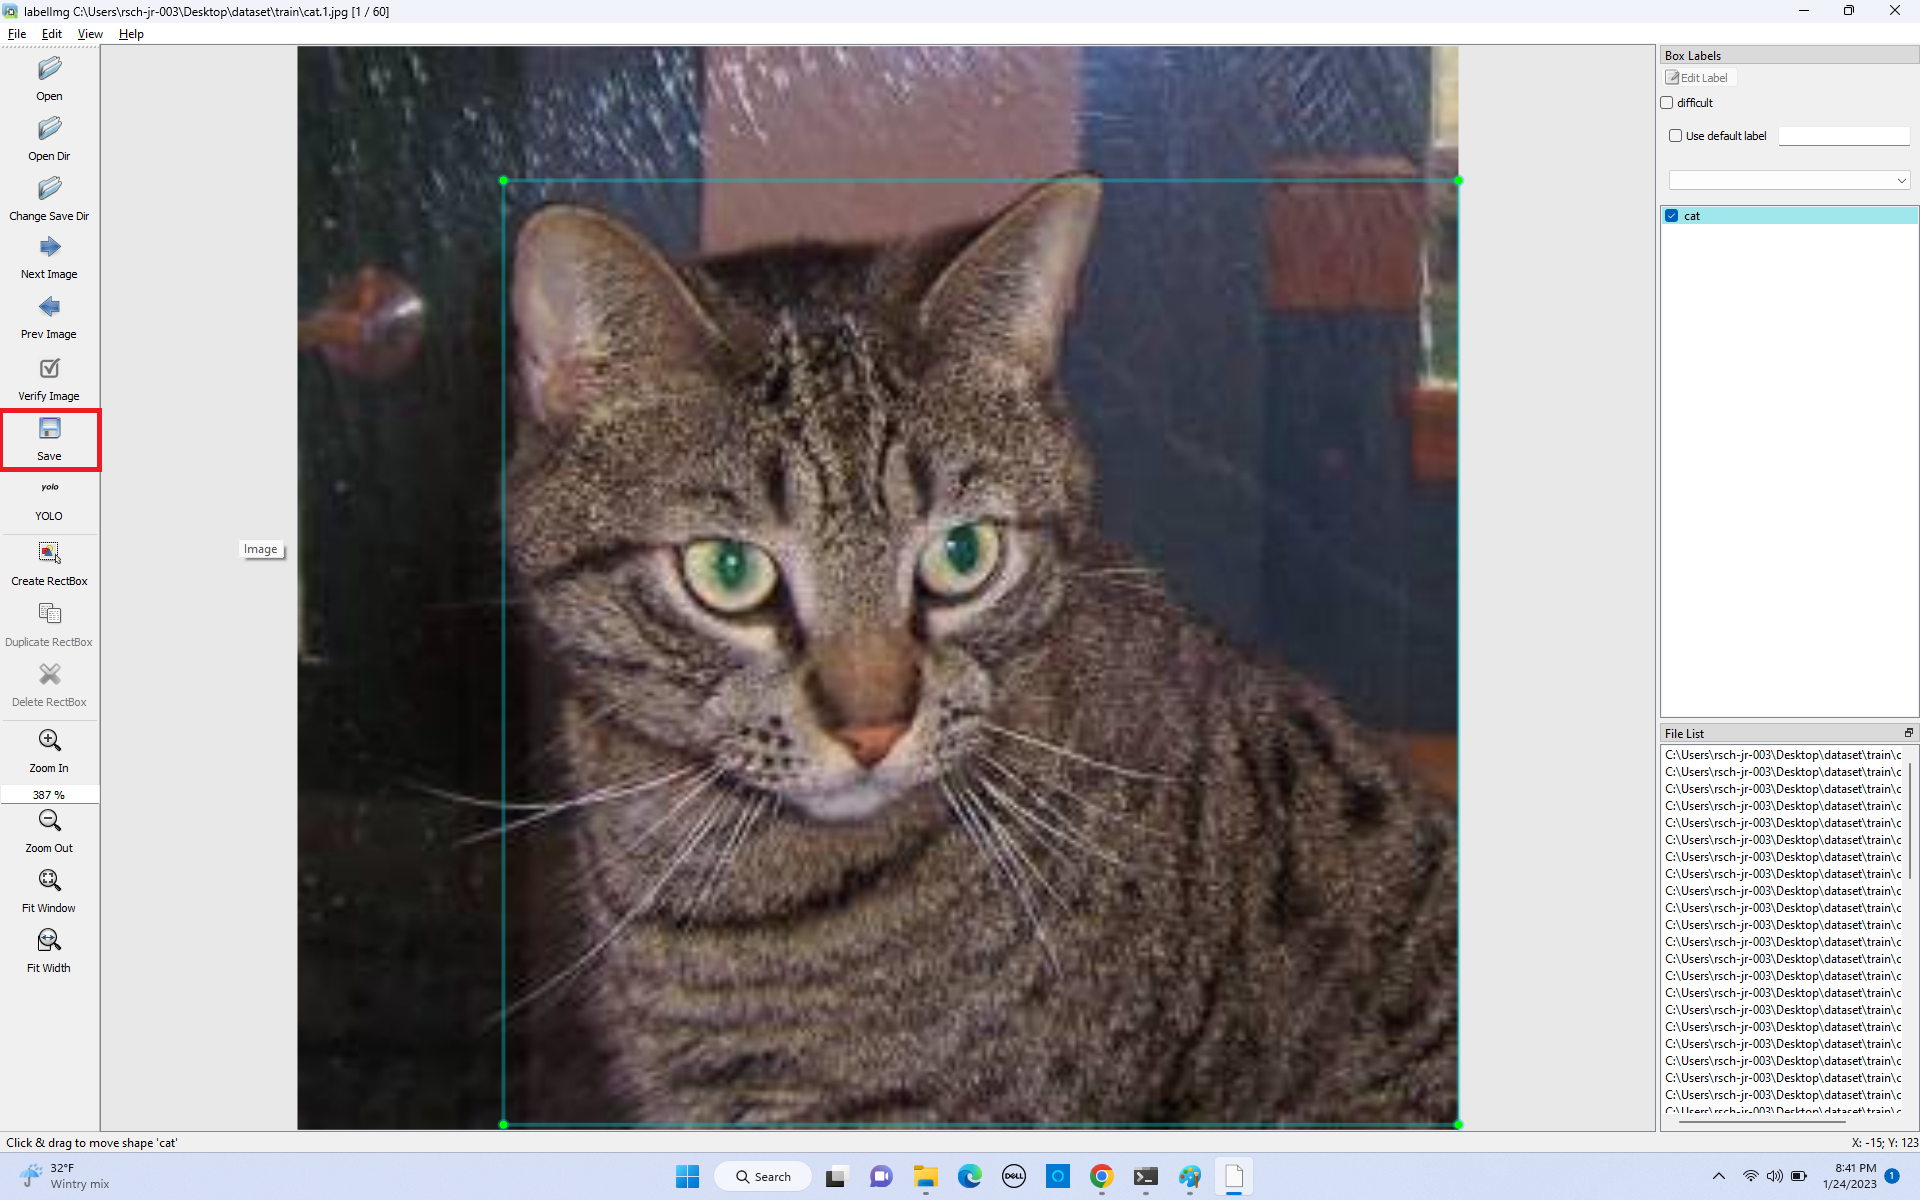
6. Click "Save" button to save the information.
A txt file of YOLO format will be saved in the same folder as you image with same name. A file named "classes.txt" is saved to that folder too. "classes.txt" defines the list of class names that your YOLO label refers to.
Warning
- Your label list shall not change in the middle of processing a list of images. When you save an image, classes.txt will also get updated, while previous annotations will not be updated.
- You shouldn't use "default classes" function when saving to YOLO format, it will not be referred.
Hotkey
| Key | Description |
|---|---|
Ctrl + u |
Load all of the images from a directory |
Ctrl + r |
Change the default annotation target dir |
Ctrl + s |
Save |
Ctrl + d |
Copy the current label and rect box |
Ctrl + Shift + d |
Delete the current image |
Space |
Flag the current images as verified |
w |
Create a rect box |
d |
Next image |
a |
Previous image |
del |
Delete the selected rect box |
Ctrl++ |
Zoom in |
Ctrl-- |
Zoom out |
↑ → ↓ ← |
Keyboard arrows to move selected rect box |
Tip
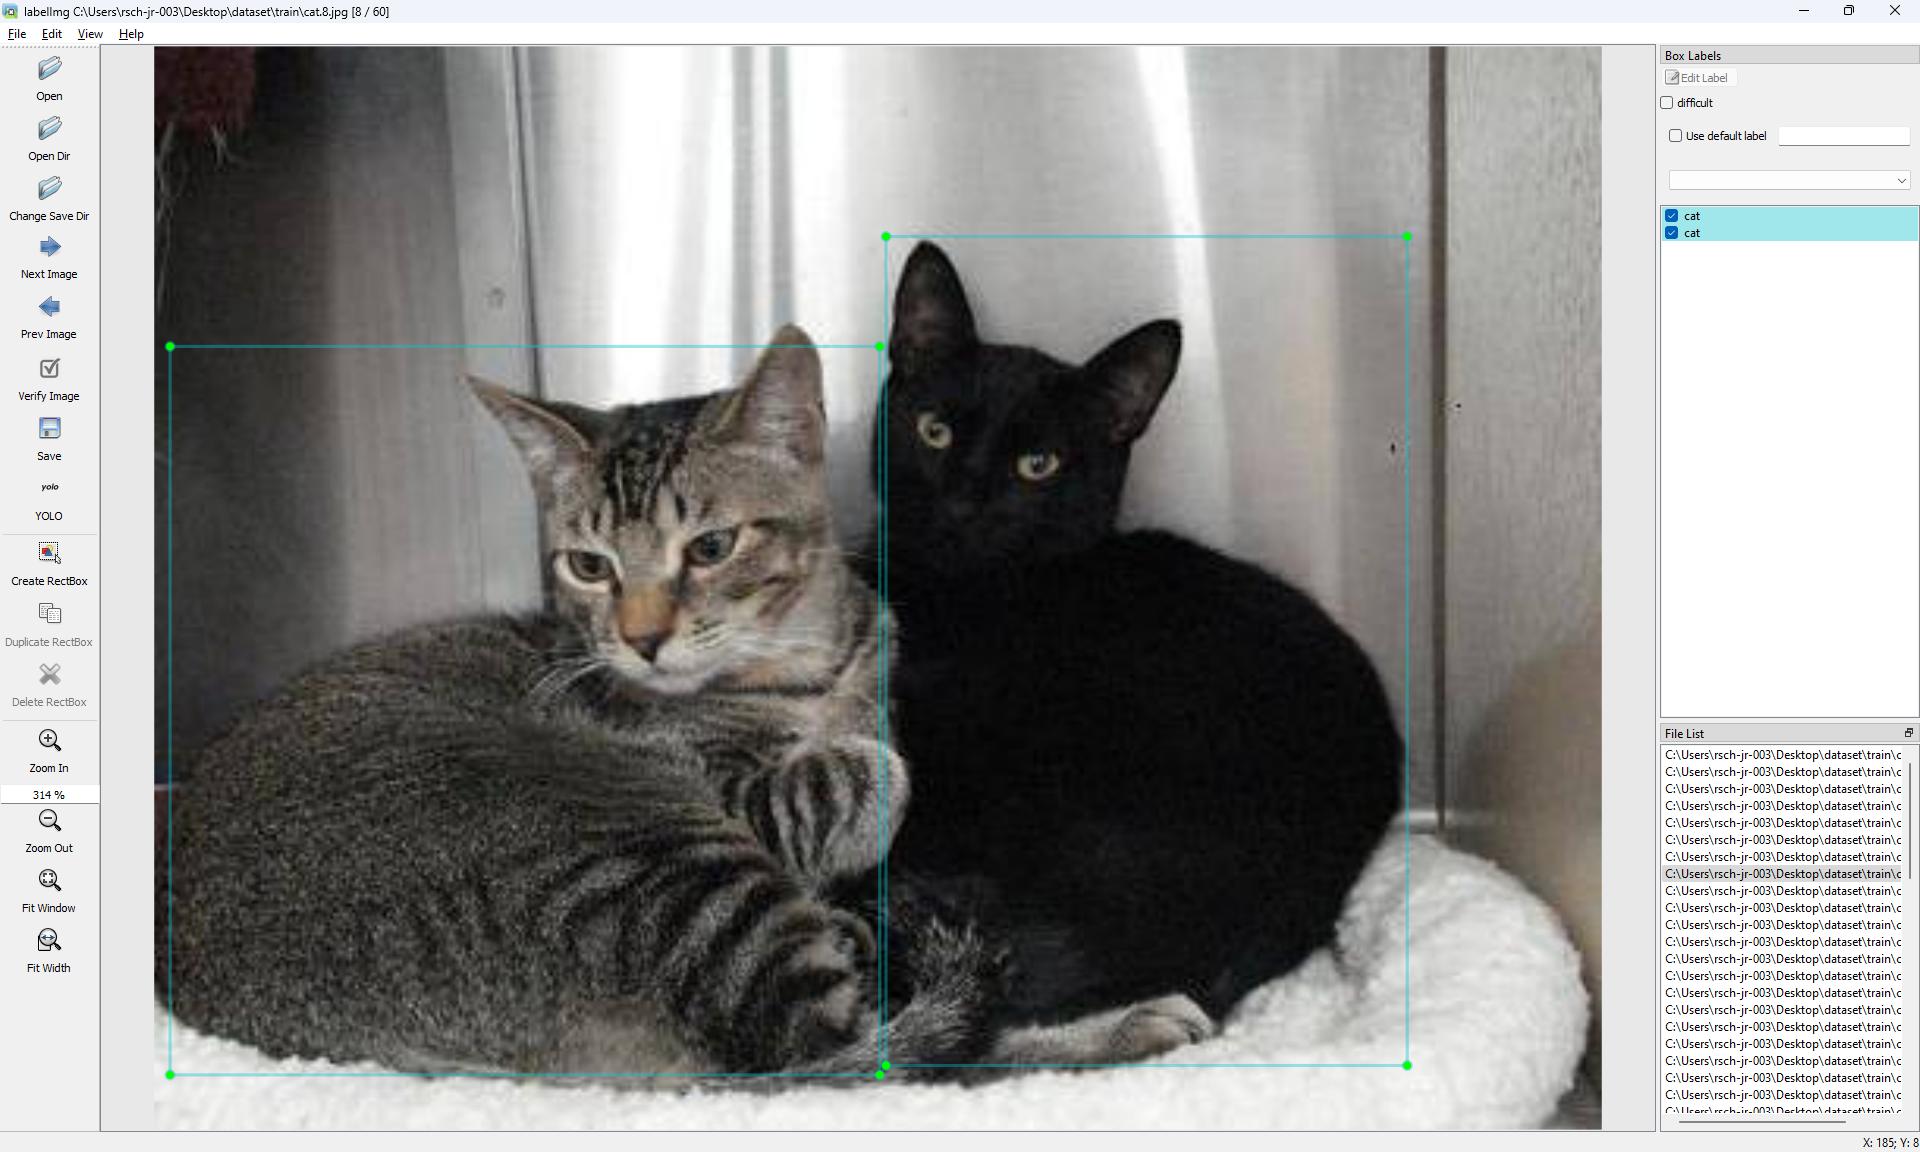
You can draw many rectangle boxes as you want and also you can draw diffent object at the same picture.
Verify Image: When pressing space, the user can flag the image as verified, a green background will appear. This is used when creating a dataset automatically, the user can then through all the pictures and flag them instead of annotate them.
Difficult: The difficult field is set to 1 indicates that the object has been annotated as "difficult", for example, an object which is clearly visible but difficult to recognize without substantial use of context. According to your deep neural network implementation, you can include or exclude difficult objects during training.
How to reset the settings
In case there are issues with loading the classes, you can either:
1. From the top menu of the labelimg click on Menu/File/Reset All
2. Remove the .labelImgSettings.pkl from your home directory. In Linuux and Mac you can do: rm ~/.labelImgSettings.pkl
